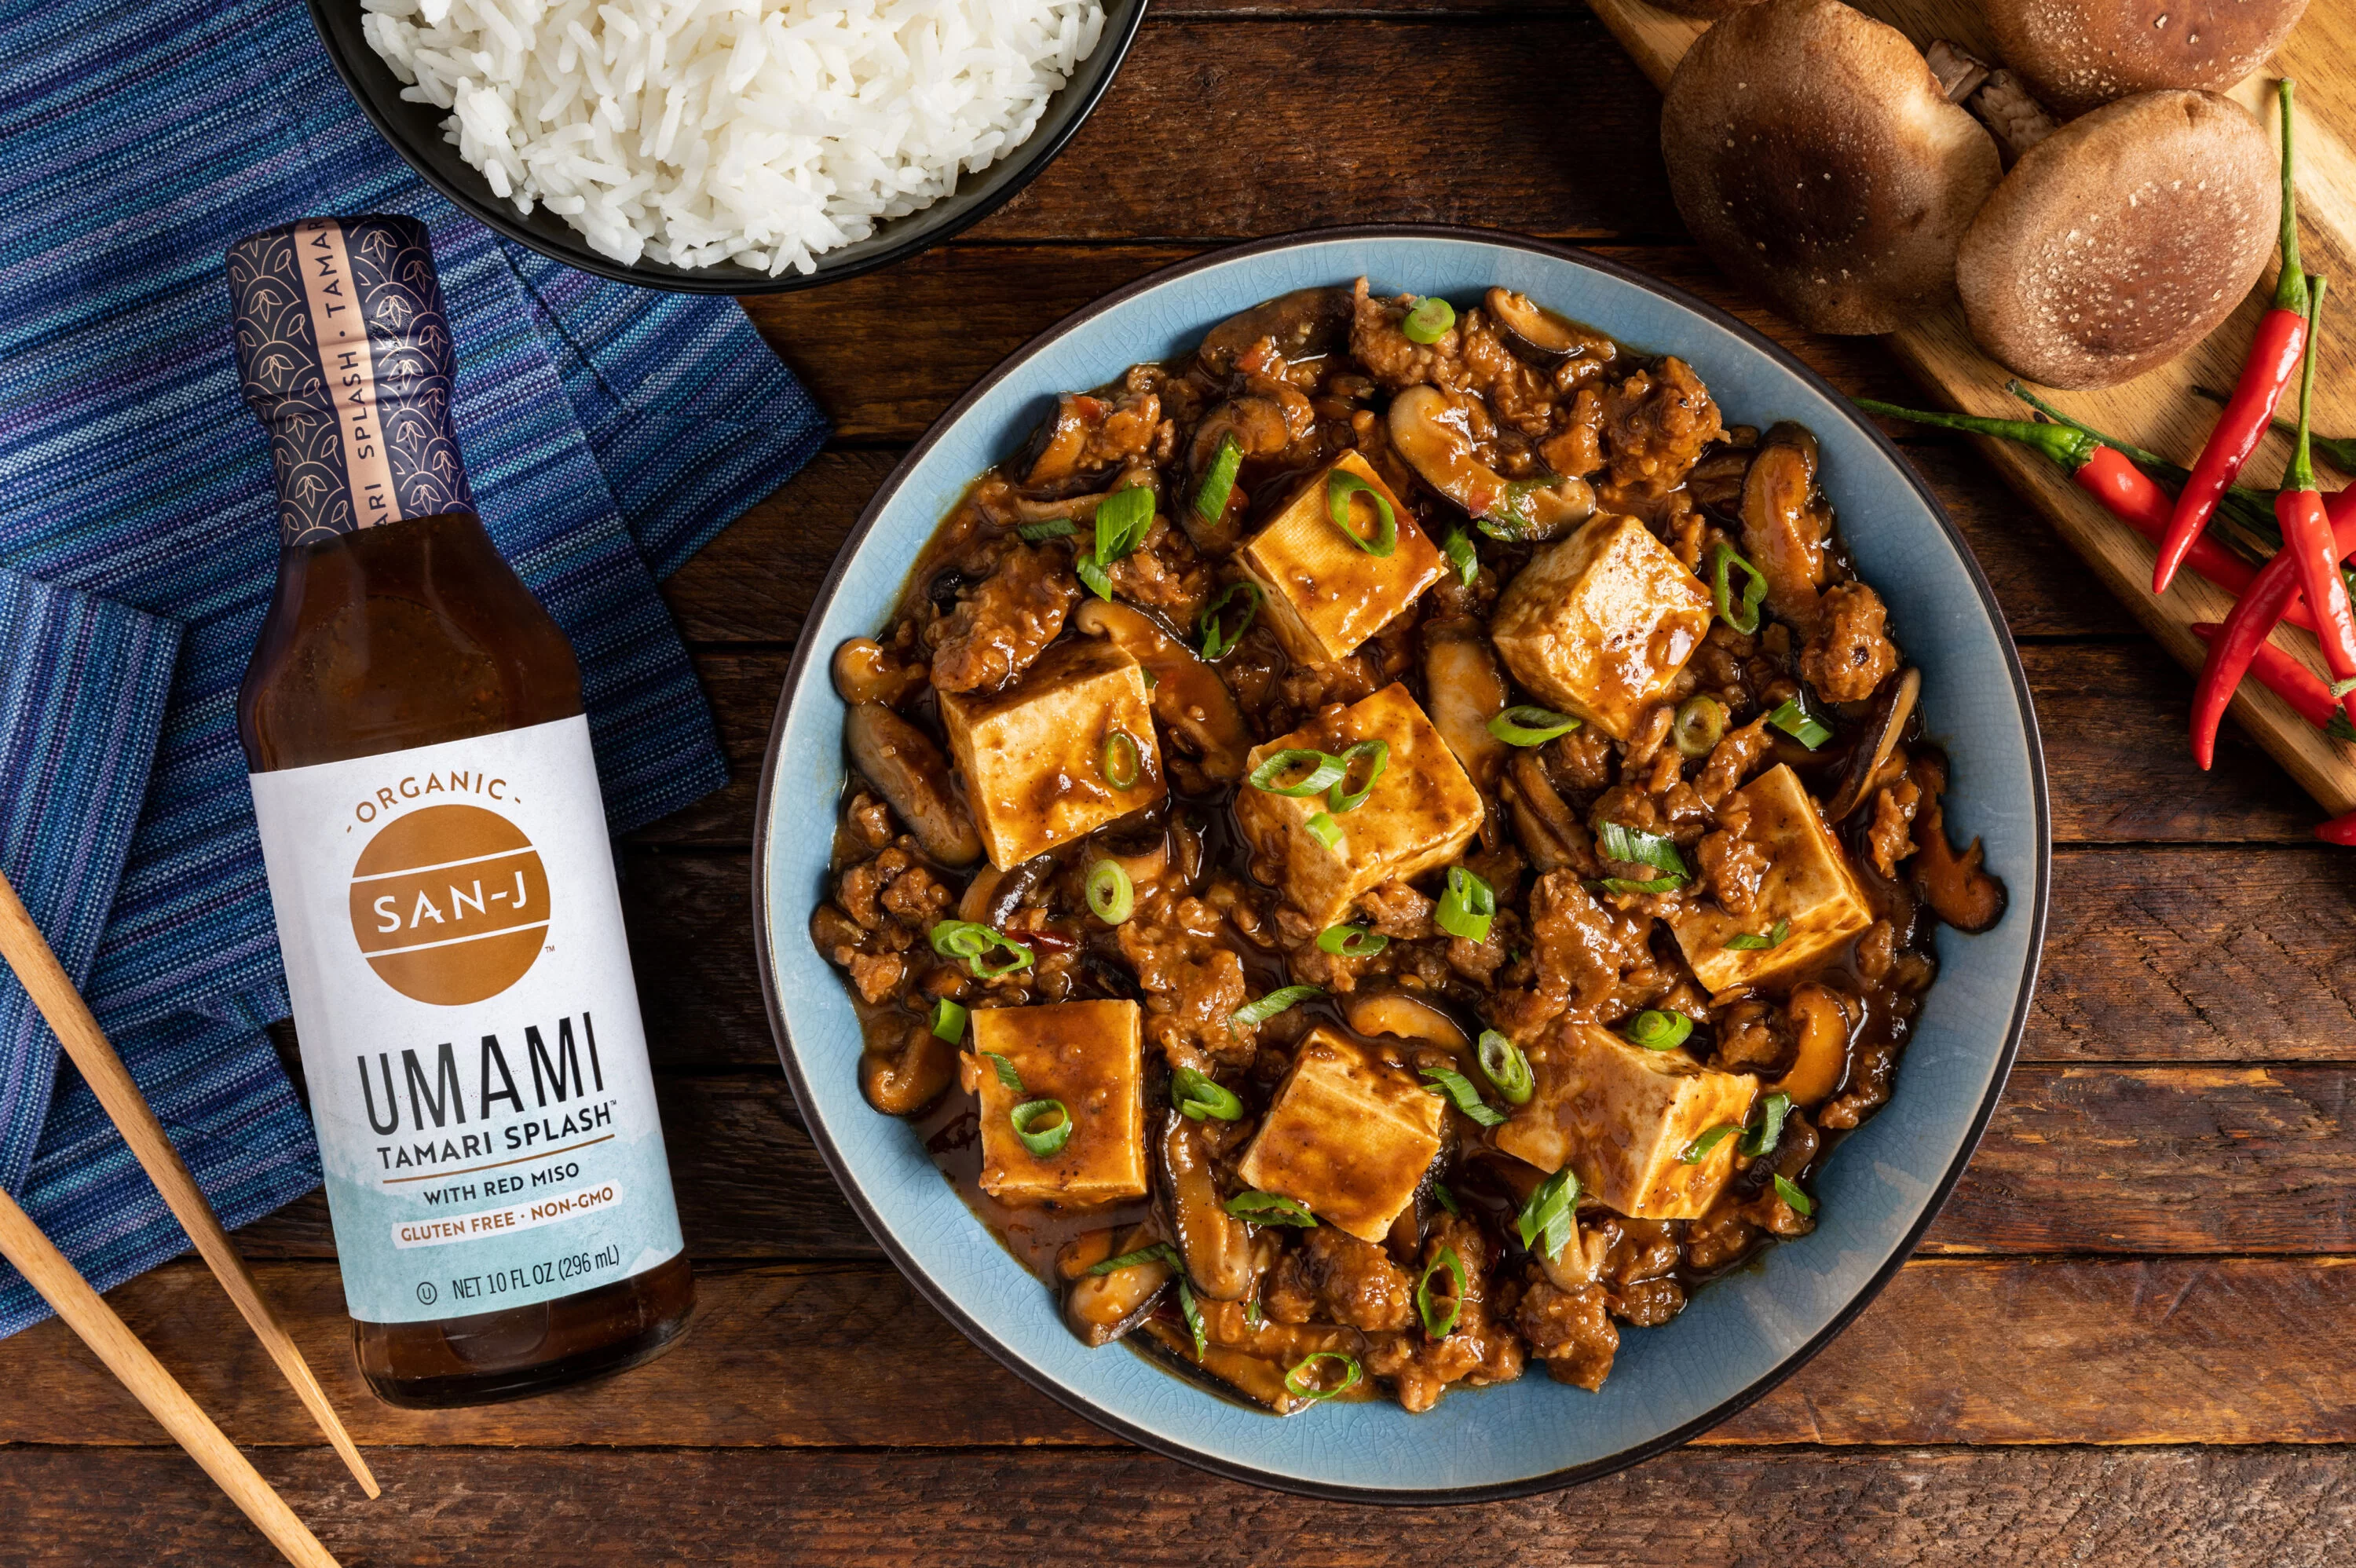
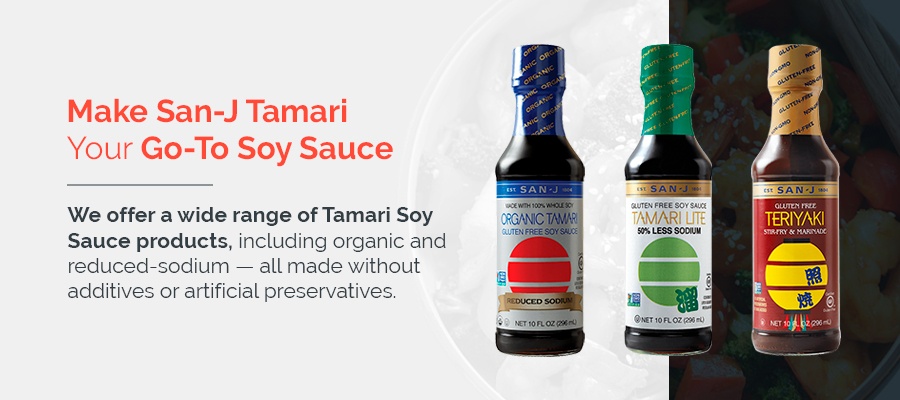
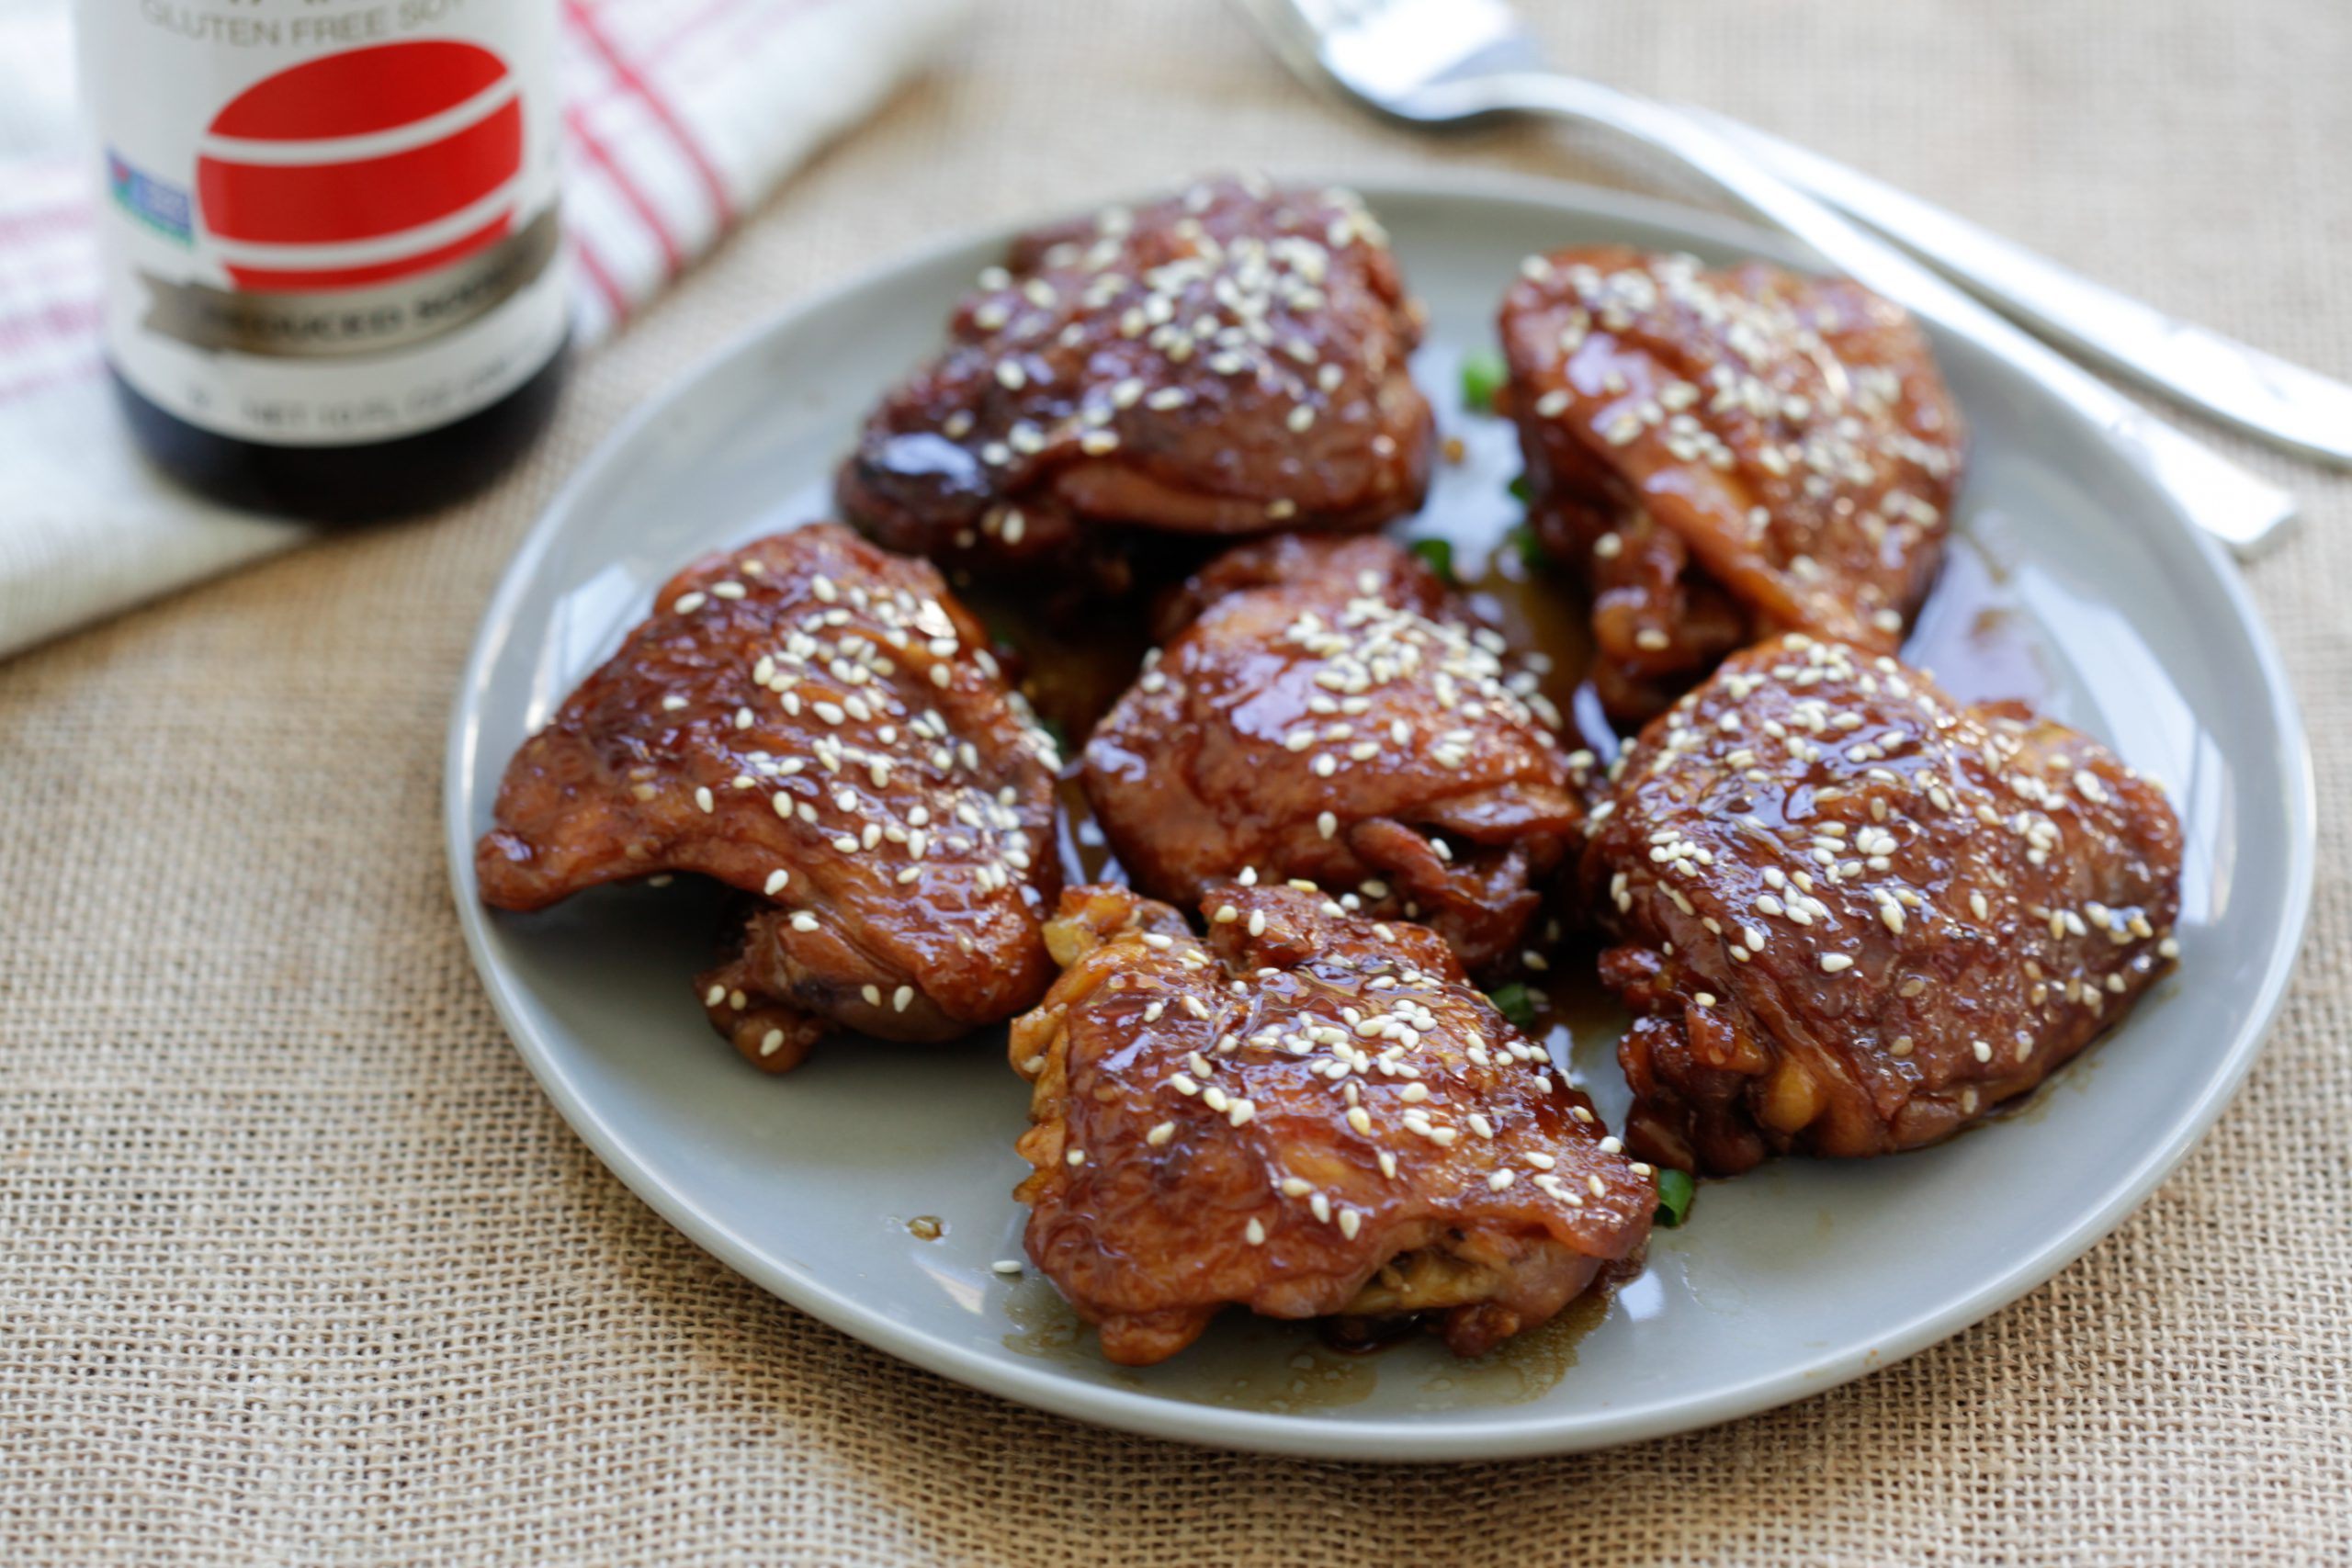
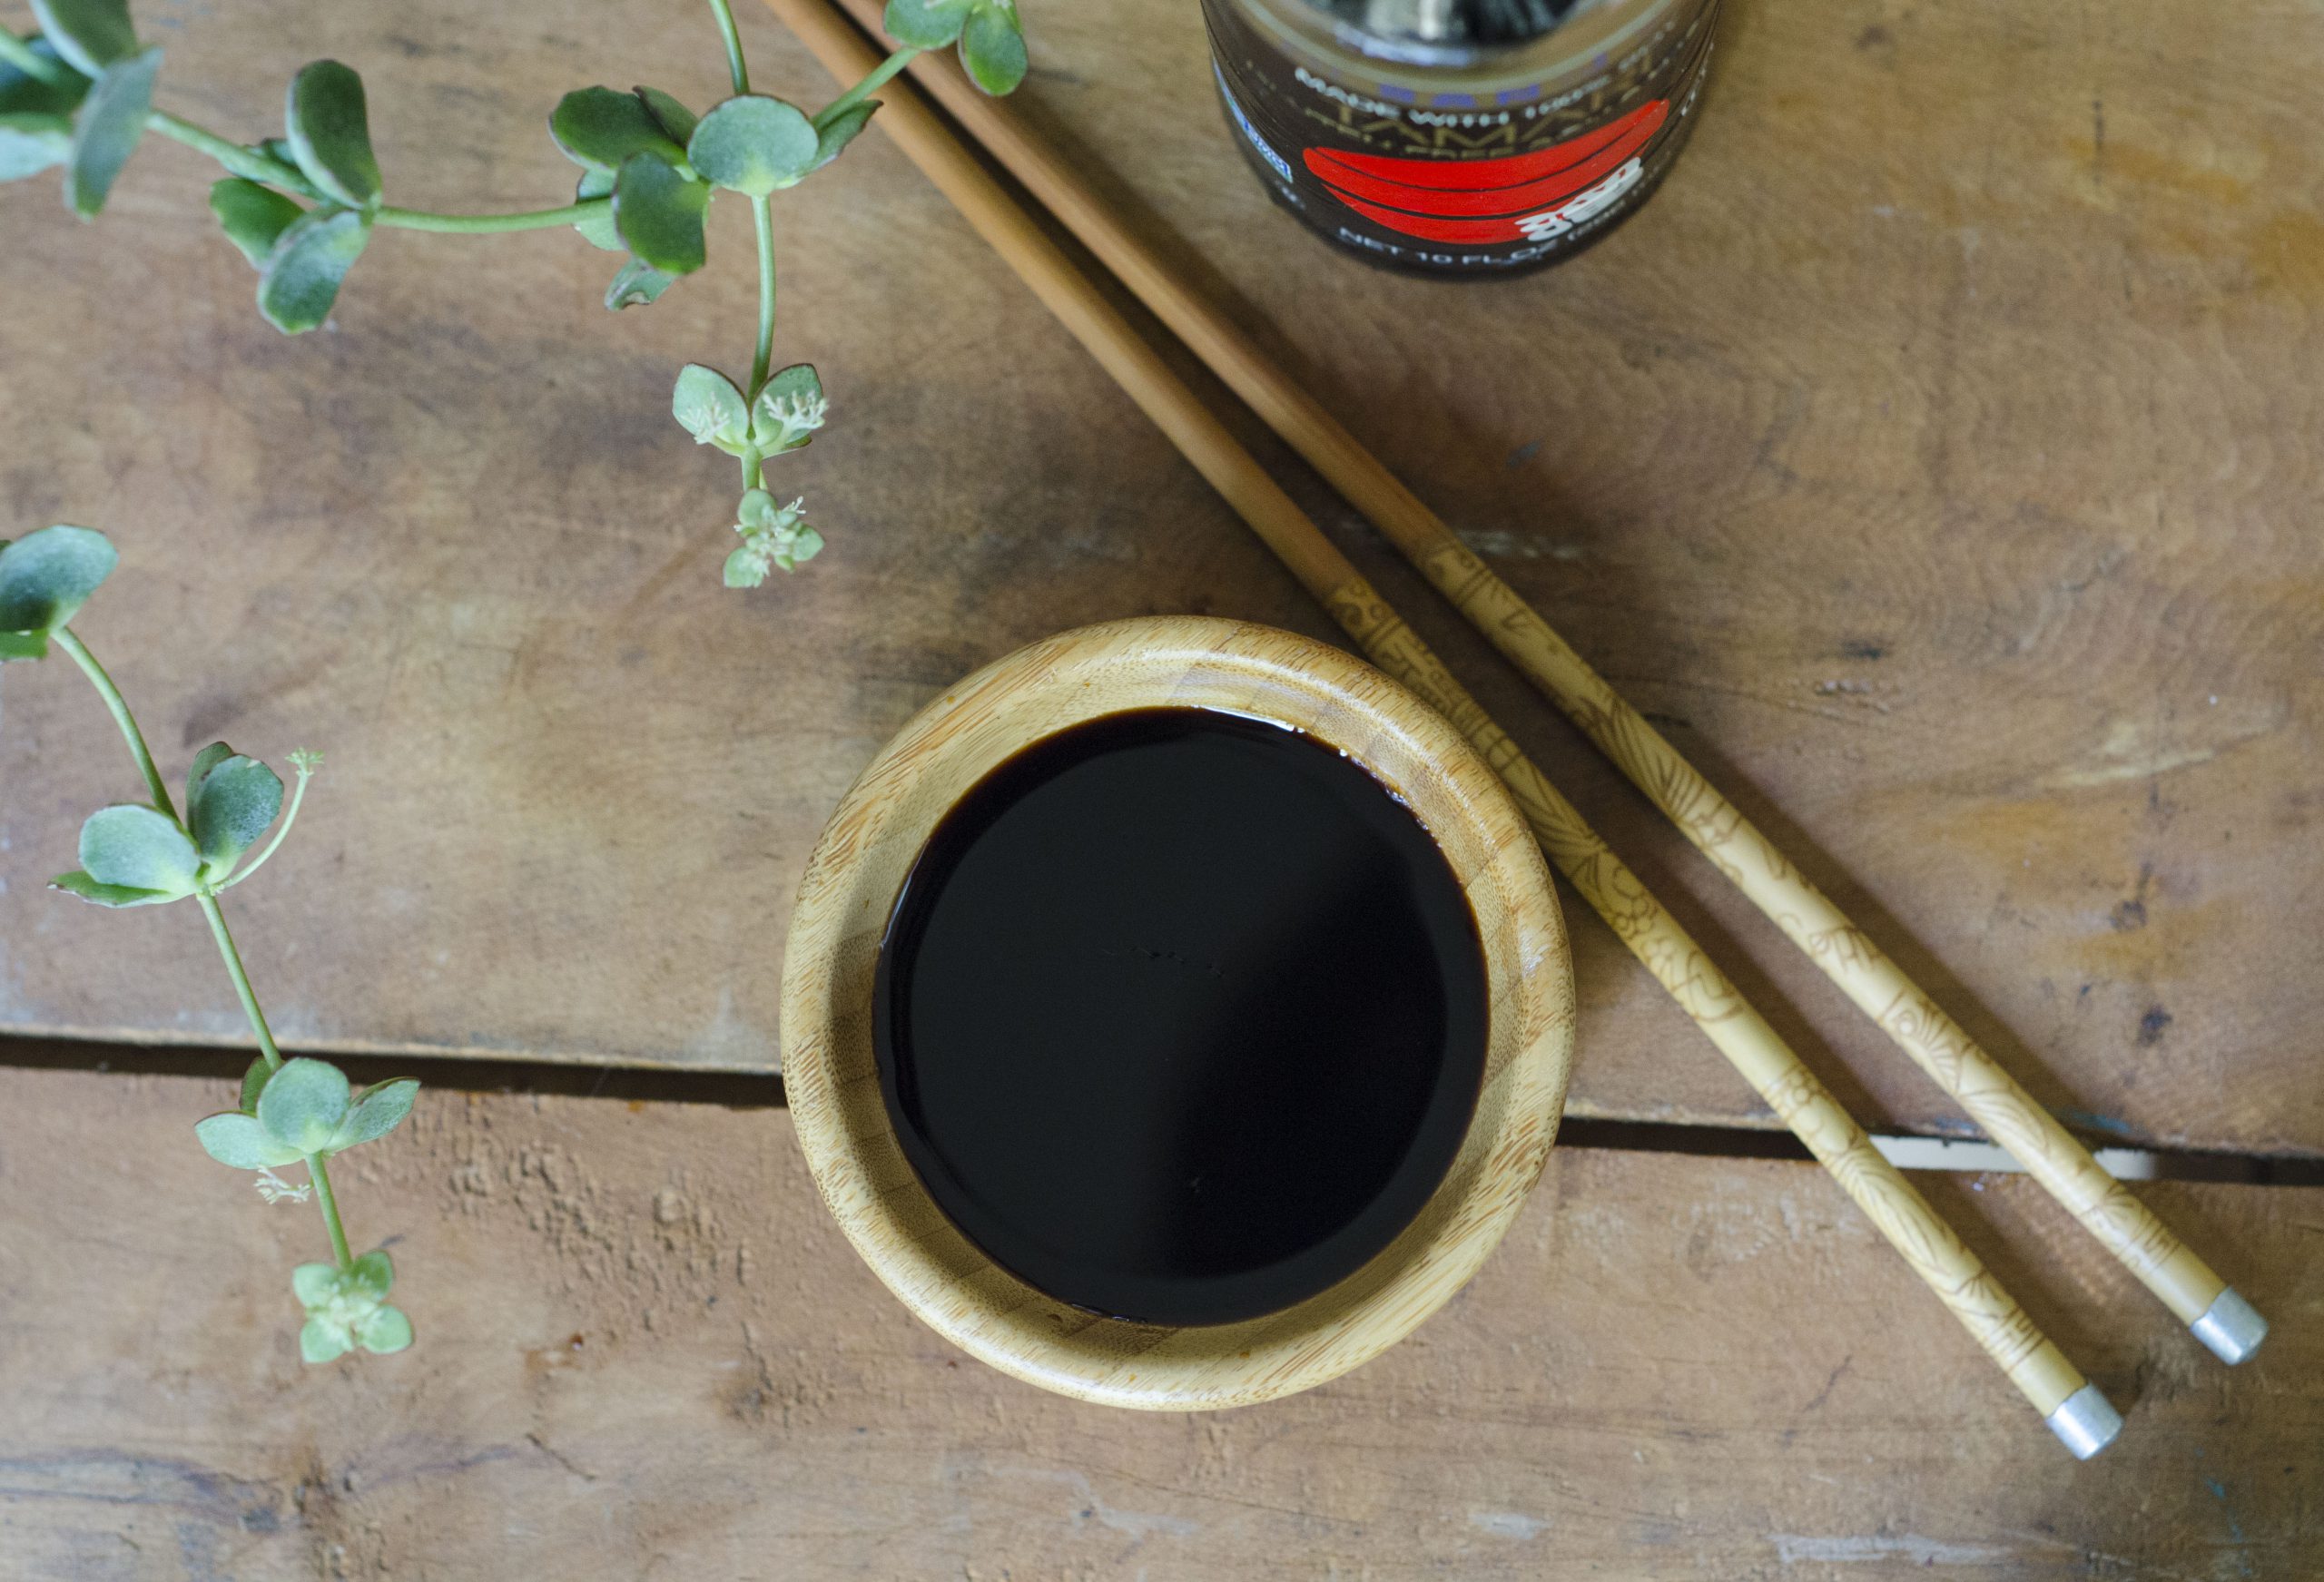
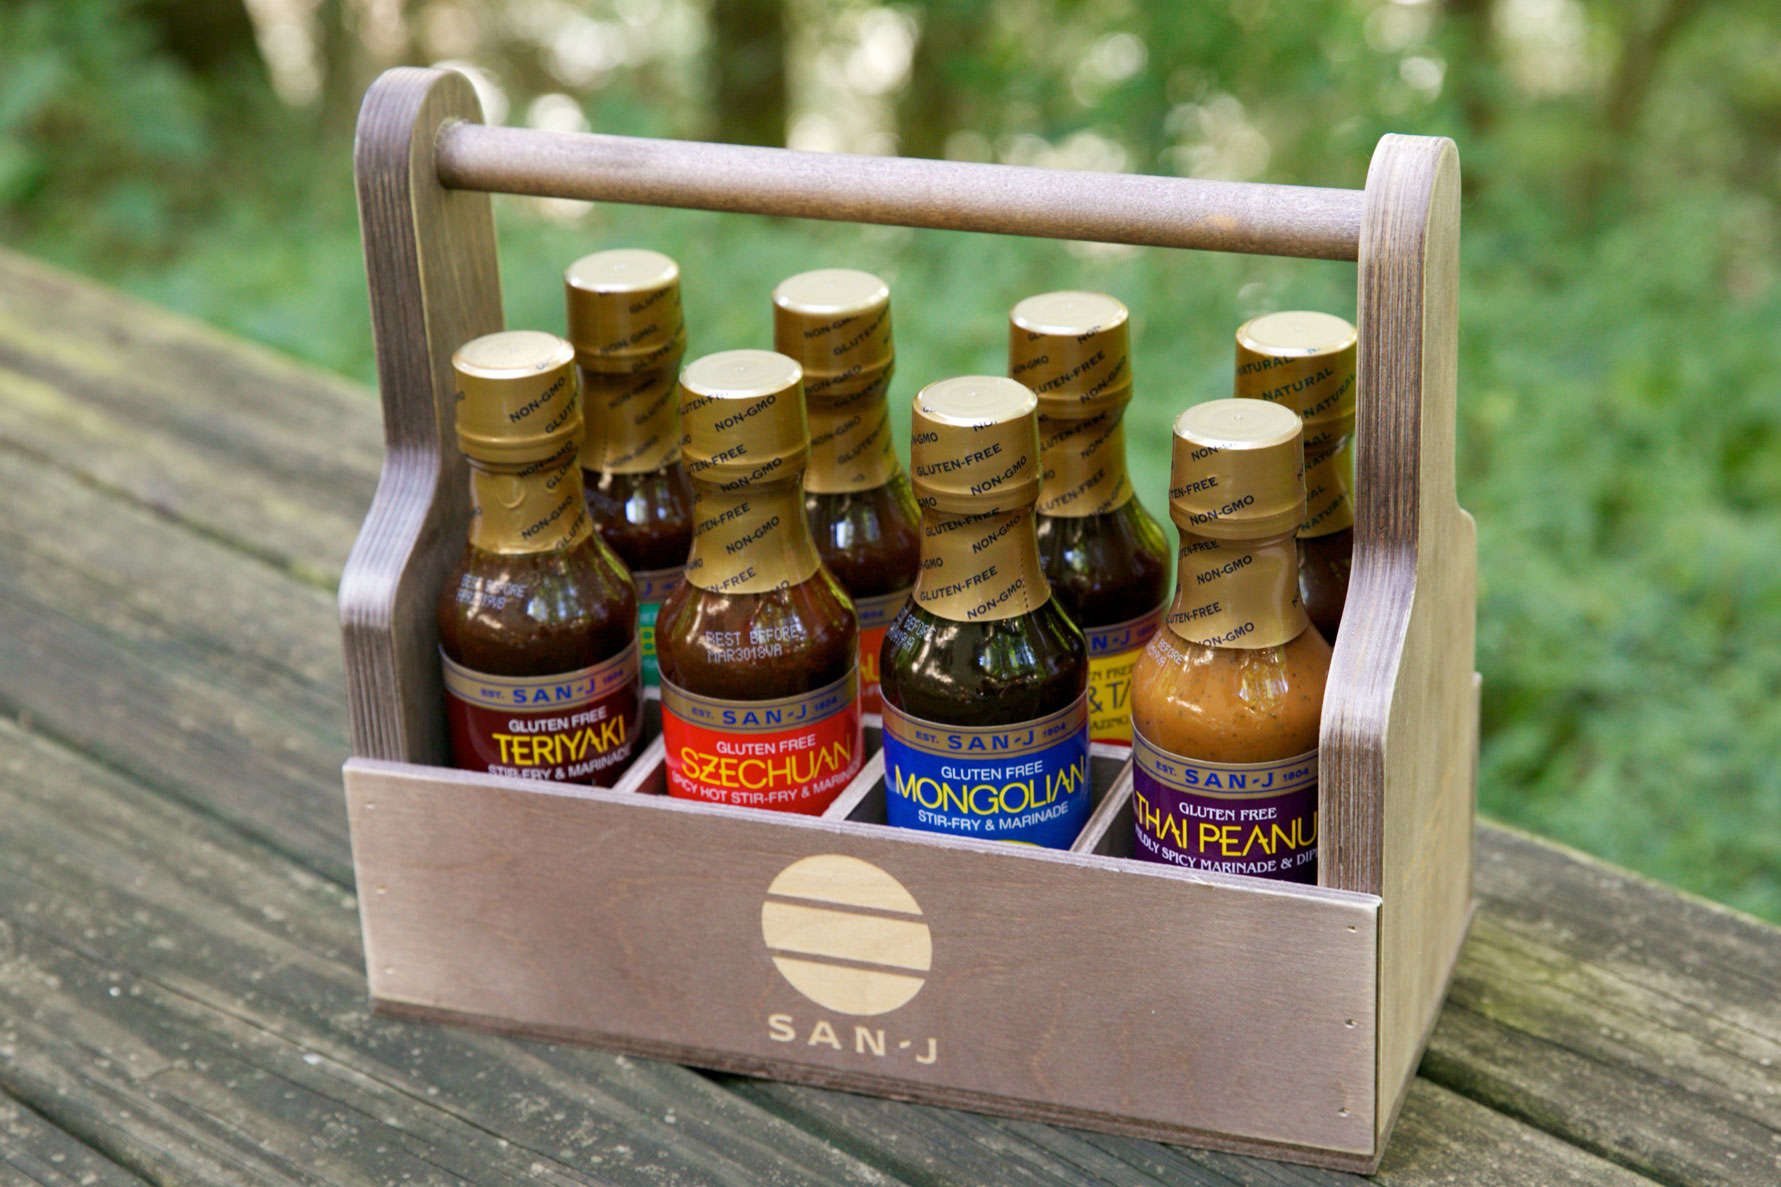
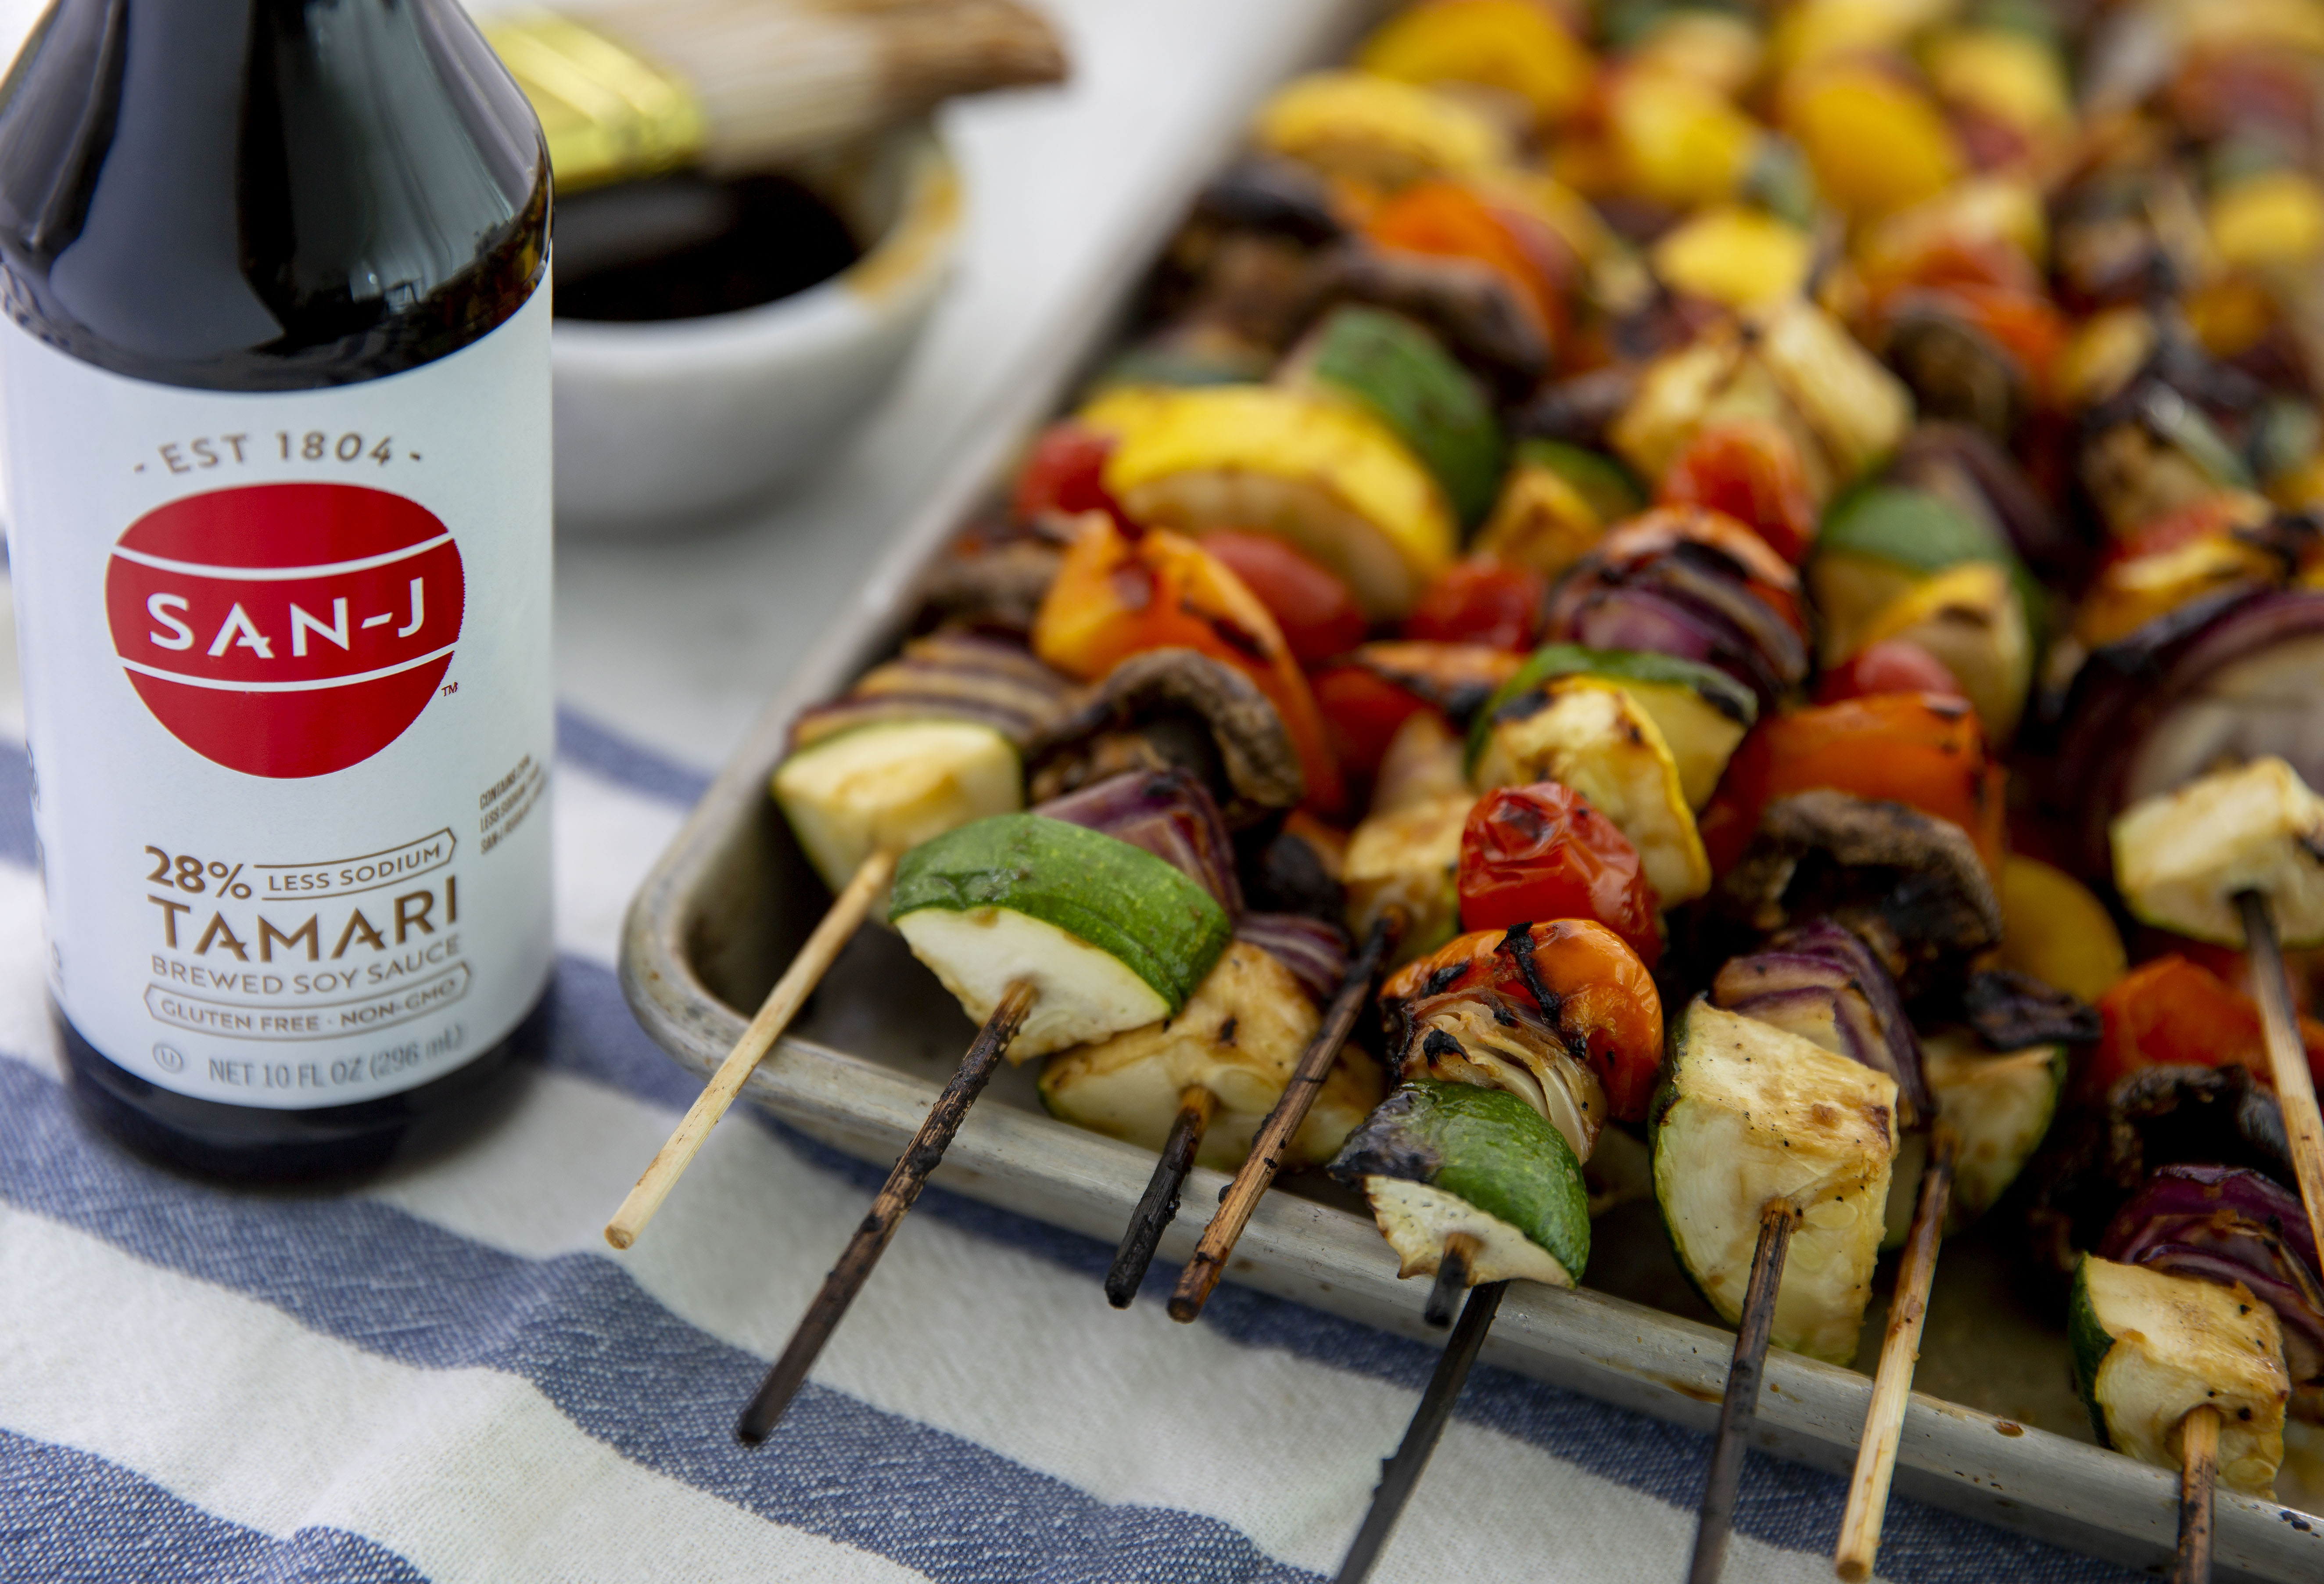
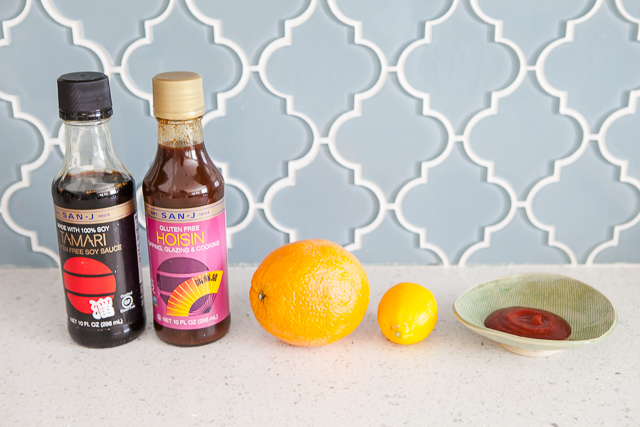
Soy sauce is the quintessential condiment for dishes of any type of cuisine. So, imagine the convenience of soy sauce with added flavors, and you have SAN-J Umami Tamari Splash, a line of delicious condiments made with our signature Tamari. Umami Tamari Splash starts with our reduced sodium Tamari, which has been fermented for up to six months, and we add umami-packed ingredients like red miso, black garlic and tomato paste for bold flavors.
Top Uses for Umami Tamari Splash
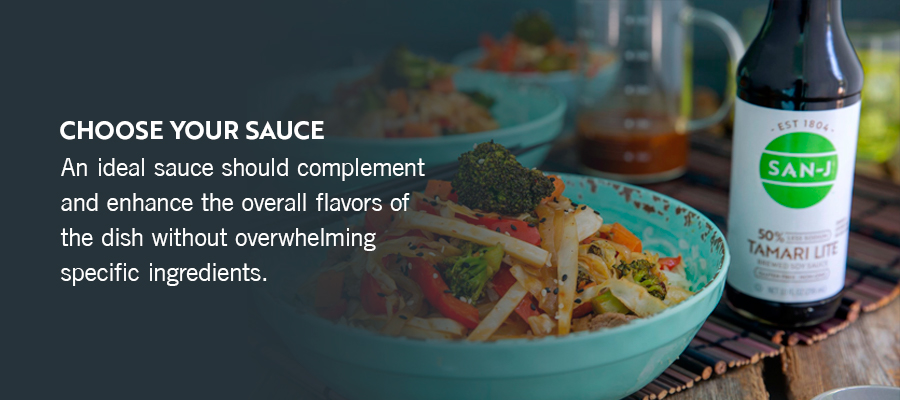
Umami is the fifth taste alongside sweet, sour, salty and bitter and has a meaty or brothy flavor. Incorporating umami ingredients such as Umami Tamari Splash into dishes is a great way to make food more satisfying as it creates a deep, savory taste that adds layers of complexity and richness. Some of the many ways you can incorporate our Umami Tamari Splash include:
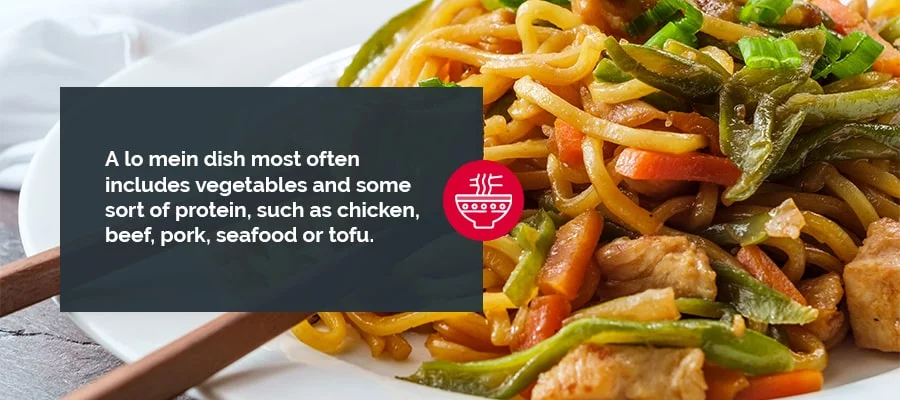
Grilled meats and seafood: Drizzle over grilled fish, meat, tofu and chicken wings for a bold, savory boost.
Bowls and sides: Add to grain bowls, eggs, pizza and spring rolls for an umami kick.
Sauces and dips: Stir into pasta sauce, aioli or stews for added depth of flavor.
Condiment for sandwiches and wraps: Use as a bold, savory topping for burgers, sandwiches or wraps.
Dressings and toppings: Combine with roasted vegetables, noodles or rice dishes for an extra layer of flavor.
What Sets Umami Tamari Splash Apart?
When it comes to adding exciting flavors to dishes, you can’t go wrong with Umami Tamari Splash. It delivers a big taste with about 70% less sodium than typical soy sauce.
Add the highest-quality ingredients to your plate with Umami Tamari Splash that is certified vegan by Vegan Action, certified gluten-free by the Gluten-Free Certification Organization, Non-GMO verified by the Non-GMO Project, and certified organic by USDA Organic and Quality Assurance International, so that you can enjoy authentic flavors even with dietary restrictions.
Whether you want to splash this sauce on stir-fry or boost the flavors of grilled fish and eggs, our sauce can elevate any dish.
Recipe Ideas
Make our Umami Tamari Splash the star of your next meal with these umami recipes:
Umami salmon bowls: The salty richness of umami salmon bowls complements the tartness of the pickled vegetables for a delectable meal.
Air-fryer shishito peppers with umami-ginger sauce: As a quick and tasty appetizer, our air-fryer shishito peppers with umami-ginger sauce are exceptionally flavorful when tossed with soy sauce, lemon and ginger.
Japanese-style carbonara: This Japanese-style carbonara gives the traditional flavors of carbonara an Asian-inspired umami taste thanks to shiitake mushrooms and a sauce made from our Umami Tamari Splash.
Plant-based mapo tofu: This plant-based mapo tofu is similar to traditional mapo tofu with an umami twist thanks to shiitake mushrooms and Umami Tamari Splash.
Find SAN-J Umami Tamari Splash in a Store Near You
When you purchase sauces from SAN-J, you are buying a product that uses the highest-quality ingredients. Use our store locator to find our sauces at a store near you and taste the SAN-J difference.
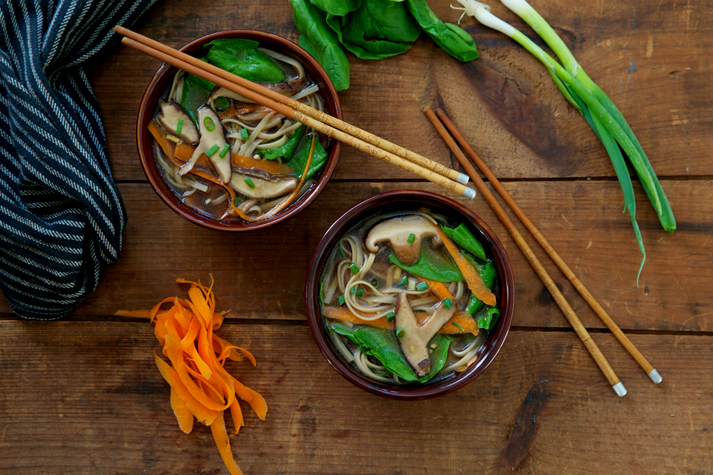
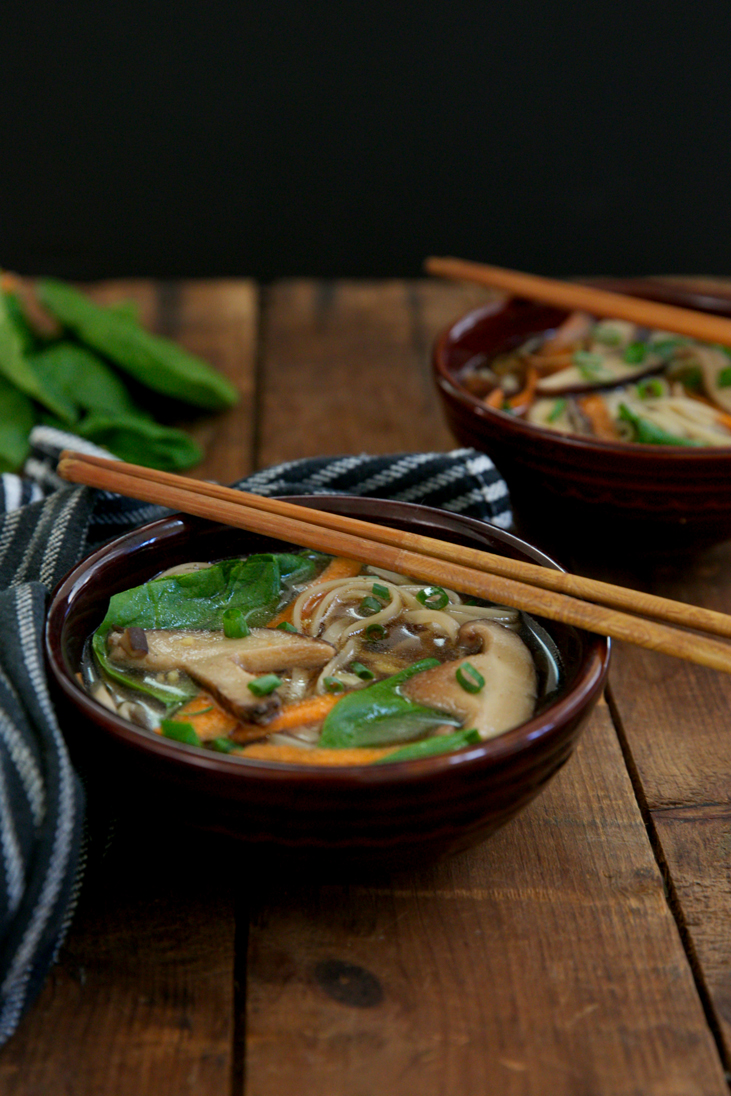
Japanese cooking often involves complex processes like fermentation to enhance the flavors of specific ingredients. This achieves what is popularly known as umami, one of the five Japanese-discovered flavor profiles characterized by its distinct combination of the other sweet, bitter, salty and sour profiles.
We’ll explore koji and its use in the fermentation process, its role in Japanese food, five essential ingredients for Japanese fermented food and examples of appetizing dishes containing these ingredients.
What Is Koji?
Koji is a variant of the Aspergillus oryzaefungus used in fermentation to produce miso, soy sauce, and sake. The fungus initiates the fermentation process by creating a reaction when it is combined with ingredients like wheat, rice and soybeans. Enzymes during this reaction help convert proteins into amino acids and starch into sugars. Once broken down, ingredients are left with an umami taste.
Koji can be store-bought to be used in the fermentation process at home, but the right application will determine whether the enzymes react as they should. This means the right ingredients and the exact fermentation time frame must be used to achieve the desired results.
The Role of Koji in Fermented Japanese Food
Foods naturally possess enzymes that can be manipulated or broken down to change flavor profiles while promoting shelf life. Fermentation helps preserve foods like meat, fish, grain, fruit and vegetables since they are often stored for later use.
Different Aspergillus fungi or koji variants contain enzymes that break down carbohydrates, lipids and proteins to achieve fermentation. This is necessary for certain catabolic processes to occur in food.
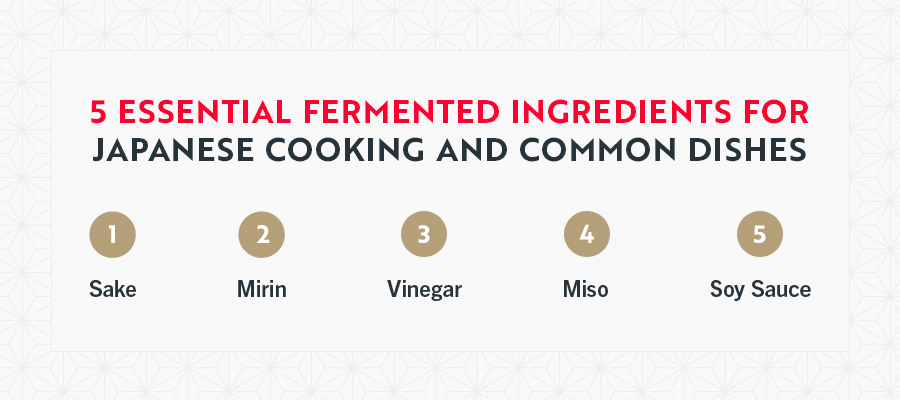
5 Essential Fermented Ingredients for Japanese Cooking and Common Dishes
Certain ingredients must undergo fermentation to ensure the right taste for the desired dish. Learn more about the role of koji in five essential ingredients used for Japanese cooking and some dishes containing these, demonstrating how common the koji fermentation process is in creating them.
1. Sake
Sake is a traditional Japanese wine whereby rice grains are converted to sugar through fermentation, giving it a sweet flavor. Water and yeast are added during fermentation, producing a beverage with a low alcohol percentage.
For sake fermentation, koji, water and rice are mixed and covered until a sweet substance is formed. After adding yeast and more water, it ferments in a vessel for a month. It then becomes what is called “moto,” containing alcohol. A second seven-day fermentation stage is introduced, where additional koji, water and rice are added to the vessel.
Lastly, the fermented sake is sterilized and bottled after standing for another week.
Mirin is a Japanese rice wine similar to sake that contains less alcohol and more sugar than its counterpart. It is one of the main ingredients in producing your own teriyaki sauce and is characterized by its sweet yet tangy flavor.
Koji, glutinous rice and shochu are mixed during mirin fermentation. Shochu is a type of distilled alcohol. Koji enhances the sweetness by converting the rice starch into sugar during fermentation. The final product is left to ferment at length before it is bottled for distribution.
Of all the ingredients, you may recognize vinegar because of its global application in food. The types of vinegar produced in Japan are rice-based, whereas other types use fruit and alcohol during production. Vinegar’s main ingredient is acetic acid, but it contains additional amino acids and sugars that give its characteristic sweet-acidic flavor.
During pure rice vinegar fermentation, sake is initially brewed and used later in the process. Sugar is produced by combining rice, koji and water. Koji enzymes break down and convert the rice starch into sugar. Yeast further ferments the sugar to form moromi. Ethanol is produced during this stage.
Water, acetic acid bacteria and vinegar then ferment the sake-moromi and ethanol to create acetic acid, the main ingredient in vinegar. Once fermentation is complete, the vinegar is stored to mature before being bottled.
Japanese cuisine is light and minimalistic, incorporating subtle, natural flavors. One popular seasoning is a soybean paste called miso. Miso adds a unique flavor to soups and noodle dishes and can be used as a marinade or brine.
Koji used to produce miso is grown on grain before being added to the rest of the mixture. The fermentation process goes through two stages. In the first, the koji from the rice spores are soaked, then steamed, cooled and immunized before it is fermented for two days.
During the second fermentation stage, soybeans and salt are soaked, boiled for a few hours, mashed and then mixed with the fermented koji from the first stage. It is then stored for further fermentation. This process takes up to twelve months — the longer it ferments, the more miso varieties develop.
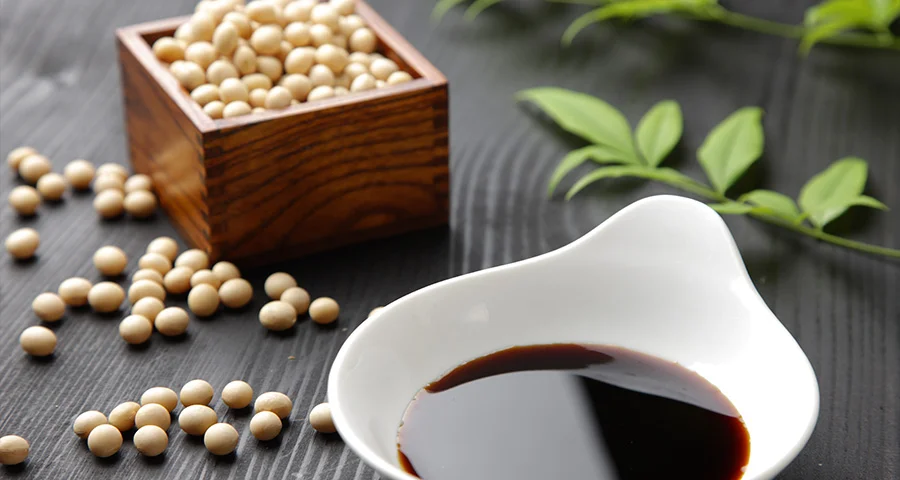
One of the most widely used condiments, soy sauce amplifies ingredients with its distinguished taste. It is unique in combining the five taste groups to produce a unique flavor that can be used for various cooking applications.
The fermentation process is lengthy and involves mixing koji, soybeans and salt to produce what we know as soy sauce or shoyu. While brewing, the koji produces enzymes that break down proteins and starch into amino acids and glucose. What sets our Tamari Soy Sauce apart is that we do not add wheat to the soybean base, which is often done during the fermentation process.
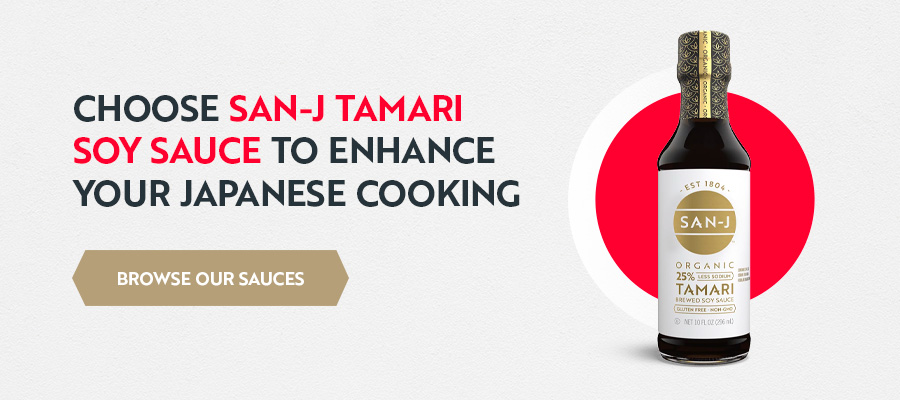
Choose SAN-J Tamari Soy Sauce to Enhance Your Japanese Cooking
Understanding koji’s role in transforming protein into amino acids and starch into glucose in traditional Japanese cooking helps you appreciate the complexity and diversity of the enhanced flavors. This provides insight into the exciting world of Japanese cuisine that you may otherwise take for granted.
This holiday season, entertain your gluten-free guests with a menu everyone can enjoy. We will show you how to plan a holiday menu with mouthwatering recipes your other guests won’t realize are gluten-free.
Our detailed guide takes you through each step of preparing your gluten-free holiday menu, from the initial research to presenting impressive dishes your guests will appreciate.
Top tip: Use SAN-J No Soy Tamari if you also need soy-free holiday menu ideas.
3 Steps to Entertaining Gluten-Free Guests Perfectly
When preparing to host gluten-intolerant guests, focus on all the food you can serve rather than the few items that contain gluten. Gluten is a protein found in wheat and some other grains, and as you will see from our recipes below, with a bit of preparation, creating memorable gluten-free holiday dishes is well within reach.
These three steps will help you prepare before exploring our exciting gluten-free holiday menu ideas.
1. Gluten-Free Hosting 101
Unless you are gluten-free, you may not realize how many great gluten-free ingredients and products are available. Familiarize yourself with gluten-free diet requirements and research safe ingredients. You will quickly discover that your gluten-free holiday menu can still be fun, and many products, including SAN-J Tamari Soy Sauce, are 100% without wheat and certified gluten-free.
Communicate with your gluten-free guests as part of the research process, and don’t be afraid to ask them questions! Your guests will feel special and love being part of the meal-planning process.
2. Choose Your Menu
Selecting a gluten-free holiday menu can be daunting. Fortunately, we’ve got you covered with a selection of 100% gluten-free starters, mains and desserts you can serve with confidence for Thanksgiving or Christmas.
Cook dishes from scratch using simple ingredients to ensure your carefully planned holiday menu does not accidentally contain hidden gluten. Instead of buying salad dressing, create your own using ingredients such as balsamic vinegar, or add an exciting twist by offering a zesty gluten-free dipping sauce.
3. Prepare Your Kitchen
One of the most important parts of gluten-free entertaining is preventing cross-contamination in the kitchen. A surprising number of cooking tools and surfaces, such as cutting boards, can harbor traces of gluten. Before starting your holiday meal prep, it is a good idea to run all pots, pans, utensils, measuring cups and plates through the dishwasher again. Scrub kitchen surfaces with disinfectant spray or rinse them with soap and hot water.
Prepare in advance and remain aware of your surroundings to avoid cross-contamination, and your holiday meal will be a success. Creating standout gluten-free dishes can be delicious and rewarding.
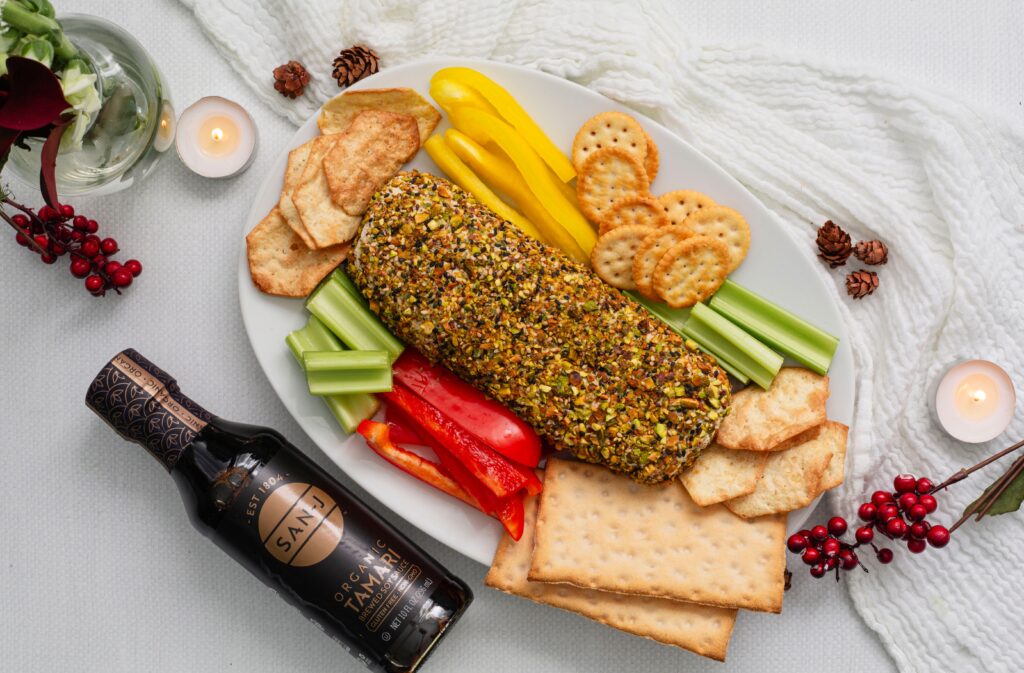
Fresh herbs like chives or parsley for garnish optional
Gluten-free crackers, sliced baguette, vegetables for serving
Once you have the ingredients ready:
Mix the goat cheese, cream cheese, tamari, and honey or maple syrup.
Shape the cheese mixture into a log and place it on a piece of plastic wrap or parchment paper. Wrap tightly and refrigerate for at least 30 minutes to firm up.
Mix the chopped pistachios and furikake on a clean, flat surface or a large plate. Unwrap the chilled goat cheese log and roll it over the pistachio and furikake mixture, pressing gently to adhere the coating evenly on all sides.
Place the coated cheese log on a serving platter and garnish with fresh herbs if desired.
Serve with your choice of crackers, sliced baguette, or fresh vegetables.
18 slices Gluten free bacon cut in half so you have 36 short strips
Once you have the ingredients ready:
Soak the toothpicks in water for about 15 minutes.
Preheat the oven to 400 degrees. Line 2 rimmed baking sheets with foil.
Place the brown sugar in a small bowl. Combine the tamari and ginger in another bowl.
In a small mixing bowl, combine the goat cheese with the pecans, mixing well. Stuff the dates with some of the goat cheese mixture, wrap each date with half a piece of bacon, and secure with a toothpick. Dip the dates in the tamari mixture then into the brown sugar, coating well. Place on the prepared baking sheets.
Bake for 15-20 minutes or until the bacon is crisp. Serve hot, warm, or at room temperature.
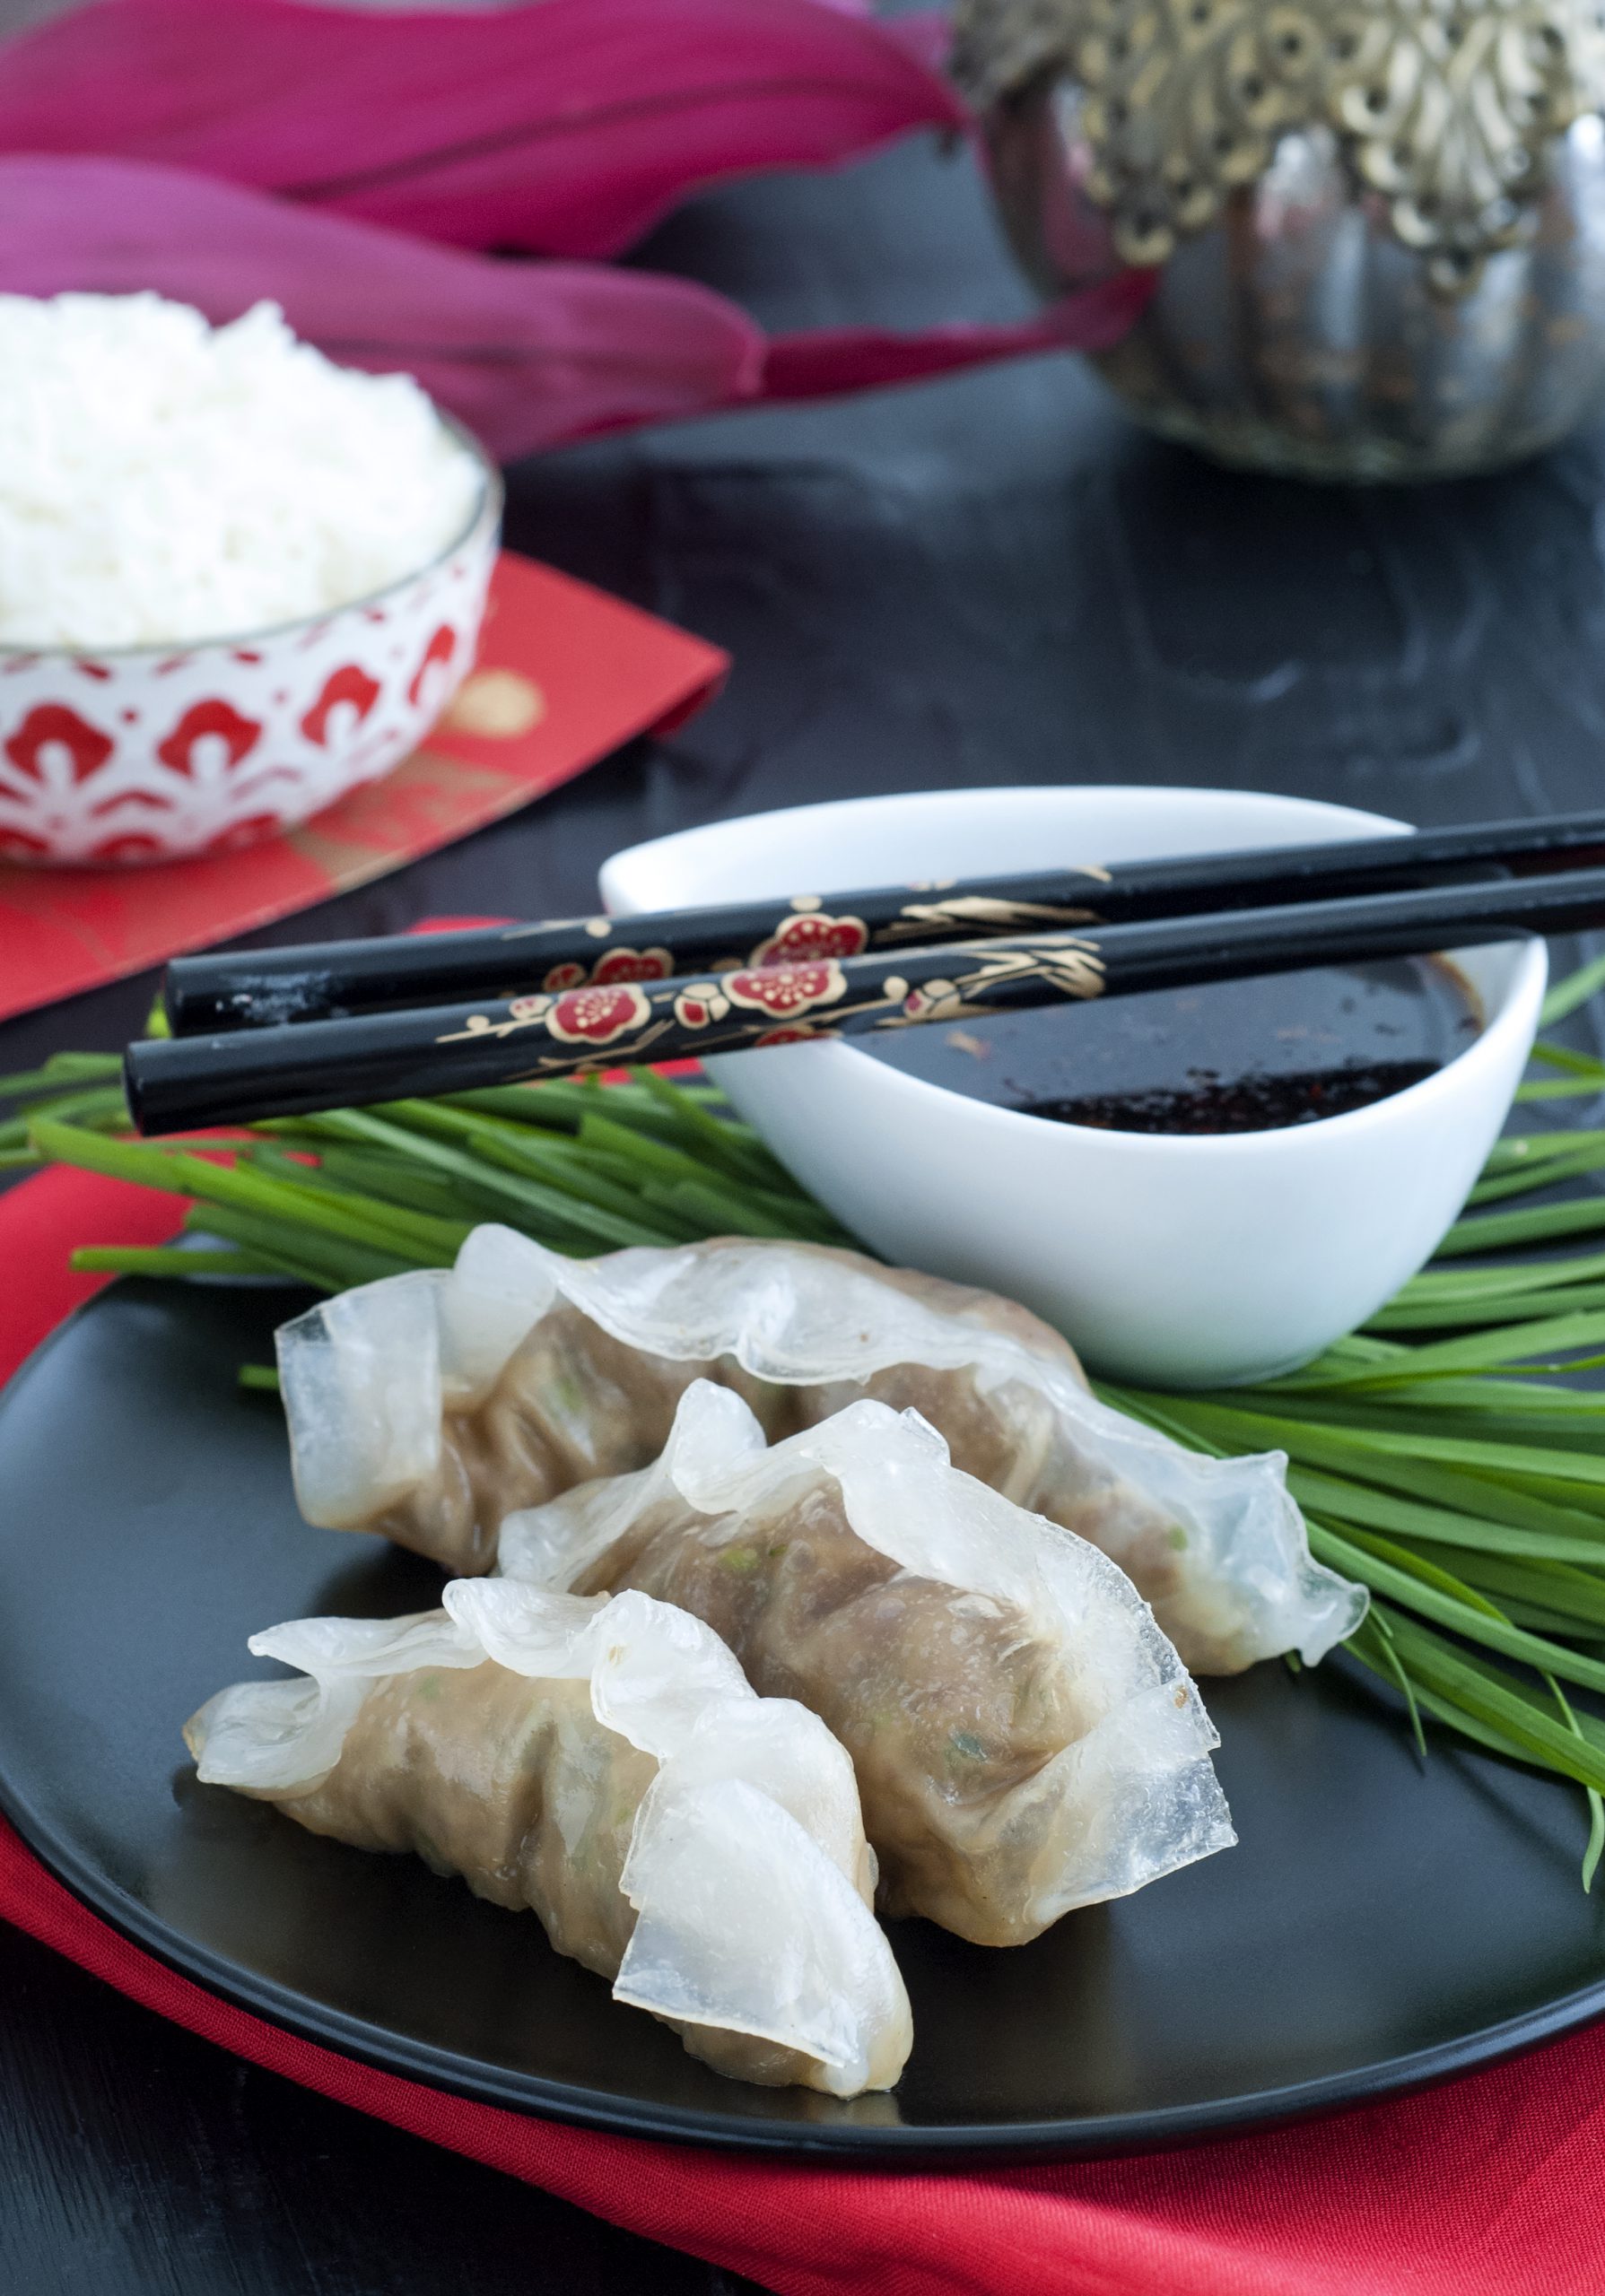
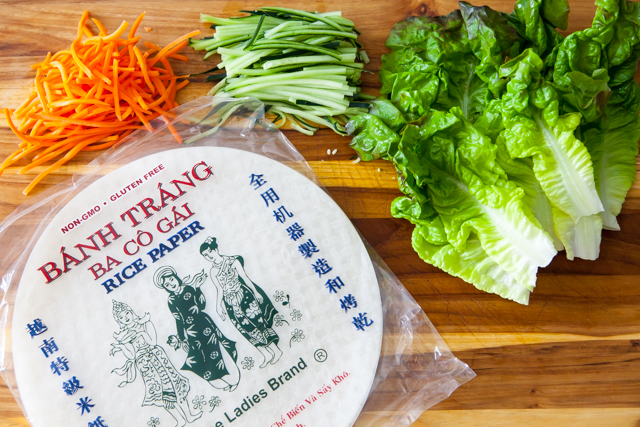
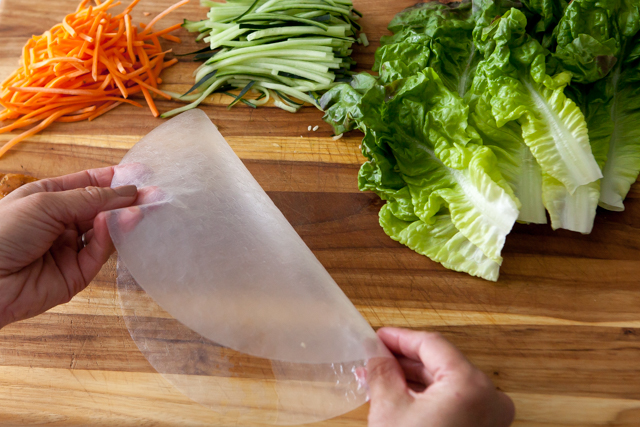
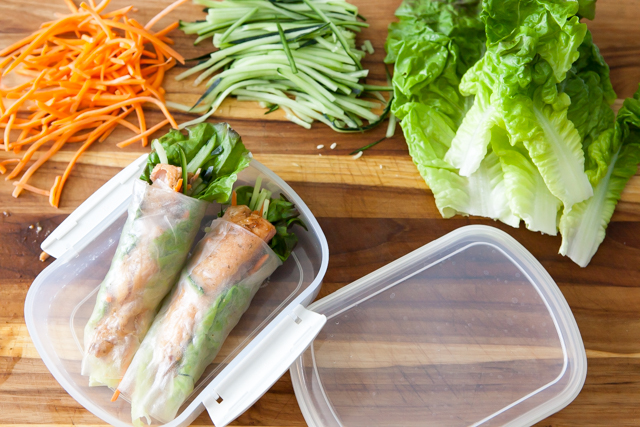
12 (8-9 inch) rice paper wrappers (each dumpling will be double-wrapped)
vegetable oil for frying
2 green onions, thinly sliced
For the Dipping Sauce:
6 tbsp jellied cranberry sauce
1 tbsp SAN-J Tamari Soy Sauce
1 1/2 tsp rice vinegar
1 tsp grated fresh ginger
Once you have the ingredients ready:
For the Dumplings
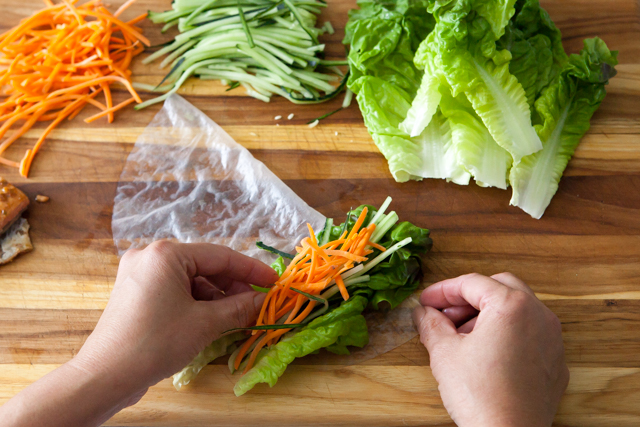
Heat olive oil in a large skillet over medium-high heat. Add the vegetable slaw and cook for 2 minutes, stirring occasionally. Add the turkey, ginger, garlic, SAN-J Organic Tamari, and sesame oil. Cook for 1-2 minutes or until heated through and the slaw is crisp tender.
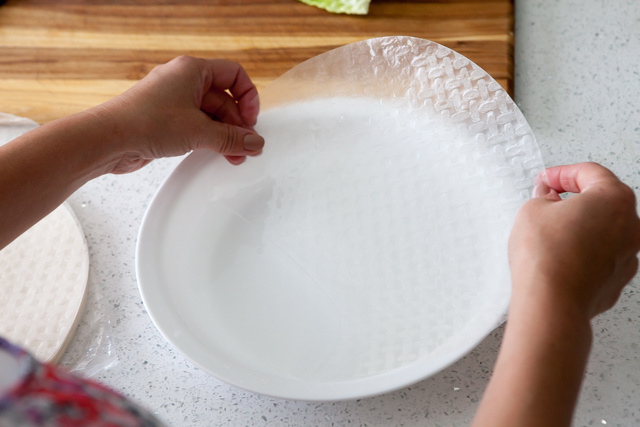
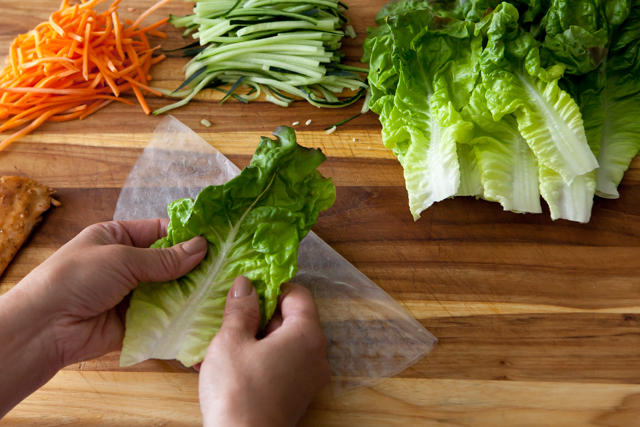
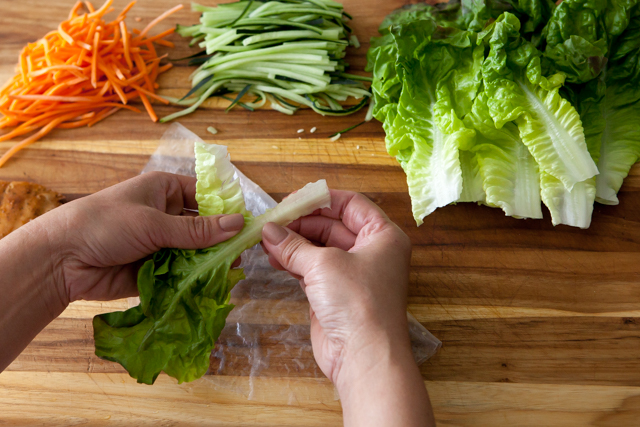
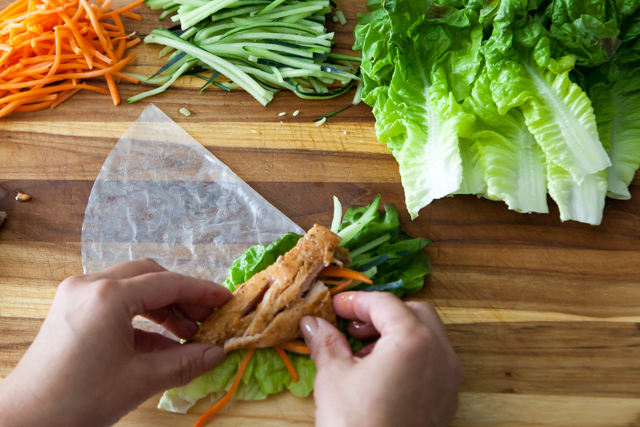
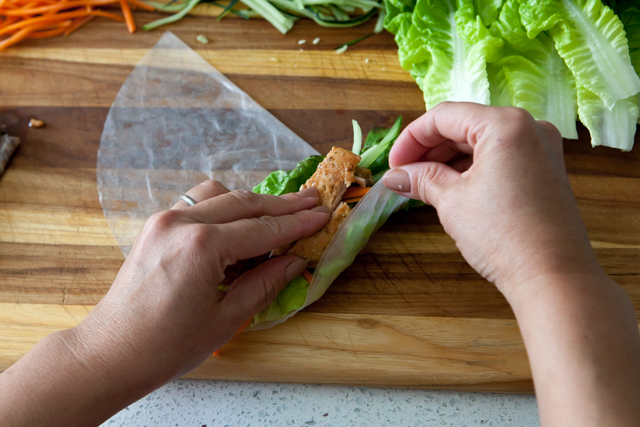
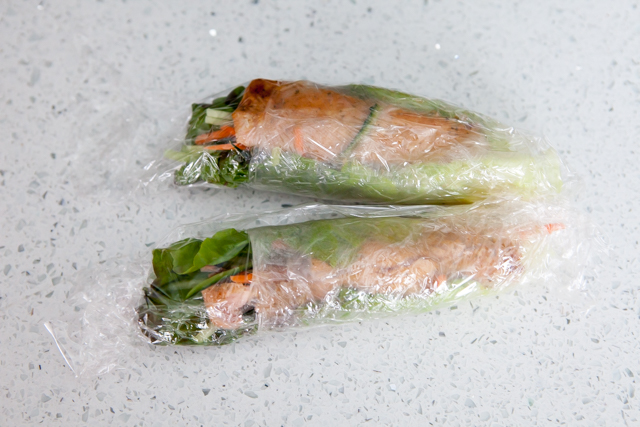
Dip one rice paper wrapper in cold water for a few seconds until pliable and place on a damp surface. Add a spoonful of filling in the center of the wrapper. Starting at the bottom, fold the rice paper wrapper over the filling, then the top over, and finally the sides, making a rectangle.
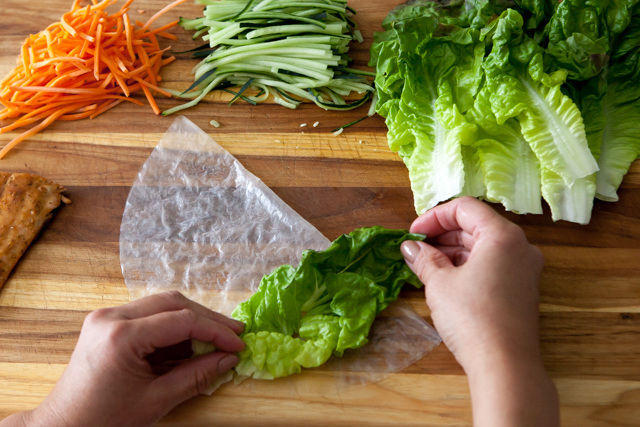
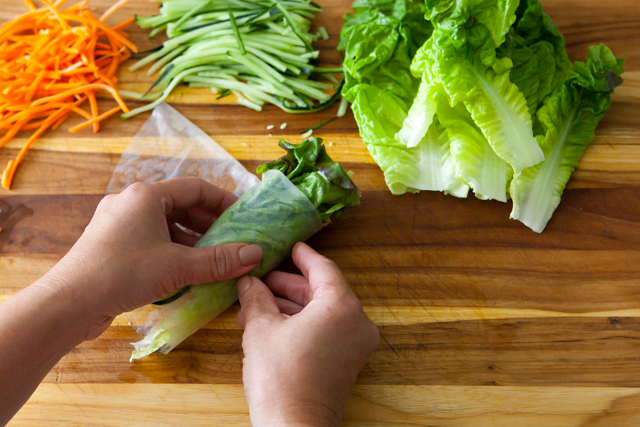
Now create a double wrapping for that same dumpling: Dip a second wrapper in water, place on a damp surface and fold over in the same manner, double wrapping the dumpling. Repeat with remaining wrappers and filling.
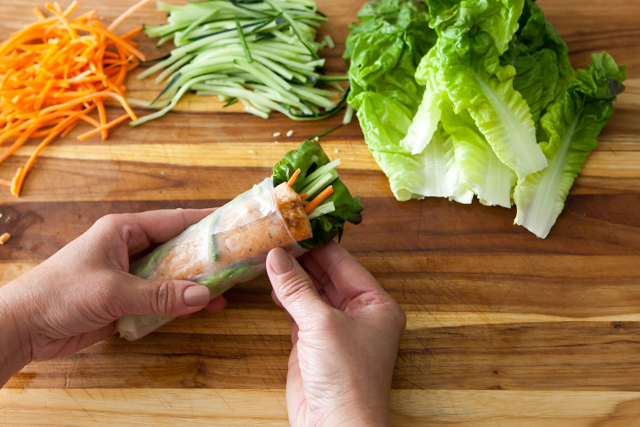
Pour enough vegetable oil to come up about ¼ inch in a skillet. Heat over medium-high heat. Fry the dumplings a few minutes on each side until golden brown. Garnish with green onions and serve with dipping sauce.
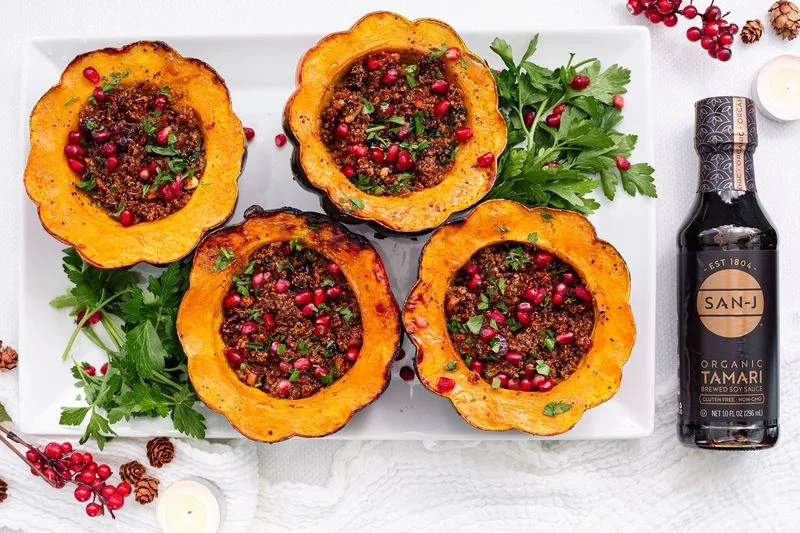
Preheat the oven to 400°F (200°C). Line 2 baking sheets with parchment paper.
Brush the cut sides of the acorn squash with olive oil and season with salt and pepper. Place the squash halves cut side down on the baking sheets. Roast for 25 – 35 minutes or until tender when pierced with a fork. Set aside. Leave oven on.
While the squash are roasting, make the filling. In a large skillet, heat 2 tablespoons of olive oil over medium heat. Add the garlic and sauté for about 1 minute. Add the chopped mushrooms and cook for 4-5 minutes until they release their moisture and start to brown. Stir in the spinach and cook until wilted, about 2 minutes. Add the cooked quinoa, dried cranberries, toasted nuts, thyme, and sage. Mix well. Add the SAN-J Tamari and maple syrup, stirring to evenly coat. Season with salt and black pepper to taste. Cook for an additional 2-3 minutes to allow flavors to meld.
Turn the roasted squash halves cut side up and spoon the stuffing mixture evenly into each half.
Place the stuffed squash back into the oven and bake for an additional 10 minutes to warm through.
Transfer to a serving platter, drizzle with a little more maple syrup and garnish with parsley and pomegranate seeds.
Drizzle prunes with balsamic vinegar in a small bowl and set aside.
Warm coconut oil in a large pot over medium high heat. Add onion, carrots, collard greens and a splash of SAN-J Tamari Soy Sauce and sauté for 10 minutes, until onion is translucent and collard greens are wilted.
Add mushrooms and sauté for about 8 minutes, until all their liquid is evaporated.
Add garlic, chili, thyme, rosemary, sage and black pepper and saute for 2-3 minutes.
Add prunes together with balsamic vinegar, followed by 2 tablespoons SAN-J Tamari Soy Sauce and tomato paste and stir around until the liquid evaporates, about 1 minute. Add crushed tomatoes, stir to combine and bring to a near boil. Carefully drop cauliflower into the sauce and spoon plenty of sauce on top of the cauliflower to coat it completely. Stir some of the vegetables out from under the cauliflower to ensure that it’s covered with the sauce as much as possible. The top of the cauliflower may peek out a little and that’s ok.
Bring the sauce back to a boil, adjust the heat to a slow simmer, cover and cook for 40-50 minutes, until the cauliflower is completely cooked and soft throughout. Scoop the simmering sauce over the cauliflower every now and then while it’s cooking.
Remove the cauliflower from the pot, slice and serve it warm with plenty of sauce, over vegetable mash or any grains of choice.
Preheat oven to 425ºF. Line a rimmed baking sheet with foil.
Cut the bacon into 1-inch pieces. Scatter in an even layer on the baking sheet and bake for 8 minutes.
In a large mixing bowl, combine the soy sauce, oil, honey, vinegar, and chili garlic sauce. Add the Brussels sprouts and toss well.
Add the cooked bacon and bacon grease to the Brussels sprouts and toss well. Transfer to the baking sheet and bake for 8 minutes, toss, then bake for another 6-10 minutes depending on the size of the sprouts. They should be crisp tender and the bacon slightly crisp.
Transfer to a serving bowl along with any juices. Sprinkle the cranberries and green onions over the top and serve.
Orange slices and fresh herbs for garnish optional
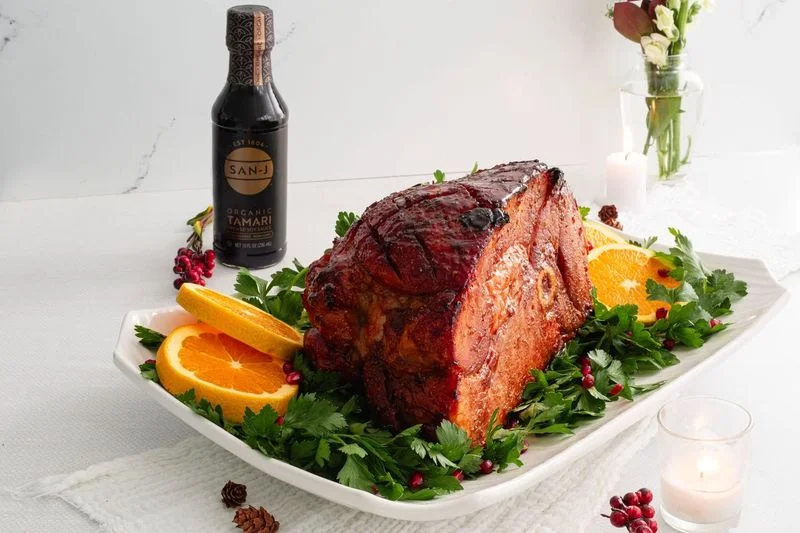
Once you have the ingredients ready:
Preheat the oven to 325°F (160°C). Line a large roasting pan with foil and place a rack on top.
Score the surface in a diamond pattern with a sharp knife, making shallow cuts about ½ inch apart. This helps the glaze penetrate the ham and creates a beautiful presentation.
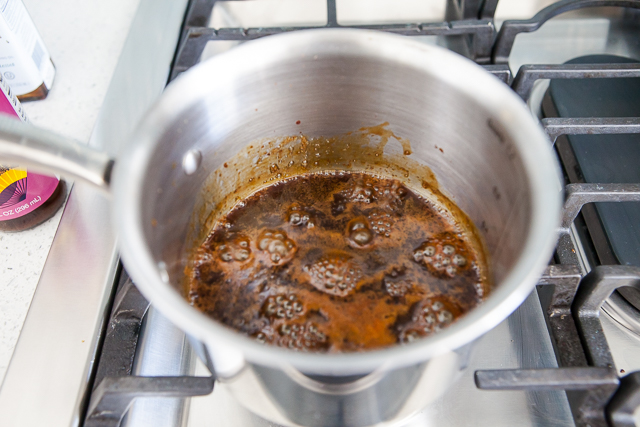
In a small saucepan over medium heat, combine the honey, SAN-J Tamari, Dijon mustard, brown sugar, chili garlic sauce, rice vinegar, black pepper, and ground ginger. Stir and simmer for 2-3 minutes until the sugar dissolves and the glaze is slightly thickened. Remove from heat and set aside.
Brush a generous amount of the glaze over the ham, making sure it gets into the scored cuts. Bake for 1.5–2 hours, basting with the glaze every 20 minutes or until the ham is warmed through and glazed.
Remove the ham from the oven and let it rest for 10 minutes.
Garnish with orange slices and fresh herbs if desired.
Remove the neck and giblets from the turkey. Save for another use or discard. Rinse the turkey well inside and out.
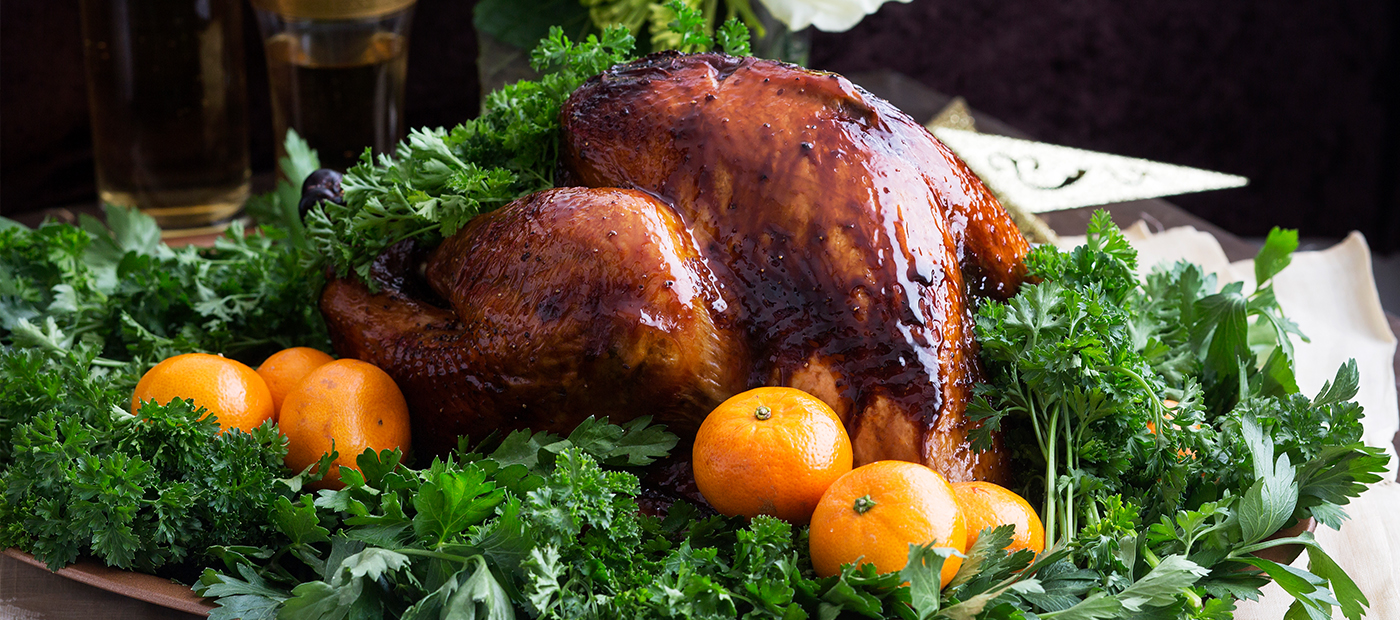
Combine 6 cups of water with the salt and bring to a boil, stirring to dissolve the salt. Stir in 2 cups honey, 1 cup tamari, the molasses, orange wedges, sage, red pepper flakes, garlic powder, and peppercorns. Add the ice and stir until it melts. Pour the mixture into a pot or bucket large enough to hold the turkey. Place the turkey to the liquid, breast side down, and add enough cold water so that the turkey is fully covered with the mixture, stirring the water in to combine. Cover and refrigerate overnight or up to 12 hours. Remove the turkey from the brine, discard the brine, and rinse the turkey with cold water. Dry the skin and cavities well, and let the turkey sit at room temperature for 1 hour before roasting.
Preheat the oven to 350 degrees.
Rub the butter generously all over the turkey. Sprinkle with pepper. Place the turkey on a rack in a roasting pan and tie the legs together with kitchen string. You can also tuck the wings under the bird, if desired.
Roast for 1 hour then cover the turkey with a piece of foil sprayed with cooking spray to keep the turkey from getting too dark. Roast for another 45 minutes then start checking the internal temperature of the turkey with an instant-read thermometer inserted into the thickest part of the thigh. You want the temperature to reach 165 degrees, this will take about 2-2½ hours total.
While the turkey is roasting, make a glaze by combining the remaining ¼ cup honey, ¼ cup tamari, and balsamic vinegar in a small but deep saucepan. Bring to a boil and continue boiling until it becomes as thick as molasses, about 5 minutes. The glaze needs to be thick or it will not adhere to the turkey.
Once the turkey reaches 165 degrees, remove from the oven and increase the temperature to 450 degrees. Brush the turkey with about ⅓ of the glaze and return to the oven. Cook for 2 minutes, then glaze again with half the remaining glaze. Cook for another 3 minutes. Remove the turkey from the oven, place it on a cutting board or serving platter, give it a final brush with the glaze, tent with foil and let sit for 15 minutes before serving.
You need a container large enough to hold your turkey submerged in 2 gallons of water and able to keep cool for at least 8 hours
A large stock pot with lid or a food-safe bucket with lid and some space in the refrigerator
Or the crisper drawer lined with a large brining bag
Or a cooler filled with ice
Once you have the ingredients ready:
Start by gathering your brining container and making space in the fridge or cooler.
Remove the neck and giblets from the turkey. Rinse the turkey well, inside and out. Place the turkey breast side down in your prepared container.
Dissolve the salt by heating it in a small amount of the water, in a medium saucepan. Once dissolved, remove from heat and add the bottle of Tamari Soy Sauce. Then, if using, add sugar and/or aromatics of choice.
Pour the brine solution over the turkey, and then pour remaining cold water over the turkey.
Cover and place in the fridge to brine for 8 hours or overnight.
Once brining is complete, rinse the turkey with cold water, then pat dry with paper towels. Next, thoroughly clean your sink of any residue from the raw turkey.
You can then roast the turkey or allow to sit in fridge covered for another 24 hours until ready to cook.
Roast as usual. Check the turkey’s temperature about an hour before the end of cooking time, as brined turkeys may cook more quickly.
1 10-ounce box Frozen spinach, thawed and squeezed dry
8 ounces Cream Cheese cut into small pieces
1/2 teaspoon Grated nutmeg
1 3 to 3 1/2 pound Boneless pork loin, butterflied
Kosher or fine sea salt
Freshly ground black pepper
3 Tablespoons Maple Syrup
2 Tablespoons SAN-J Tamari Soy Sauce
Once you have the ingredients ready:
In a large skillet over medium-high heat, brown the sausage, breaking it up with a spatula, until fully cooked. Drain the fat. Add the spinach, cream cheese, and nutmeg and cook, stirring, until the cheese melts.
Lay the pork, opened, between two pieces of waxed paper and pound with a rolling pin until it is of even thickness. Season with salt and pepper. Spread the sausage mixture over the top of the pork, leaving a 1-inch border. Starting with one long end, roll tightly into a cylinder. Tie kitchen string around the cylinder at 1-inch intervals. Place on the prepared baking sheet, seam-side down. Sprinkle the outside with pepper.
In a small bowl, combine the maple syrup with the Tamari Soy Sauce. Pour half into another small bowl. Brush half the mixture over the pork and back for 35-45 minutes or until the temperature of the pork reaches 145°F.
Remove from the oven, brush with the remaining maple tamari sauce. Let sit for 10 minutes before slicing and serving.
Preheat the oven to 225°F (110°C). Line a baking sheet with parchment paper.
In a clean mixing bowl, beat the egg whites on medium speed until foamy. Add the cream of tartar and continue to beat until soft peaks form.
Gradually add the sugar while beating on high speed until stiff, glossy peaks form. Gently fold in the cornstarch and vanilla extract.
Spoon or pipe the meringue mixture onto the prepared baking sheet into 8 nests
Bake for 1.5–2 hours or until the meringues are dry and can be lifted from the parchment. Let them cool completely.
Chestnut Cream:
Combine chestnuts, half and half, and 2 tablespoons powdered sugar in a medium saucepan and bring to a gentle simmer. Simmer for 15 minutes, stirring occasionally, or until thickened and chestnuts are tender. Blend until smooth in a food processor or bender. Add the tamari and 1 teaspoon vanilla and blend. Let cool completely.
Whip heavy cream with 2 tablespoons powdered sugar and 1 teaspoon vanilla. Add about ¾ of the whipped cream to the chestnut mixture and whisk well.
Chocolate Tamari Sauce
Place chocolate chips in a heatproof bowl. Heat the heavy cream over medium heat until just beginning to simmer (do not boil). Pour the hot cream over the chocolate and let it sit for 2 minutes. Stir until the mixture is smooth and glossy. Add the tamari and stir until fully combined.
To assemble, spoon or pipe the chestnut cream onto the cooled meringues. Drizzle or spoon the chocolate tamari ganache over the top, top with the remaining whipped cream, and serve with the extra chocolate sauce on the side.
Preheat oven to 350ºF. Prepare 2 8-inch round cake pans with parchment paper and cooking spray or butter.
Add the butter and chocolate chips to a large microwave-safe bowl and heat on high power for 2 1/2 minutes. The chocolate should be very soft and beginning to melt. If not, heat for another 30 seconds. Stir until the chocolate is fully melted and glossy. Allow to cool for 5 minutes.
Combine the almond flour, cocoa powder, and baking powder in another bowl, whisking well to combine with no lumps.
To the cooled butter and chocolate, add the eggs, sugar, Tamari, and vanilla and whisk to combine. Add in the dry ingredients and mix well. Divide the batter evenly among the two prepared cake pans.
Bake for 30-35 minutes, or until the edges look dry and a toothpick inserted into the center comes out clean.
Allow to cool in the pans for 30 minutes. Remove from the pan and place upside down on a wire rack to finish cooling completely.
When completely cooled, place the cakes upside down on a cutting board and cut each cake into 8 triangles.Transfer the triangles back to the wire cooling rack, keeping them face-down. Optional, add waxed paper below on the counter.
For the Ganache
Heat the cream over medium heat until it almost comes to a boil. Add the chocolate chips and let sit for 5 minutes. Stir until smooth and glossy. While still warm, stir in the butter until completely melted. Stir in the Tamari and vanilla.
Spoon the ganache heavily over the brownie triangles, letting it drip down the sides.
Decorate with gel icing and sprinkles. Refrigerate to let the ganache harden, about 1 hour.
Preheat the oven to 350 degrees. Spray a bundt pan with cooking spray.
In a large mixing bowl, combine the cake mix, pumpkin, eggs, and pumpkin pie spice and mix well. Take 1 cup of the batter and place it in a small mixing bowl.
Melt ⅓ cup chocolate chips in the microwave for 45-60 seconds or until mostly melted. Stir until smooth and glossy. Add the melted chocolate to the 1 cup reserved batter, along with the cocoa powder.
Layer half of the pumpkin batter into the prepared bundt pan, top with the chocolate batter, spreading to cover evenly. Top with the remaining pumpkin batter and smooth the top. Bake for 30-40 minutes or until a toothpick inserted into the center comes out clean.
Remove from the oven and let cool in the pan for 15 minutes, then place on a wire rack to finish cooling.
Place the remaining ½ cup chocolate chips in a heatproof bowl. Heat the cream until it just starts to boil. Pour over the chocolate and let sit for 5 minutes. Stir the mixture well until smooth and glossy. Stir in the tamari and vanilla.
Place a piece of waxed paper under the wire cooling rack and drizzle the chocolate tamari mixture over the top of the cake. Let the chocolate cool before placing the cake on a serving plate or cake stand.
Make Gluten-Free Holiday Cooking Simple With SAN-J Sauces
Unlock all the taste in your gluten-free cooking this holiday season with the umami-rich flavor of our Tamari Soy Sauce. Unlike many other soy sauces, our sauce is brewed with 100% soy and certified gluten-free by the Gluten-Free Certification Organization.
Browse our exciting collection of SAN-J Asian cooking sauces and feel inspired to invite your gluten-intolerant friends and family back anytime!
Whether eaten as a late-night snack or a main course at a trendy restaurant, yakitori is one of the most well-known foods in Japanese cuisine. It’s also easy to recreate, requiring only a few ingredients and the proper cooking equipment.
We’ll explore everything you need to know about yakitori, from its humble beginnings to its celebrated rise. We’ll also provide a step-by-step guide to preparing it at home.
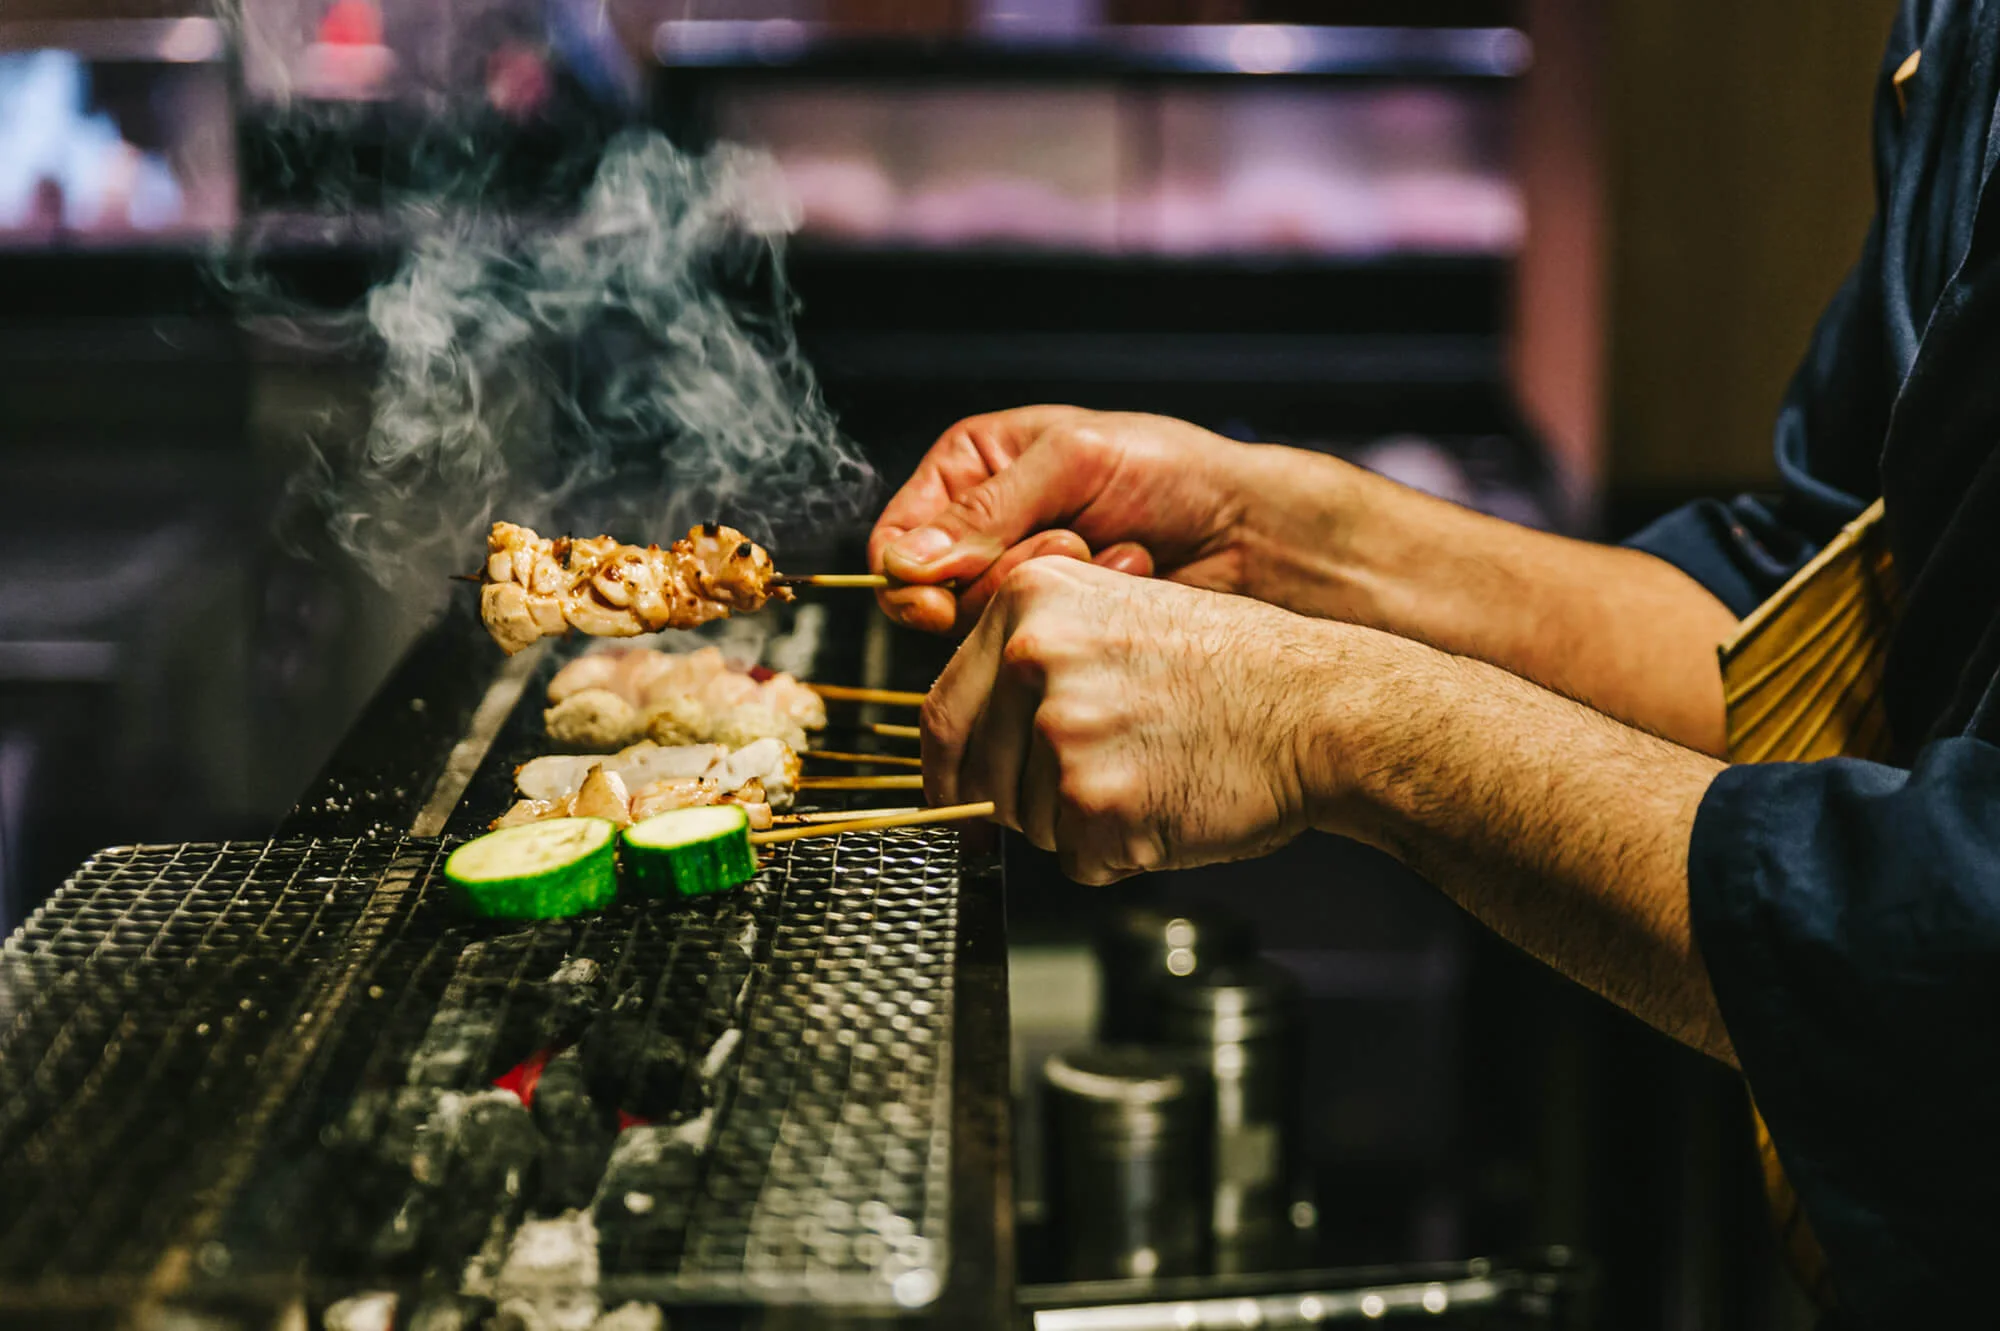
Yakitori is a simple handheld dish consisting of bite-sized pieces of chicken skewered on bamboo sticks and cooked on a charcoal grill. Its name combines the Japanese words for grill (yaki) and chicken (tori).
While it originated as a street food during the Meiji period, which lasted from the late 1860s to the early 1910s, it’s become one of Japan’s staple foods due to its simplicity and convenience. Today, you can find it almost anywhere, from 24/7 convenience stores — known as “conbini” — to upscale eateries specializing in the dish.
Yakitori chefs take a zero-waste approach when preparing this dish, using every edible part of the chicken. Some examples of cuts you might see if you were to order yakitori in Japan include:
Momo: Thigh.
Sasami: Breast.
Tebasaki: Wing.
Nankotsu: Cartilage.
Sunagimo: Gizzard.
Kawa: Skin.
Hatsu: Heart.
Hatsumoto: Heart ventricle.
Chochin: Oviduct and egg yolk.
Each cut features a different flavor and texture, so serious foodies have virtually endless options.
How Yakitori Is Made
Traditionally, yakitori is made using a charcoal grill to give it a robust, smoky flavor and delicious char. The best yakitori chefs use a special oak-based charcoal called binchō-tan, which provides a cleaner burn than other varieties. In fact, many chefs consider binchō-tan the best charcoal for cooking any type of cuisine.
You can find many varieties of yakitori throughout Japan, each with its own unique flavor profile. Some of the most common yakitori flavorings include:
Shio: A simple sprinkling of salt.
Tare: A sweetened soy sauce with a strong umami flavor.
Miso: Fermented soybean paste that imparts a salty, nutty and umami flavor.
Yuzu kosho: A salty, tangy and spicy paste made with the Japanese citrus fruit yuzu.
You can also dip your yakitori into other sauces to try new combinations, like ponzu or teriyaki sauce.
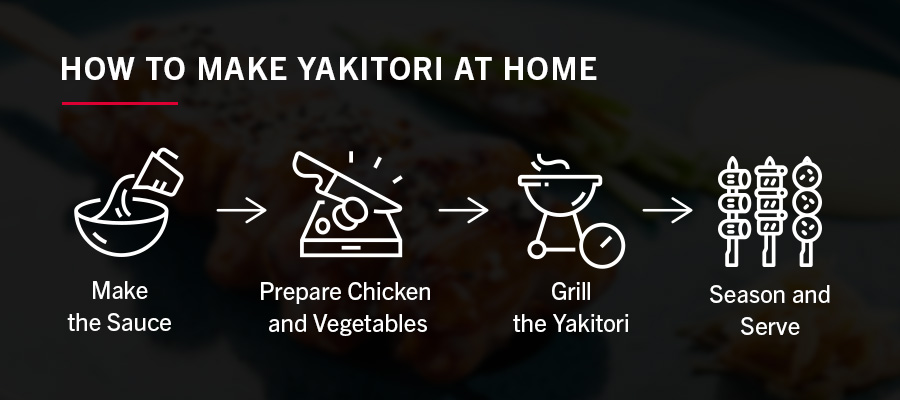
How to Make Yakitori at Home
Want to try this dish but don’t have a Japanese restaurant near you? Here’s a simple at-home yakitori recipe.
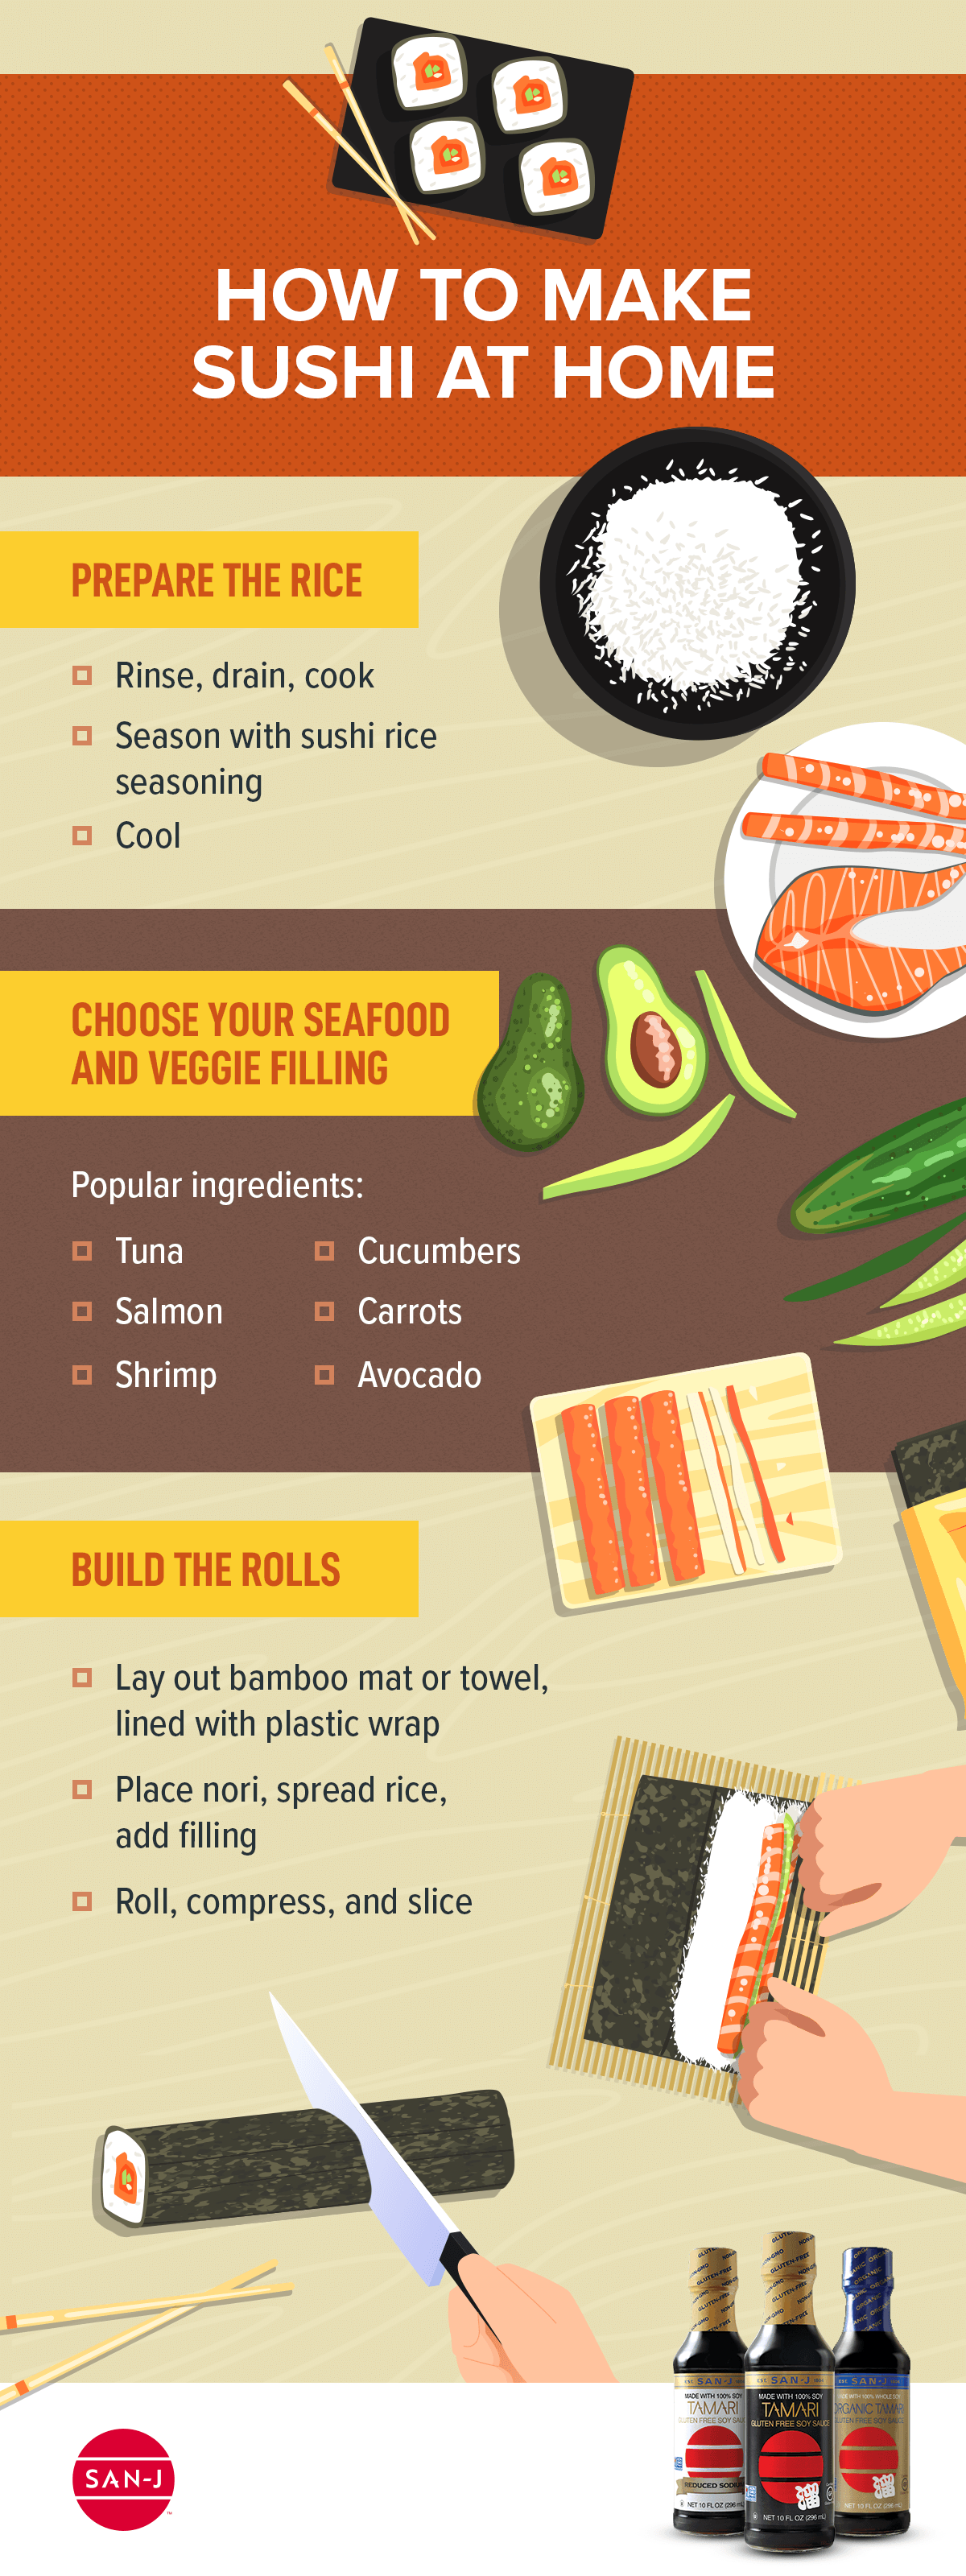
1. Make the Sauce
First, make a simple tare sauce by combining 3 tablespoons of SAN-J Tamari Soy Sauce with 3 tablespoons of mirin and 1 ½ tablespoons of sugar in a small saucepan over low heat. Stir continuously until the sauce thickens, then set aside. Multiply portions as needed for more servings.
Running short on time? Skip this step with convenient, sweet-and-savory SAN-J Teriyaki Sauce. When combined with orange zest, it also makes a delicious dipping sauce!
2. Prepare Chicken and Vegetables
Cut your chicken and vegetables into small pieces to ensure even cooking, then slide them onto skewers. Traditional yakitori skewers, such as “negima” will alternate between pieces of chicken and vegetables, but you can order them however you prefer.
Yakitori is a versatile dish, so you can customize it to accommodate your dietary needs and preferences. Some swaps you can make include:
Chicken: While chicken is traditional, you can also use pork belly, sliced beef, pork loin, tofu cubes or other plant-based meat substitutes. For a different texture, you can use ground chicken meatballs, or tsukune.
Vegetables: You can use almost any vegetable you like, including negi, shishito peppers, asparagus, mushrooms, zucchini, cherry tomatoes, onions and more.
Sauce: Yakitori sauce is easy to switch according to your preferences and dietary restrictions. If you have a soy allergy, for example, opting for plain shio yakitori is always a good move. You can also substitute conventional Tamari with a soy-free variety, like the pea-based SAN-J No-Soy Tamari.
Take this time to prepare any sides and appetizers, too.
3. Grill the Yakitori
Next, start your grill and add the skewers, spacing them out so they cook evenly. If you want to make shio yakitori, lightly salt your skewers before grilling to allow the salt to absorb into the chicken.
The cooking appliance you use will have a minor impact on the final result. While charcoal grills are traditional, an electric grill will work just as well.
If you don’t have a grill, you can use a grill pan on your stove. The pan’s ridges will create a similar seared effect, though you won’t get the same smoky flavor as you would on a real grill. Adding seasonings like smoked salt or liquid salt can help you enhance the dish’s flavor.
4. Season and Serve
Once your chicken is fully cooked, remove it from the grill and add your sauce. The best way to apply it is with a basting brush, but you can also dip the skewer into your sauce if you don’t have one available. Finally, it’s time to plate it up with sides and dips and dig in.
Cooking Tips
Want to make sure you get the most delicious yakitori? Here are some quick tips:
If you’re using bamboo or other wooden skewers, soak them in cool water for 20 minutes to prevent them from burning.
Maximize the flavor with fresh ingredients and a high-quality sauce.
Baste the skewers at the last stage of grilling to avoid creating excess smoke or burning the sauce.
Brighten up salty shio yakitori with a squeeze of fresh lemon juice.
Best Pairings for Yakitori
Yakitori is a popular snack at izakaya, which are bars that sell various finger foods — otsumami in Japanese — alongside alcoholic beverages like beer and sake. Some common otsumami pairings for yakitori include:
Karaage: Pair this crispy fried chicken with a bold dipping sauce.
Edamame: These steamed soybean pods are often served with salt or other flavorings.
Sashimi: Sashimi is thin slices of raw seafood or meat.
Sushi: Enjoy yakitori alongside raw seafood or vegetables served on rice.
Tempura: Seafood and vegetables that have been battered and deep-fried taste great with yakitori.
High-end restaurants often serve yakitori with lighter fare, such as salads and rice dishes, to ensure the yakitori remains the star of the meal.
Make Your Own Delicious Yakitori at Home With SAN-J Sauces
Making yakitori at home is easier than you think. Bring savory Japanese flavors into your kitchen with high-quality sauces from SAN-J. We make our Tamari Soy Sauces with 100% soy and no wheat, so it’s safe for those who can’t eat gluten. All our sauces are also free of artificial colors, flavors and preservatives, making them suitable for those looking to lead healthier lifestyles.
Many people have discovered that eating at home has tons of benefits. Prepping and cooking meals from scratch, or partially from scratch, provides you with plenty of upsides — more than you might imagine!
Major Benefits of Cooking at Home
Why should you eat at home? SAN-J offers several reasons to consider putting your fast food lifestyle on hold and embracing the benefits of home cooking.
Saving Money
Eating on the go may seem convenient, but it’s pricey. When you want to save your hard-earned dollars, bypass drive-thrus and get acquainted with your pots and pans.
Eating Healthier
Everyone should know the importance of a well-rounded diet. To boost the nutritional value of your daily intake, make dishes instead of buying premade ones that may be high in salt, fat and sugar.
Stimulating Your Creativity
Have you had a chance to explore your imagination lately? One advantage to making homemade food is that you get to be innovative! Experimenting with new foods and recipes may even boost your brainpower.
Spending Time With Family
Preparing lunch or dinner can be a group activity. Bring everyone in your household into the experience. Together, you can get done faster and make memories with the people in your life.
Knowing Every Ingredient
Does someone in your household have food allergies or sensitivities? When you cook at home, you can control what goes into everything you serve. You can also cut the risk of cross-contamination of known allergens.
Controlling Your Portions
Most eateries offer meals that are larger than normal. When you put together homemade food items, you can divvy out portions that make sense. This helps you maintain a healthier weight and avoid problems associated with overeating.
Making Extras for the Freezer
Do you have a favorite dish that everyone in your home asks you to make? Cook up double or triple batches to keep in the freezer. These make awesome grab-and-heat alternatives when you need a quick lunch or are too busy to make a complete meal.
Check Out Our Recipes and Sauces Today
Getting excited at the thought of cooking at home? At SAN-J, we’re here to help. Check out our lineup of easy-to-make tasty recipes. Be sure to stock your pantry with some of our premium products, including gluten-free soy sauce.
Guacamole is a spread or dip that first originated in Mexico and can now be found all over the world. Guacamole is traditionally made with avocados, tomatoes, lime and spices. Since it’s a simple dish, you’ll need the freshest ingredients to make your dip stand out — including the best ripe avocados.
Tips for Choosing the Right Avocados for Guac
You should choose avocados that are soft enough to mash easily but not too mushy. Underripe avocados don’t yet have the deliciously smooth taste they’re known for, and you should toss out overripe and brown avocados.
When you’re at the grocery store looking for the right ingredients, follow these tips to find the perfect avocado for guac:
Look at the color: A ripe avocado is shiny and dark green, not black and matte or pale green. Avoid very dark and soft avocados.
Give it the squeeze test: Hold the avocado in your hand and squeeze gently with your palm, not using your fingertips. If the avocado is ripe, it will give a little while remaining firm. Soft avocados are overripe and not ideal for guacamole. If the avocado is hard, it’s not yet ripe. You can plan ahead by purchasing a few firm avocados and keeping them in a bowl in your kitchen. They’ll ripen in a few days and will be perfect avocados for making guac.
Check under the stem: If you have a few avocados on your counter at home and want to know which one is ready for the guacamole you’re making, peel back the small stem tip at the top of the avocado to check for a lush green color. If the stem is firmly attached and doesn’t come off with a gentle nudge, the avocado is not ripe yet. Signs of brown under the stem mean the inside of the avocado is likely brown, too, and beyond its prime.
Check Out Our Guac Recipes and Other Products Today
If you’d like to learn how to make guacamole with a Szechuan twist, SAN-J has a delicious guac recipe for you to try. Be sure to check out our cooking sauces and products to add to your pantry so you can make add new and traditional flavors to your meals. We’ve been making authentic, quality ingredients at our family company for more than 200 years. Chefs trust our products to transform dishes and to balance flavors. Try SAN-J products today!
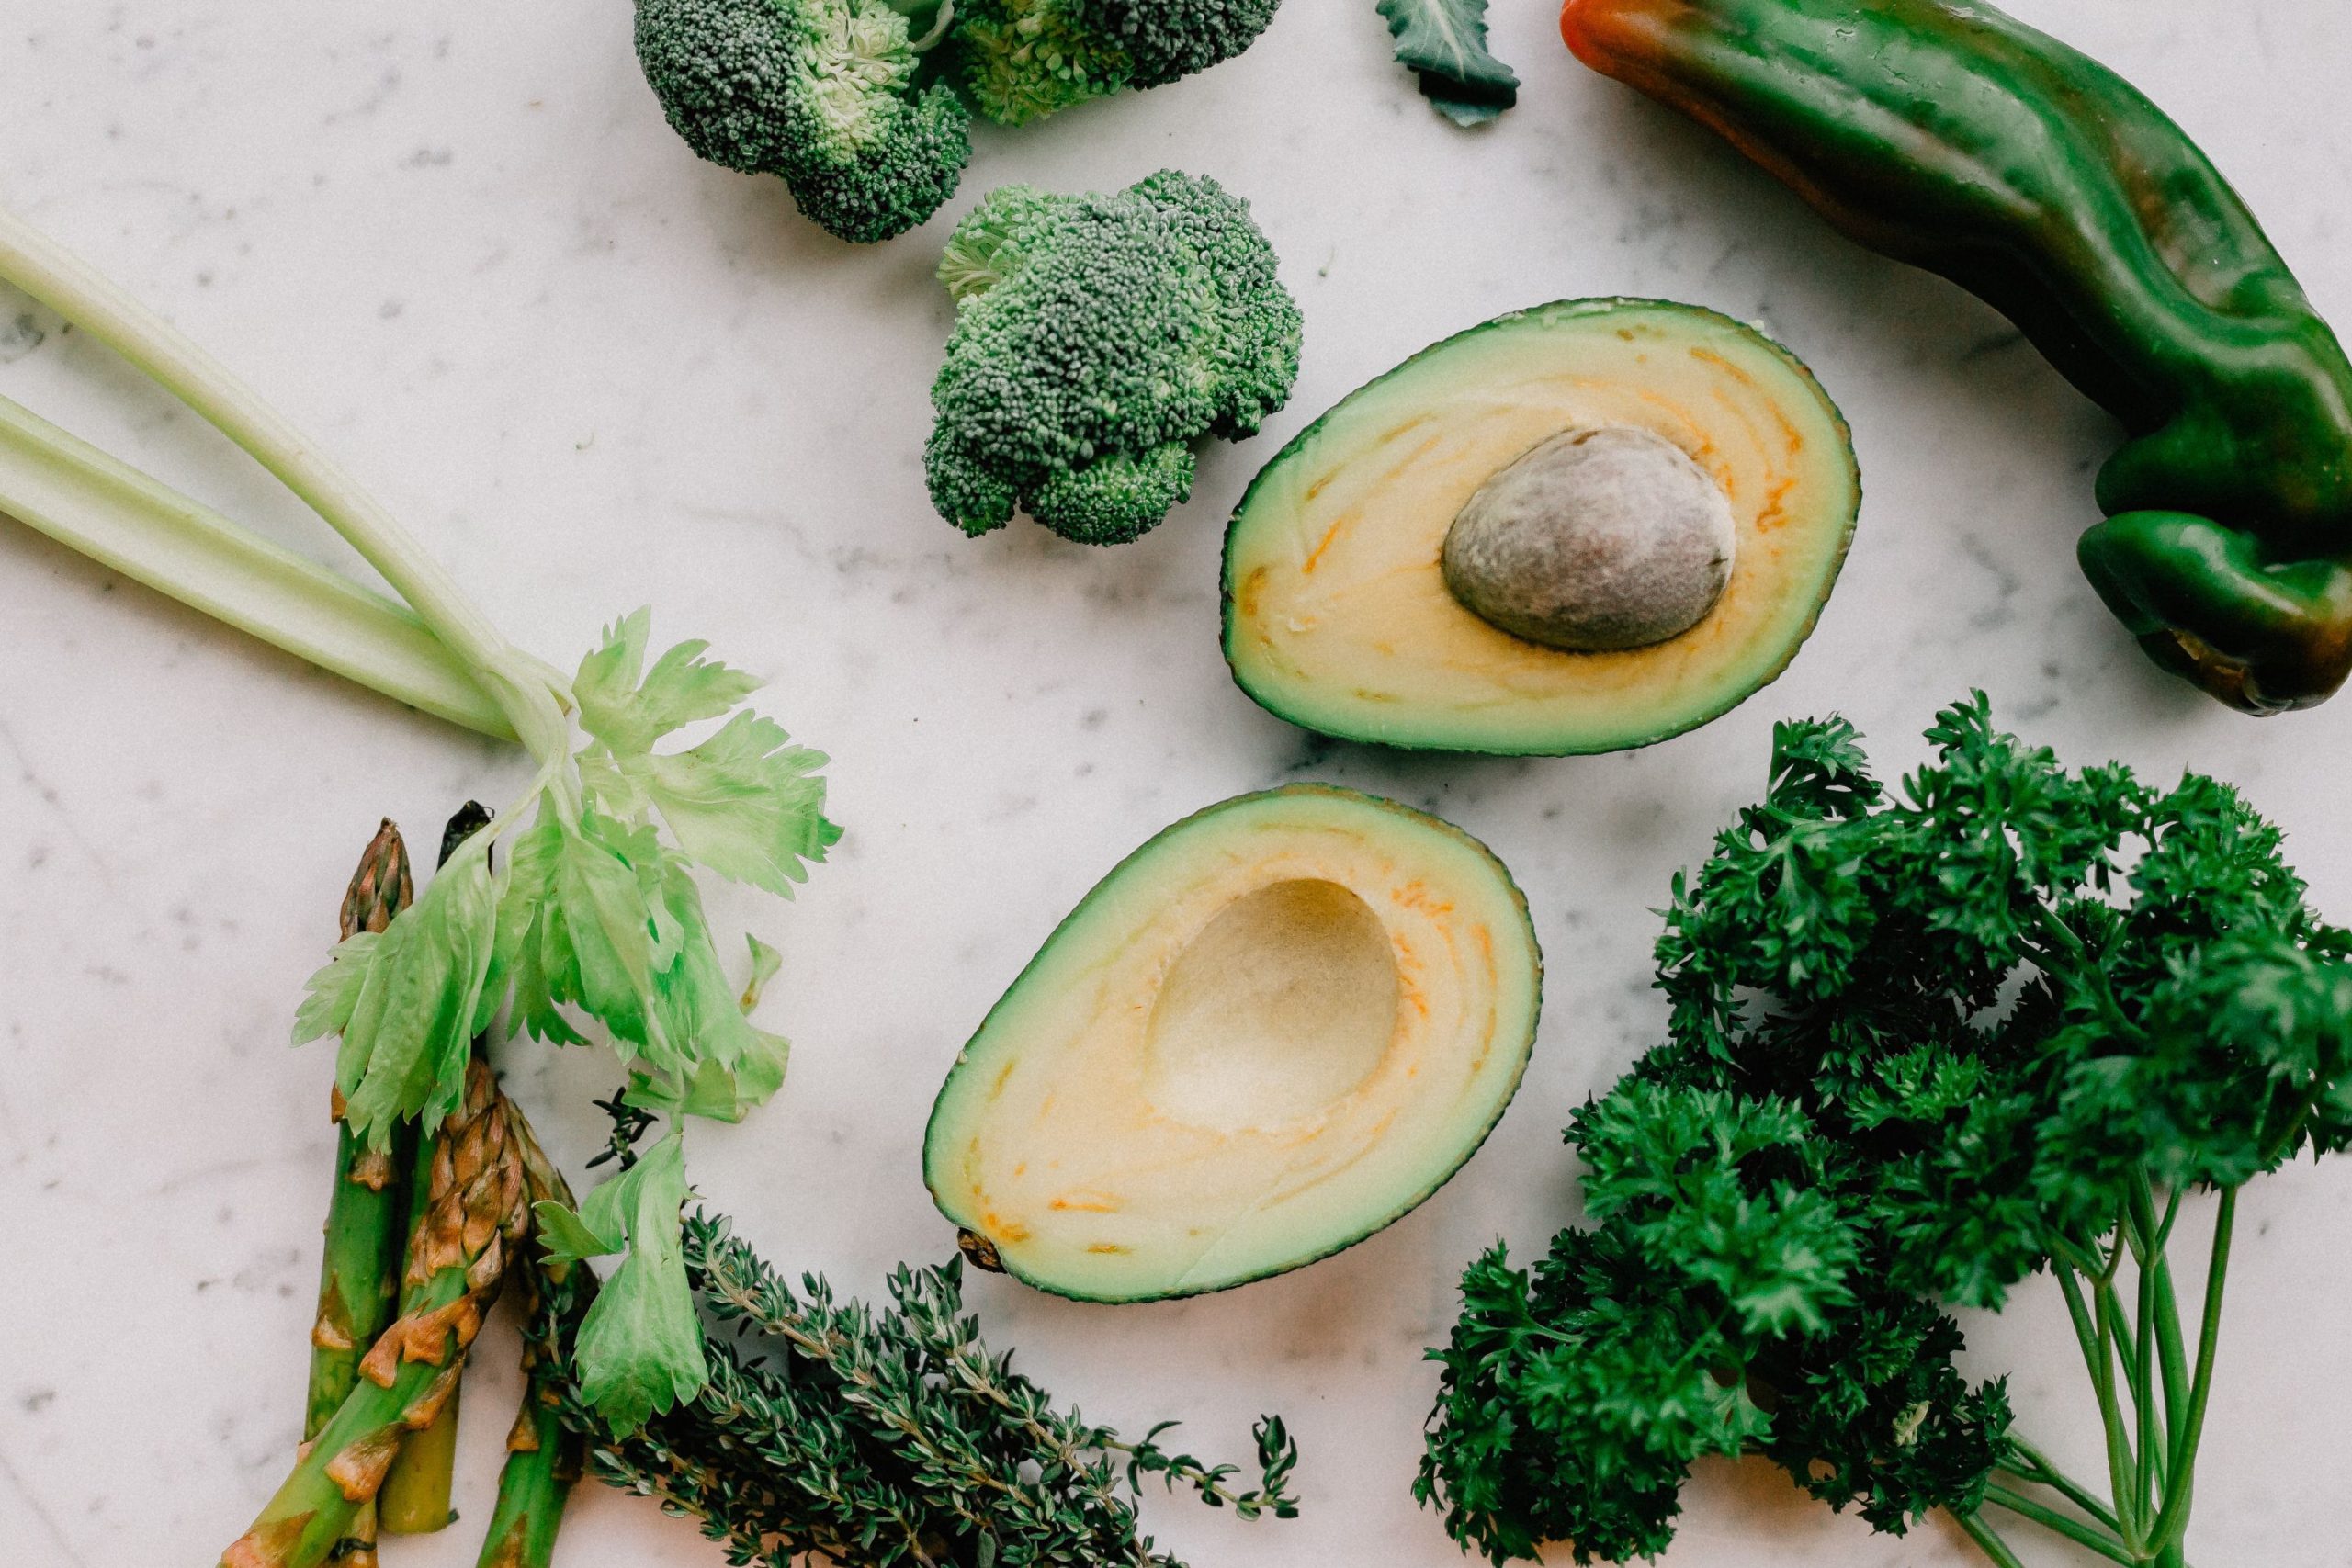
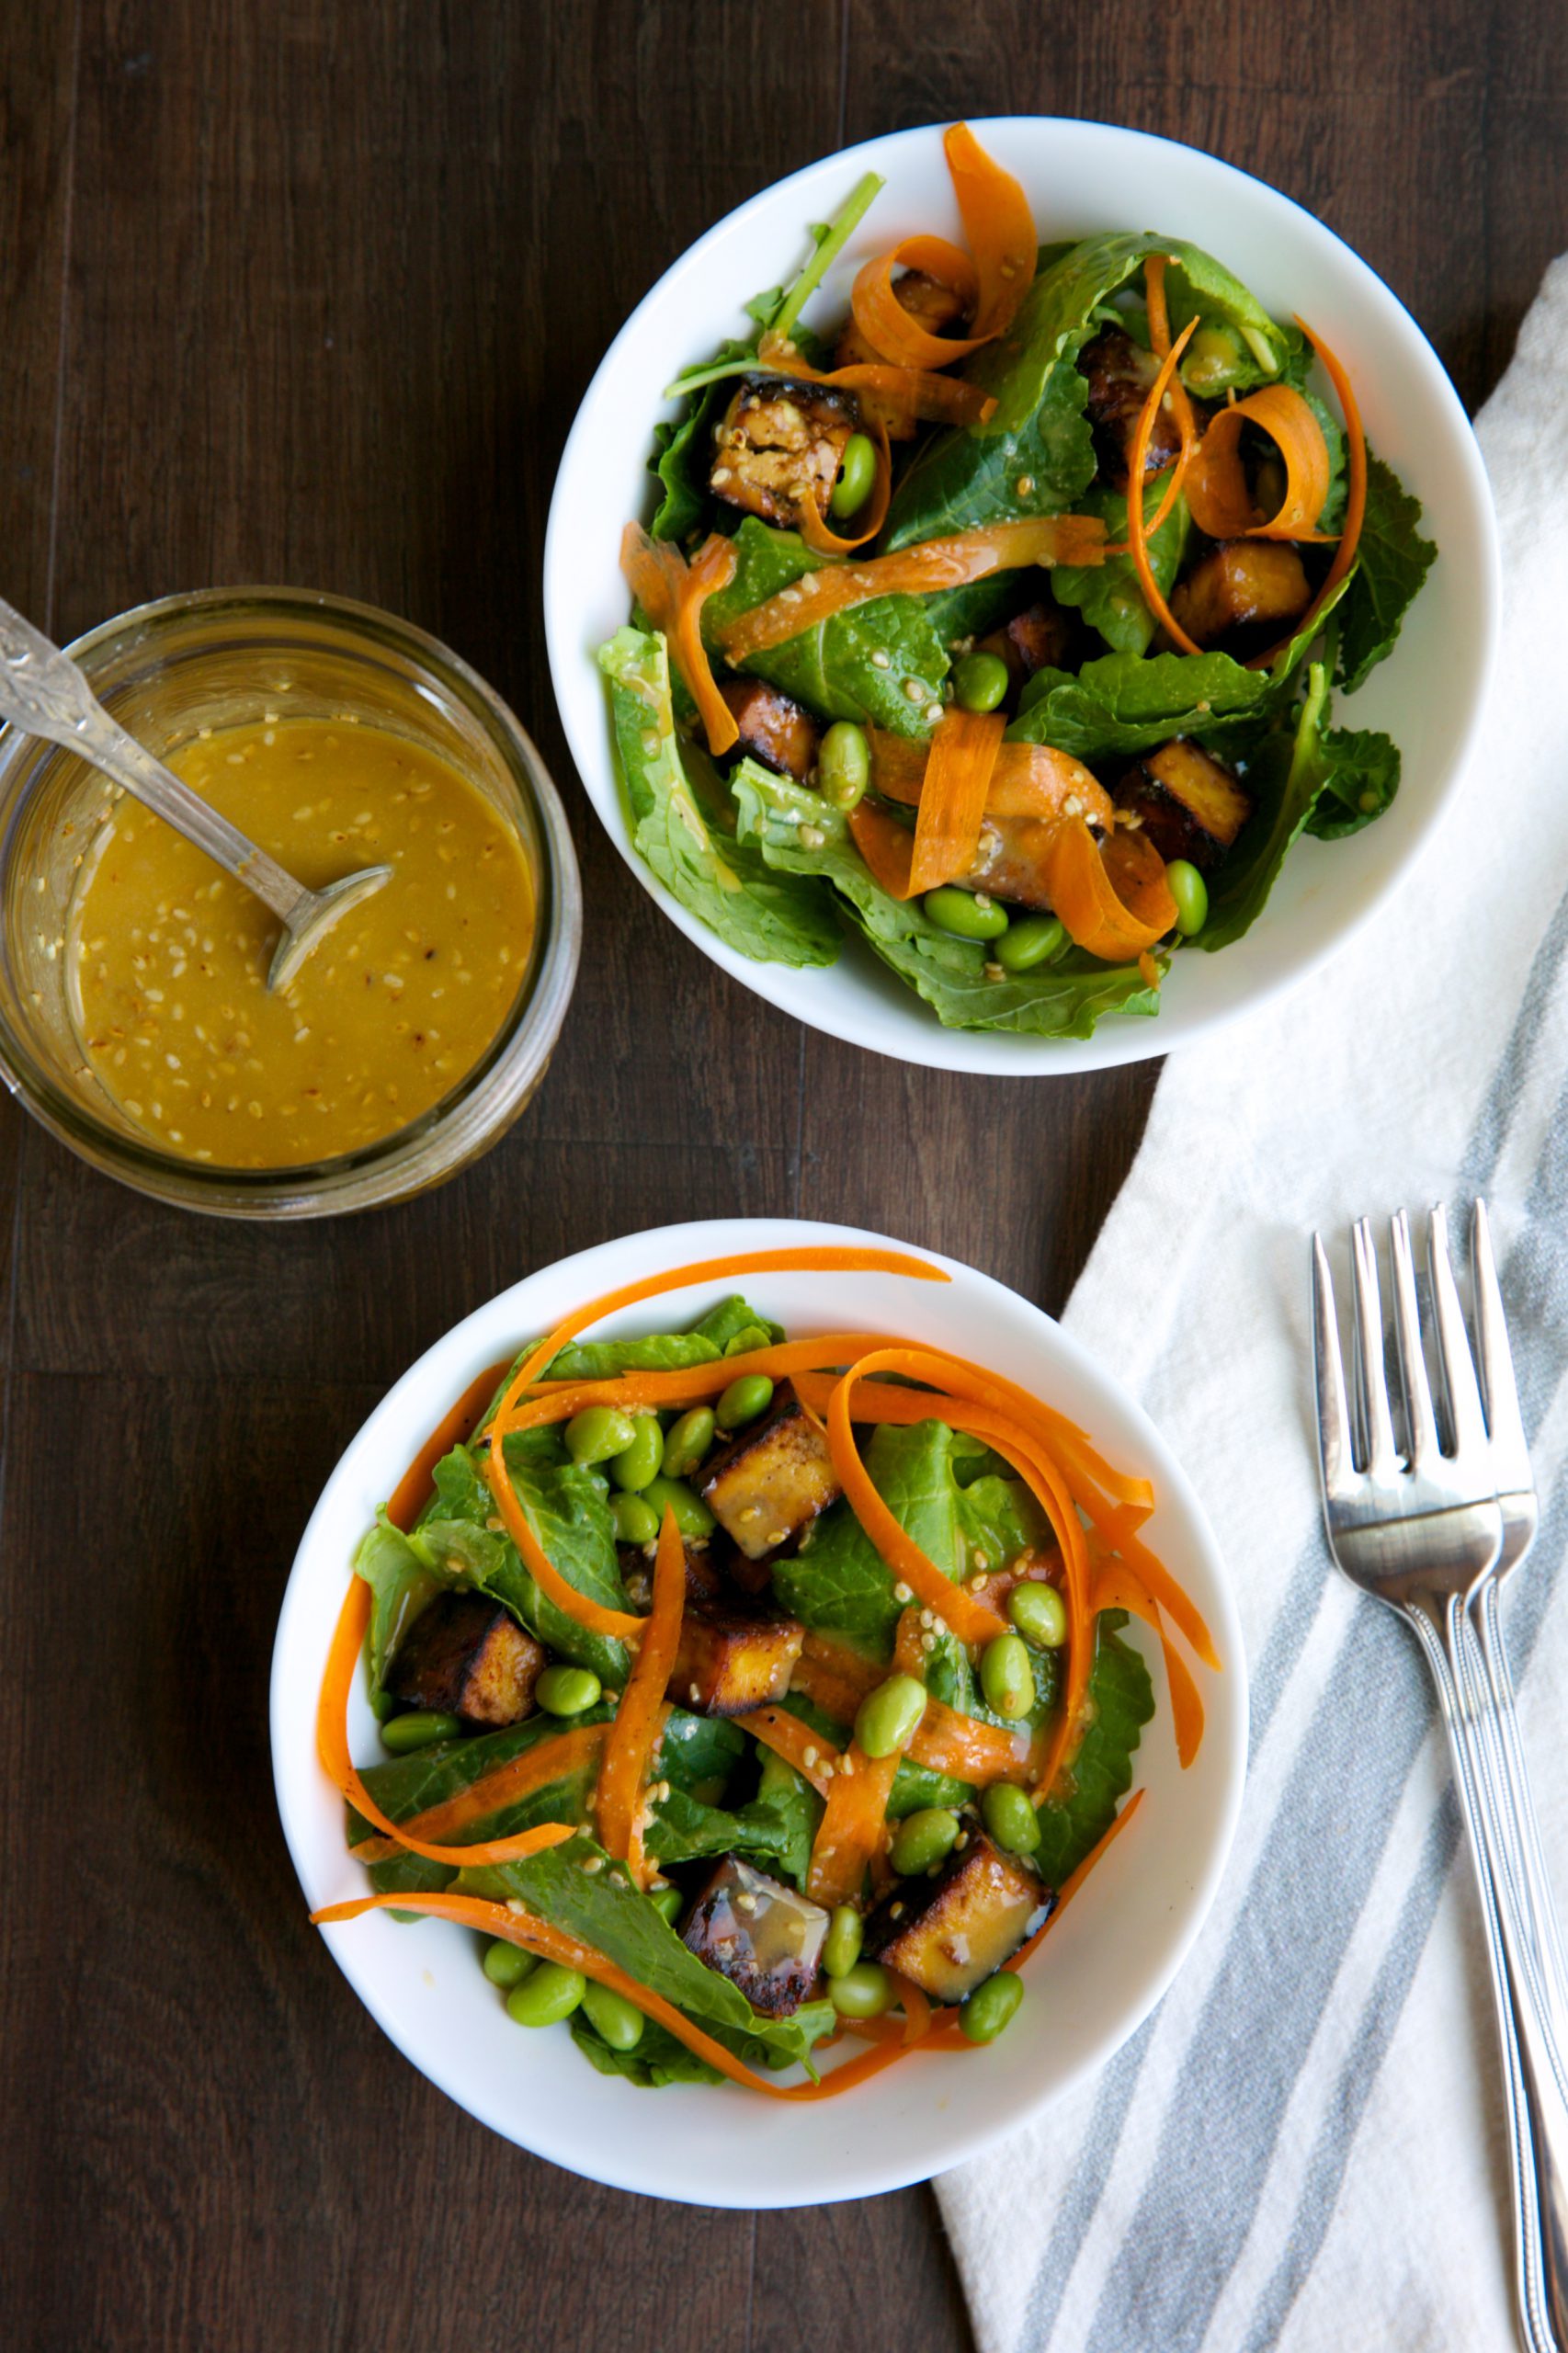
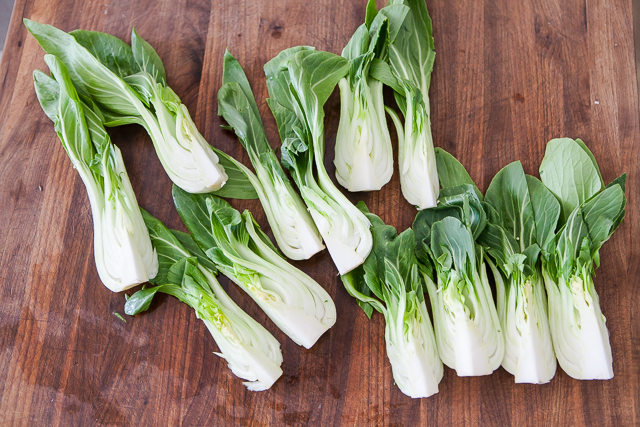
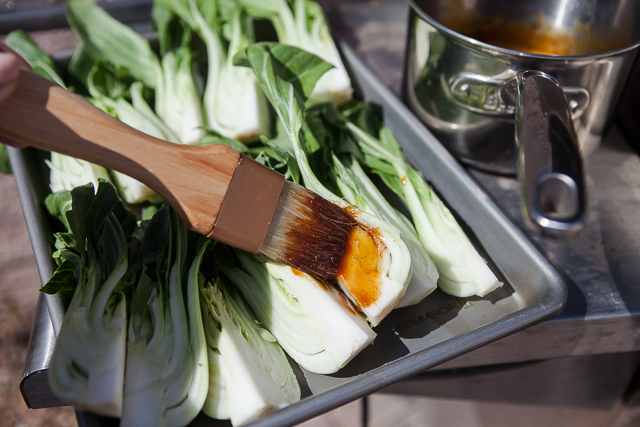
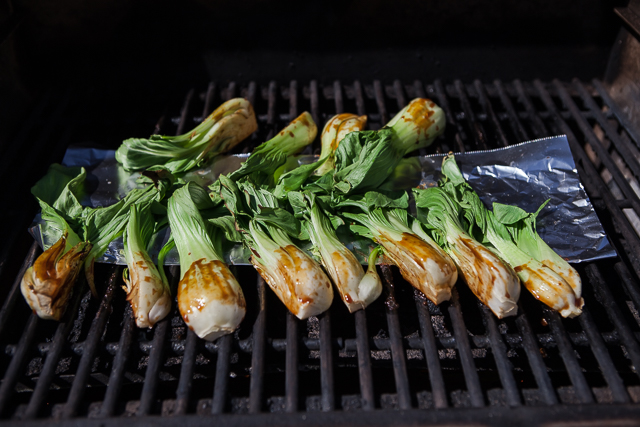
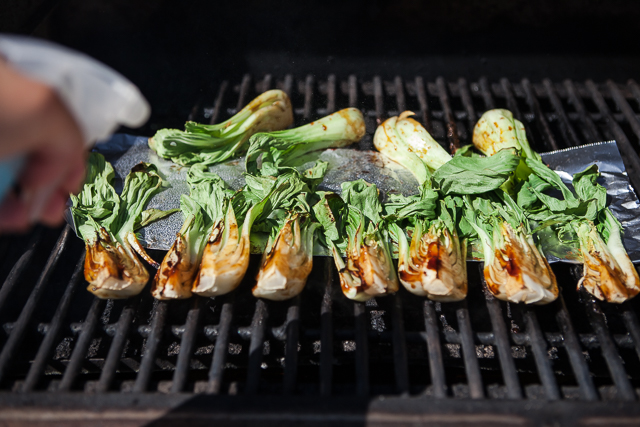
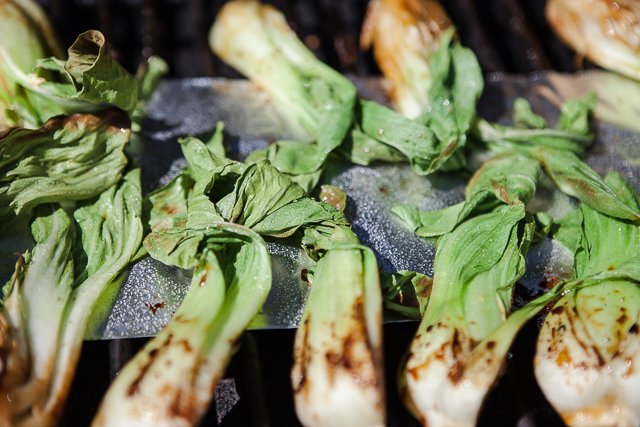
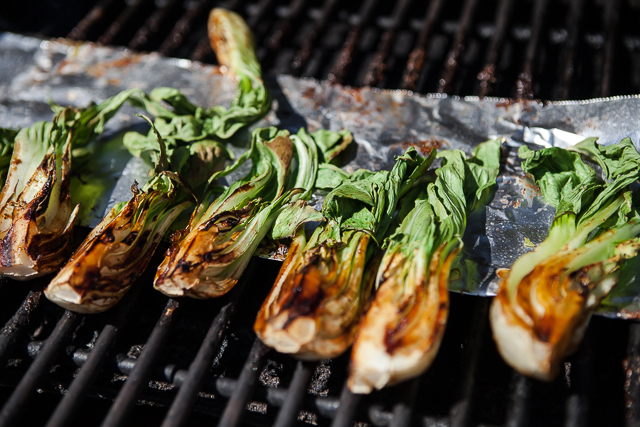
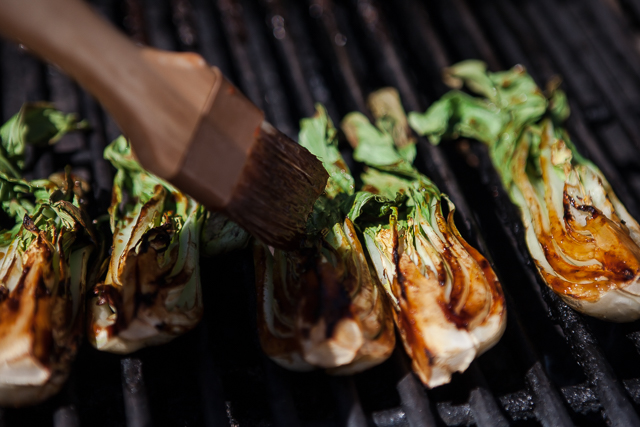
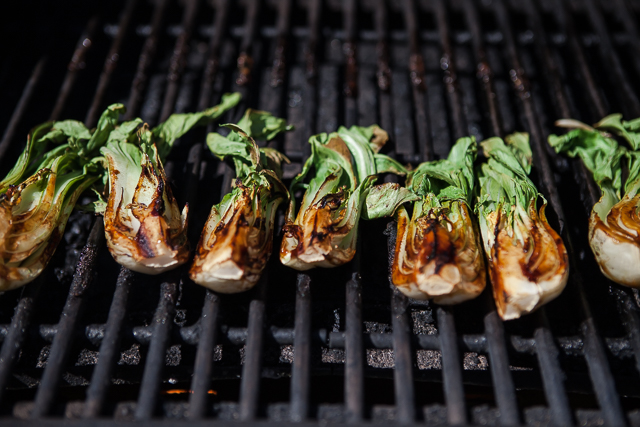
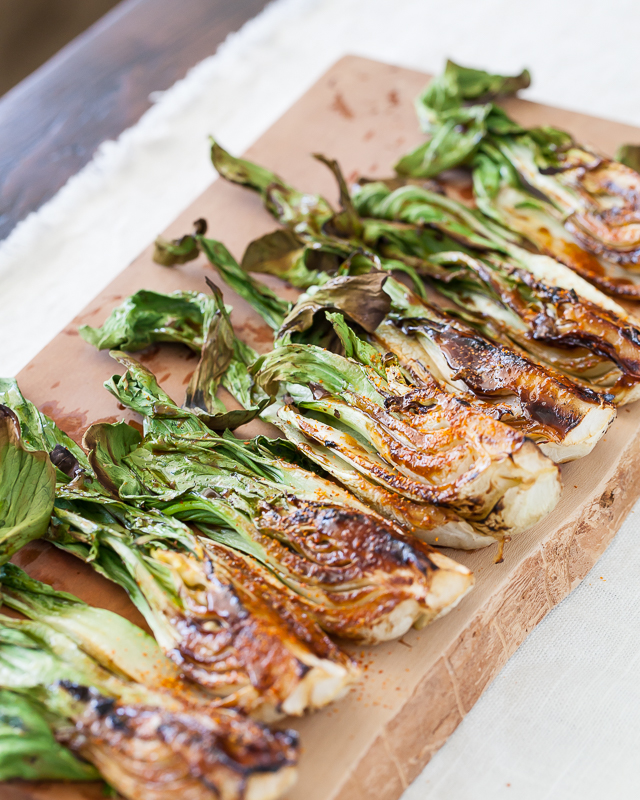
Eating vegetables is an essential part of a healthy diet. Luckily, there are countless ways to prepare vegetables to ensure that each dish is healthy and flavorful.
Combining different herbs, sauces or even cooking methods will make a world of difference in how your vegetables taste. Keep the following tips in mind if you need some inspiration the next time you prepare vegetables.
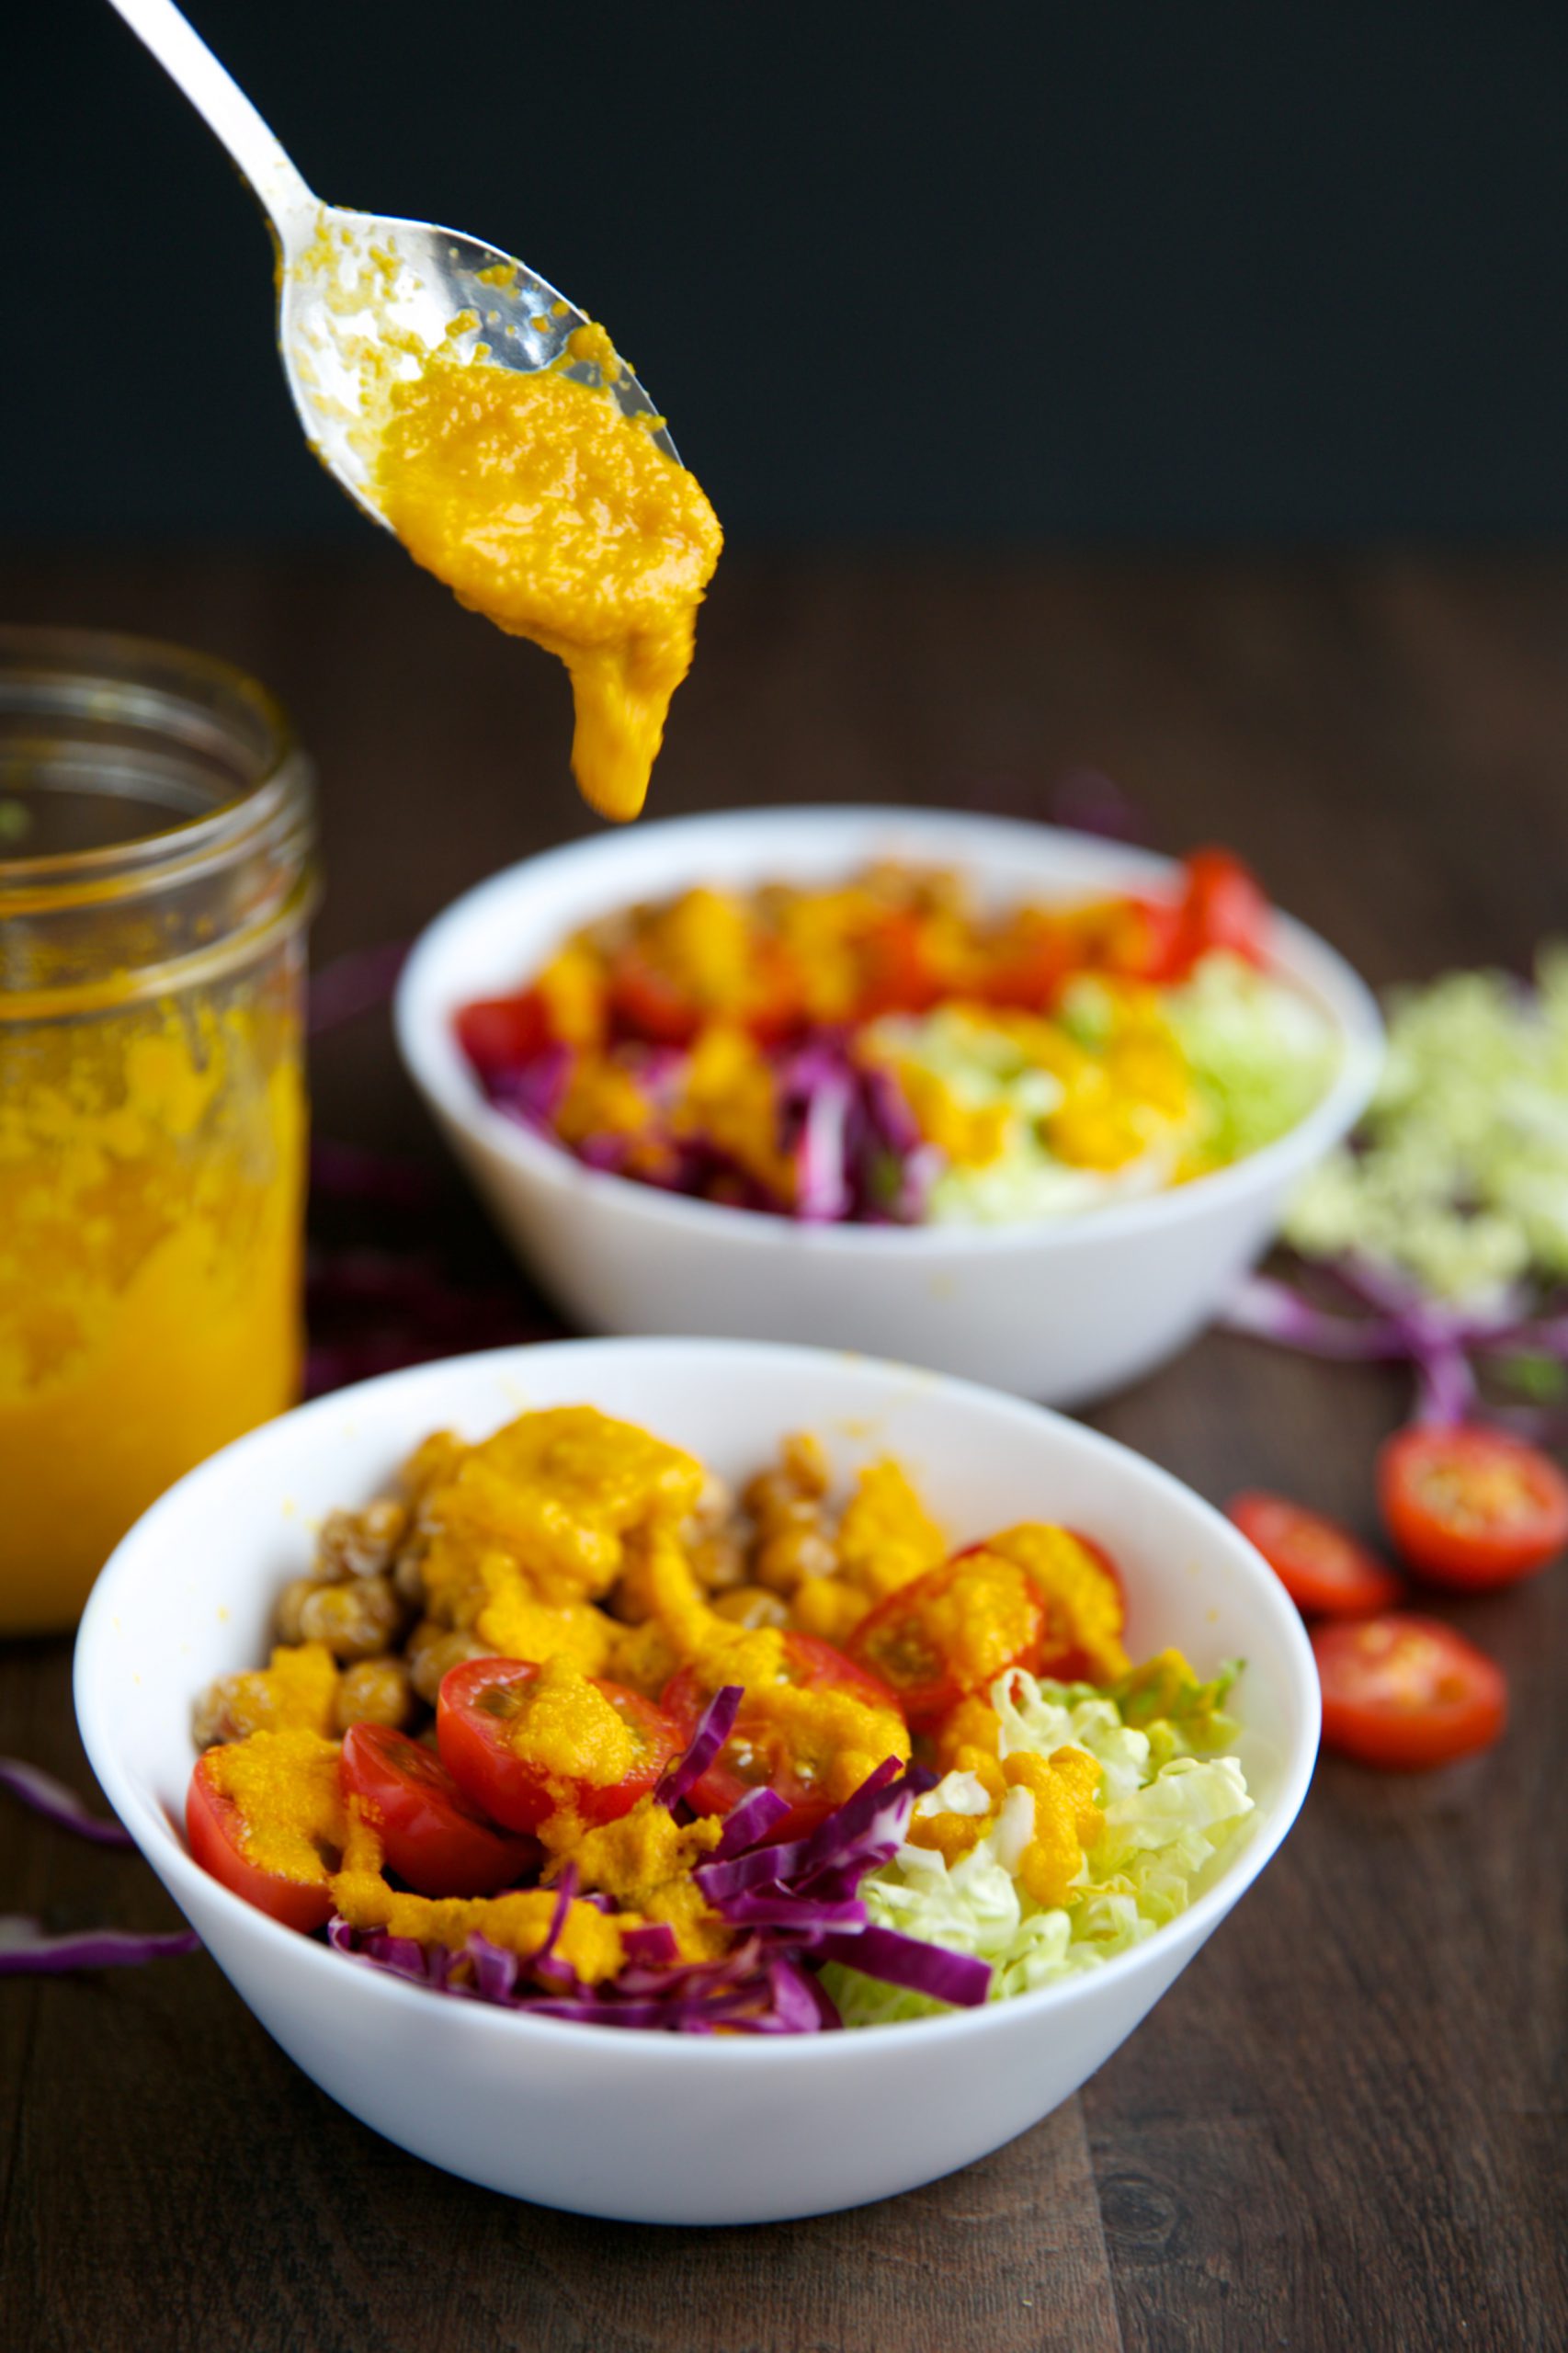
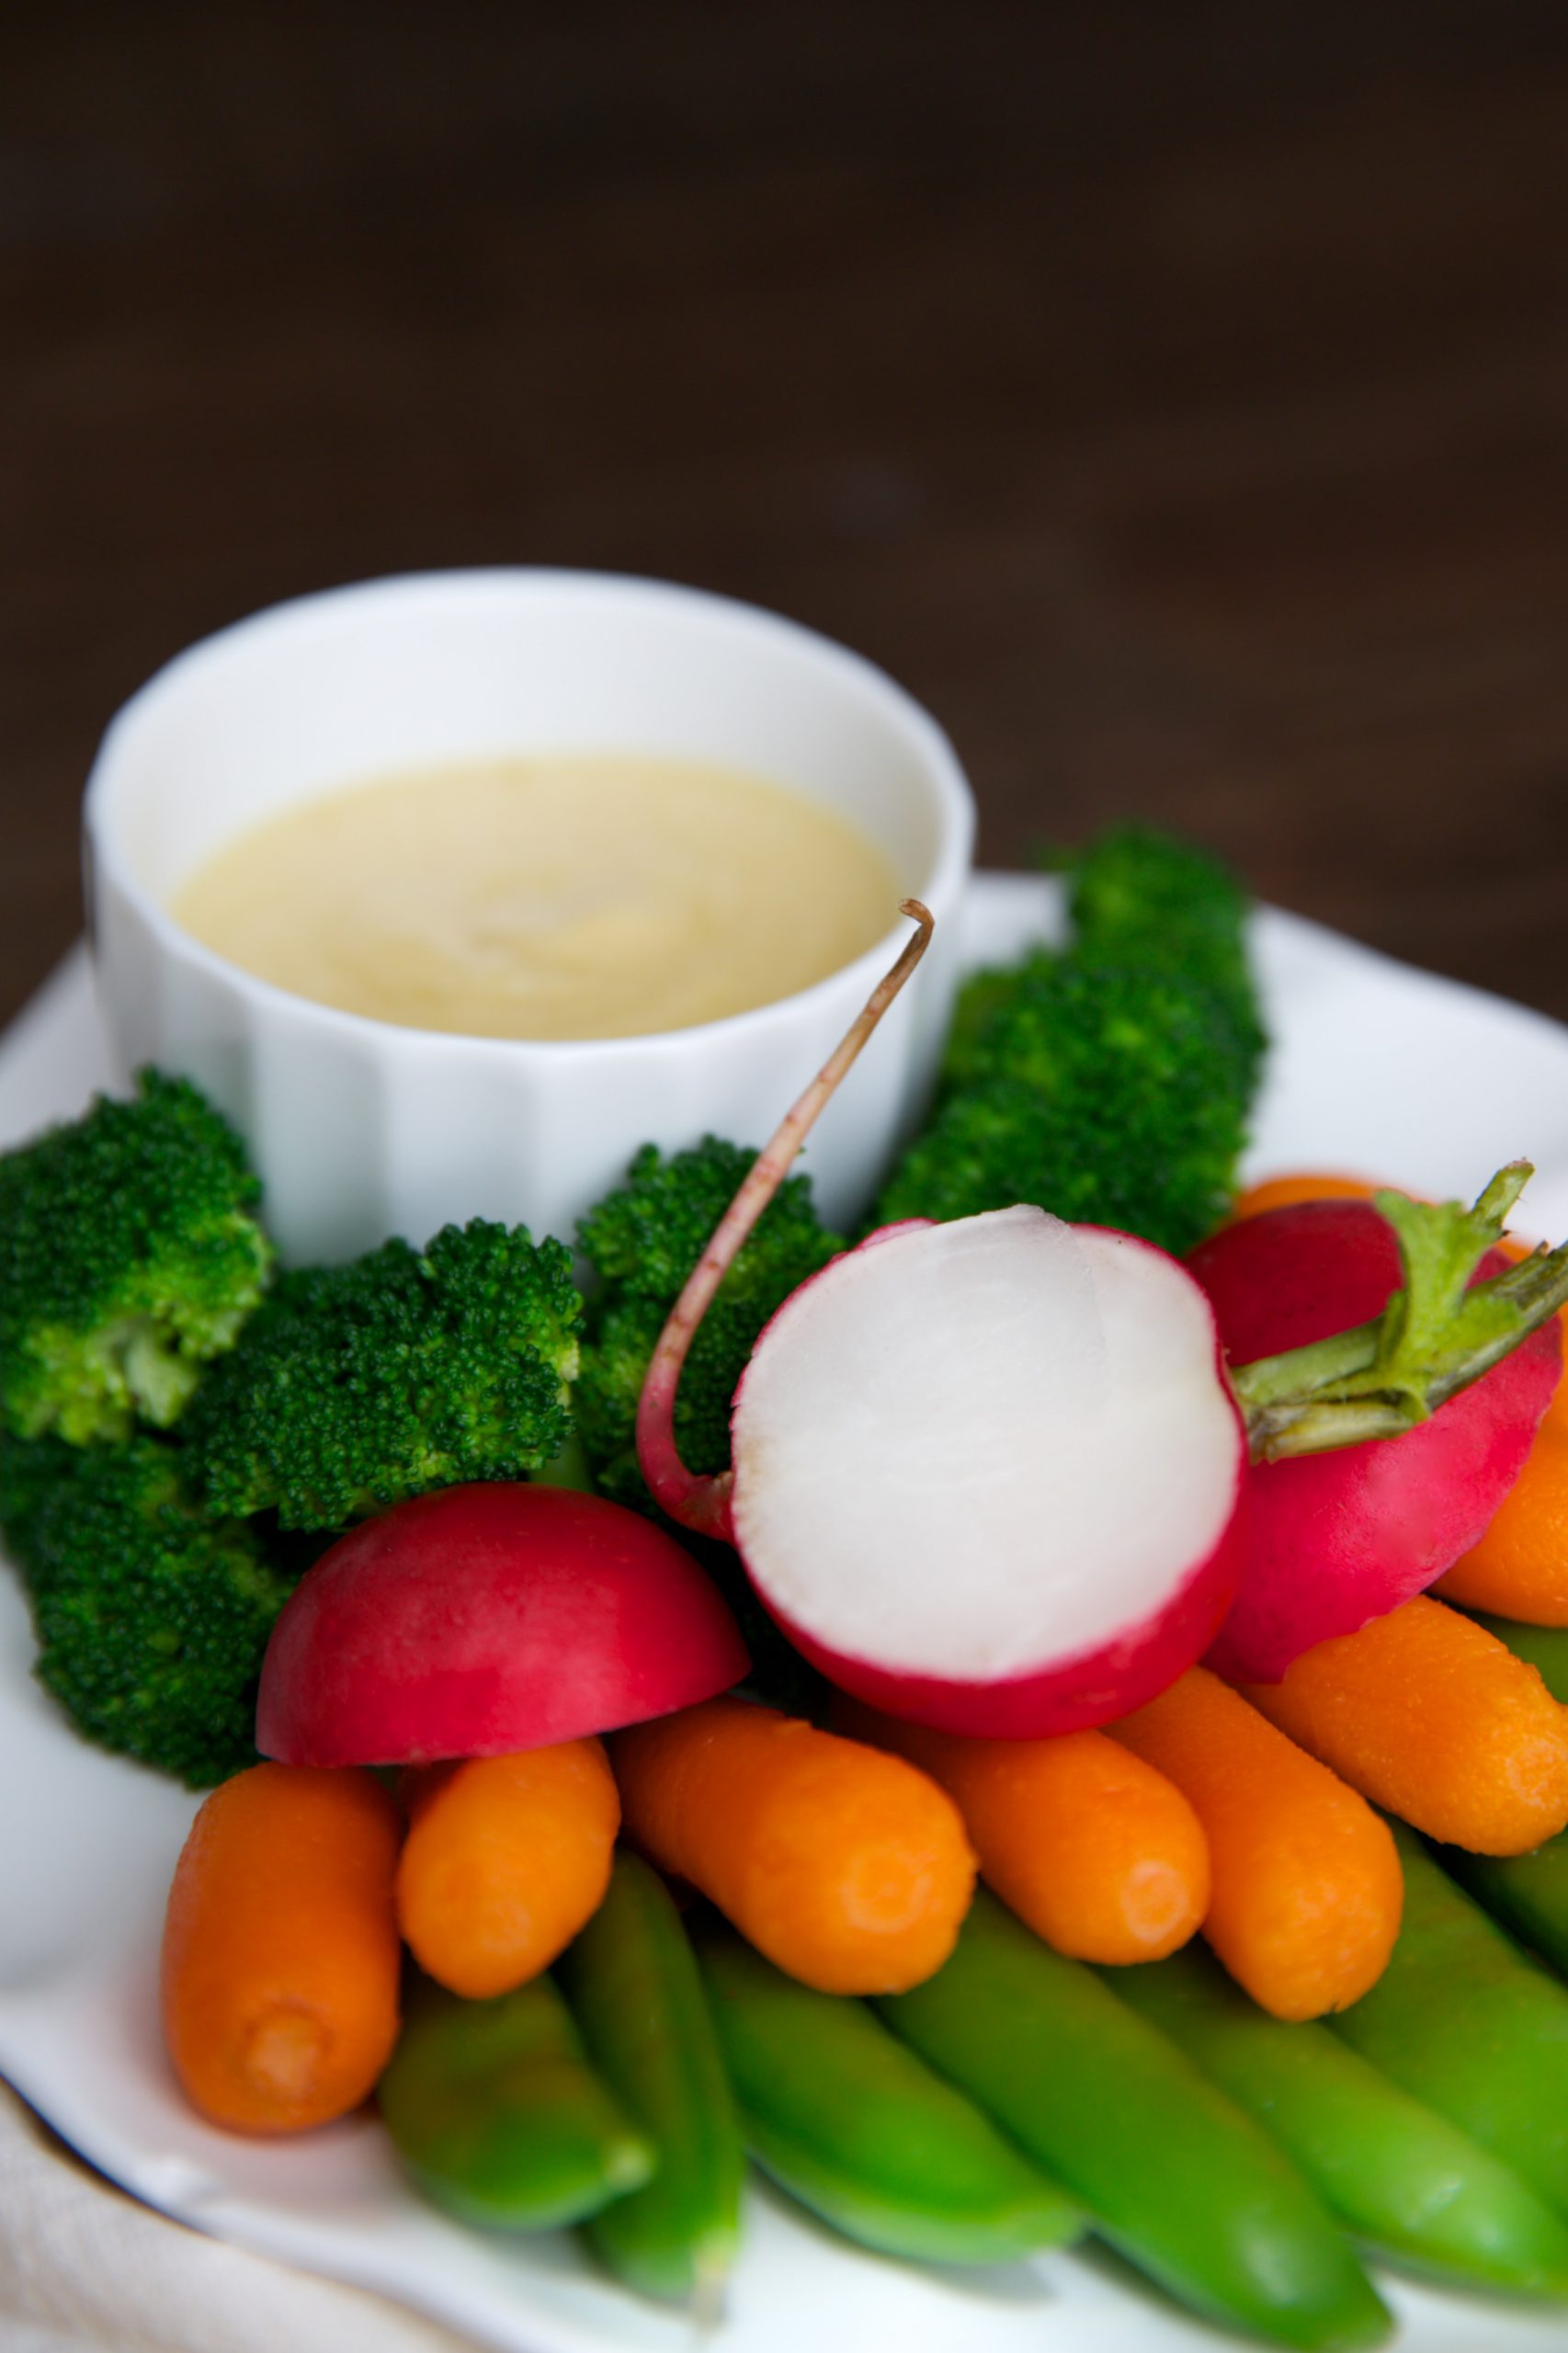
1. Try a Healthy Dip
Complement your raw vegetables with healthy dips such as hummus or miso yogurt dressing. Dips and dressings are a great way to enhance the flavor of your vegetables and add nutrients to your meal. You can also enjoy dressing on salads or over grilled vegetables.
2. Stuff Your Vegetables
Turn a vegetable from a side to the main dish by stuffing it with your favorite meat or plant-based protein and cheese. Many people stuff bell peppers, but other vegetables, such as eggplants, mushrooms, zucchini, summer squash, potatoes and artichokes, also work well. Be sure to sprinkle your favorite spices or add a splash of sauce on top for extra flavor.
3. Try New Cooking Methods
Steaming and boiling are common cooking methods for vegetables, but these techniques can leave them tasteless or mushy. Switching up your cooking method can unlock new flavors and possibilities for your vegetables. Some options include:
Air frying.
Grilling.
Oven roasting.
Sauteing.
Slow cooking.
Pressure-cooking.
4. Use Citrus
Adding a squeeze of lemon, lime or orange is an excellent way to bring out the flavor of your vegetables. The citrus will balance out any remaining bitterness, especially in vegetables like Brussels sprouts. Add a dash of citrus to steamed spinach or broccoli for a flavorful surprise or squeeze it over a vegetable of your choice before cooking.
5. Add Spices and Seasonings
Fresh herbs and spices will add flavor to any food. Think about your favorite meals and the spices featured in these dishes. You can use these same seasonings for mixed vegetables.
Some spices you can use to season vegetables include:
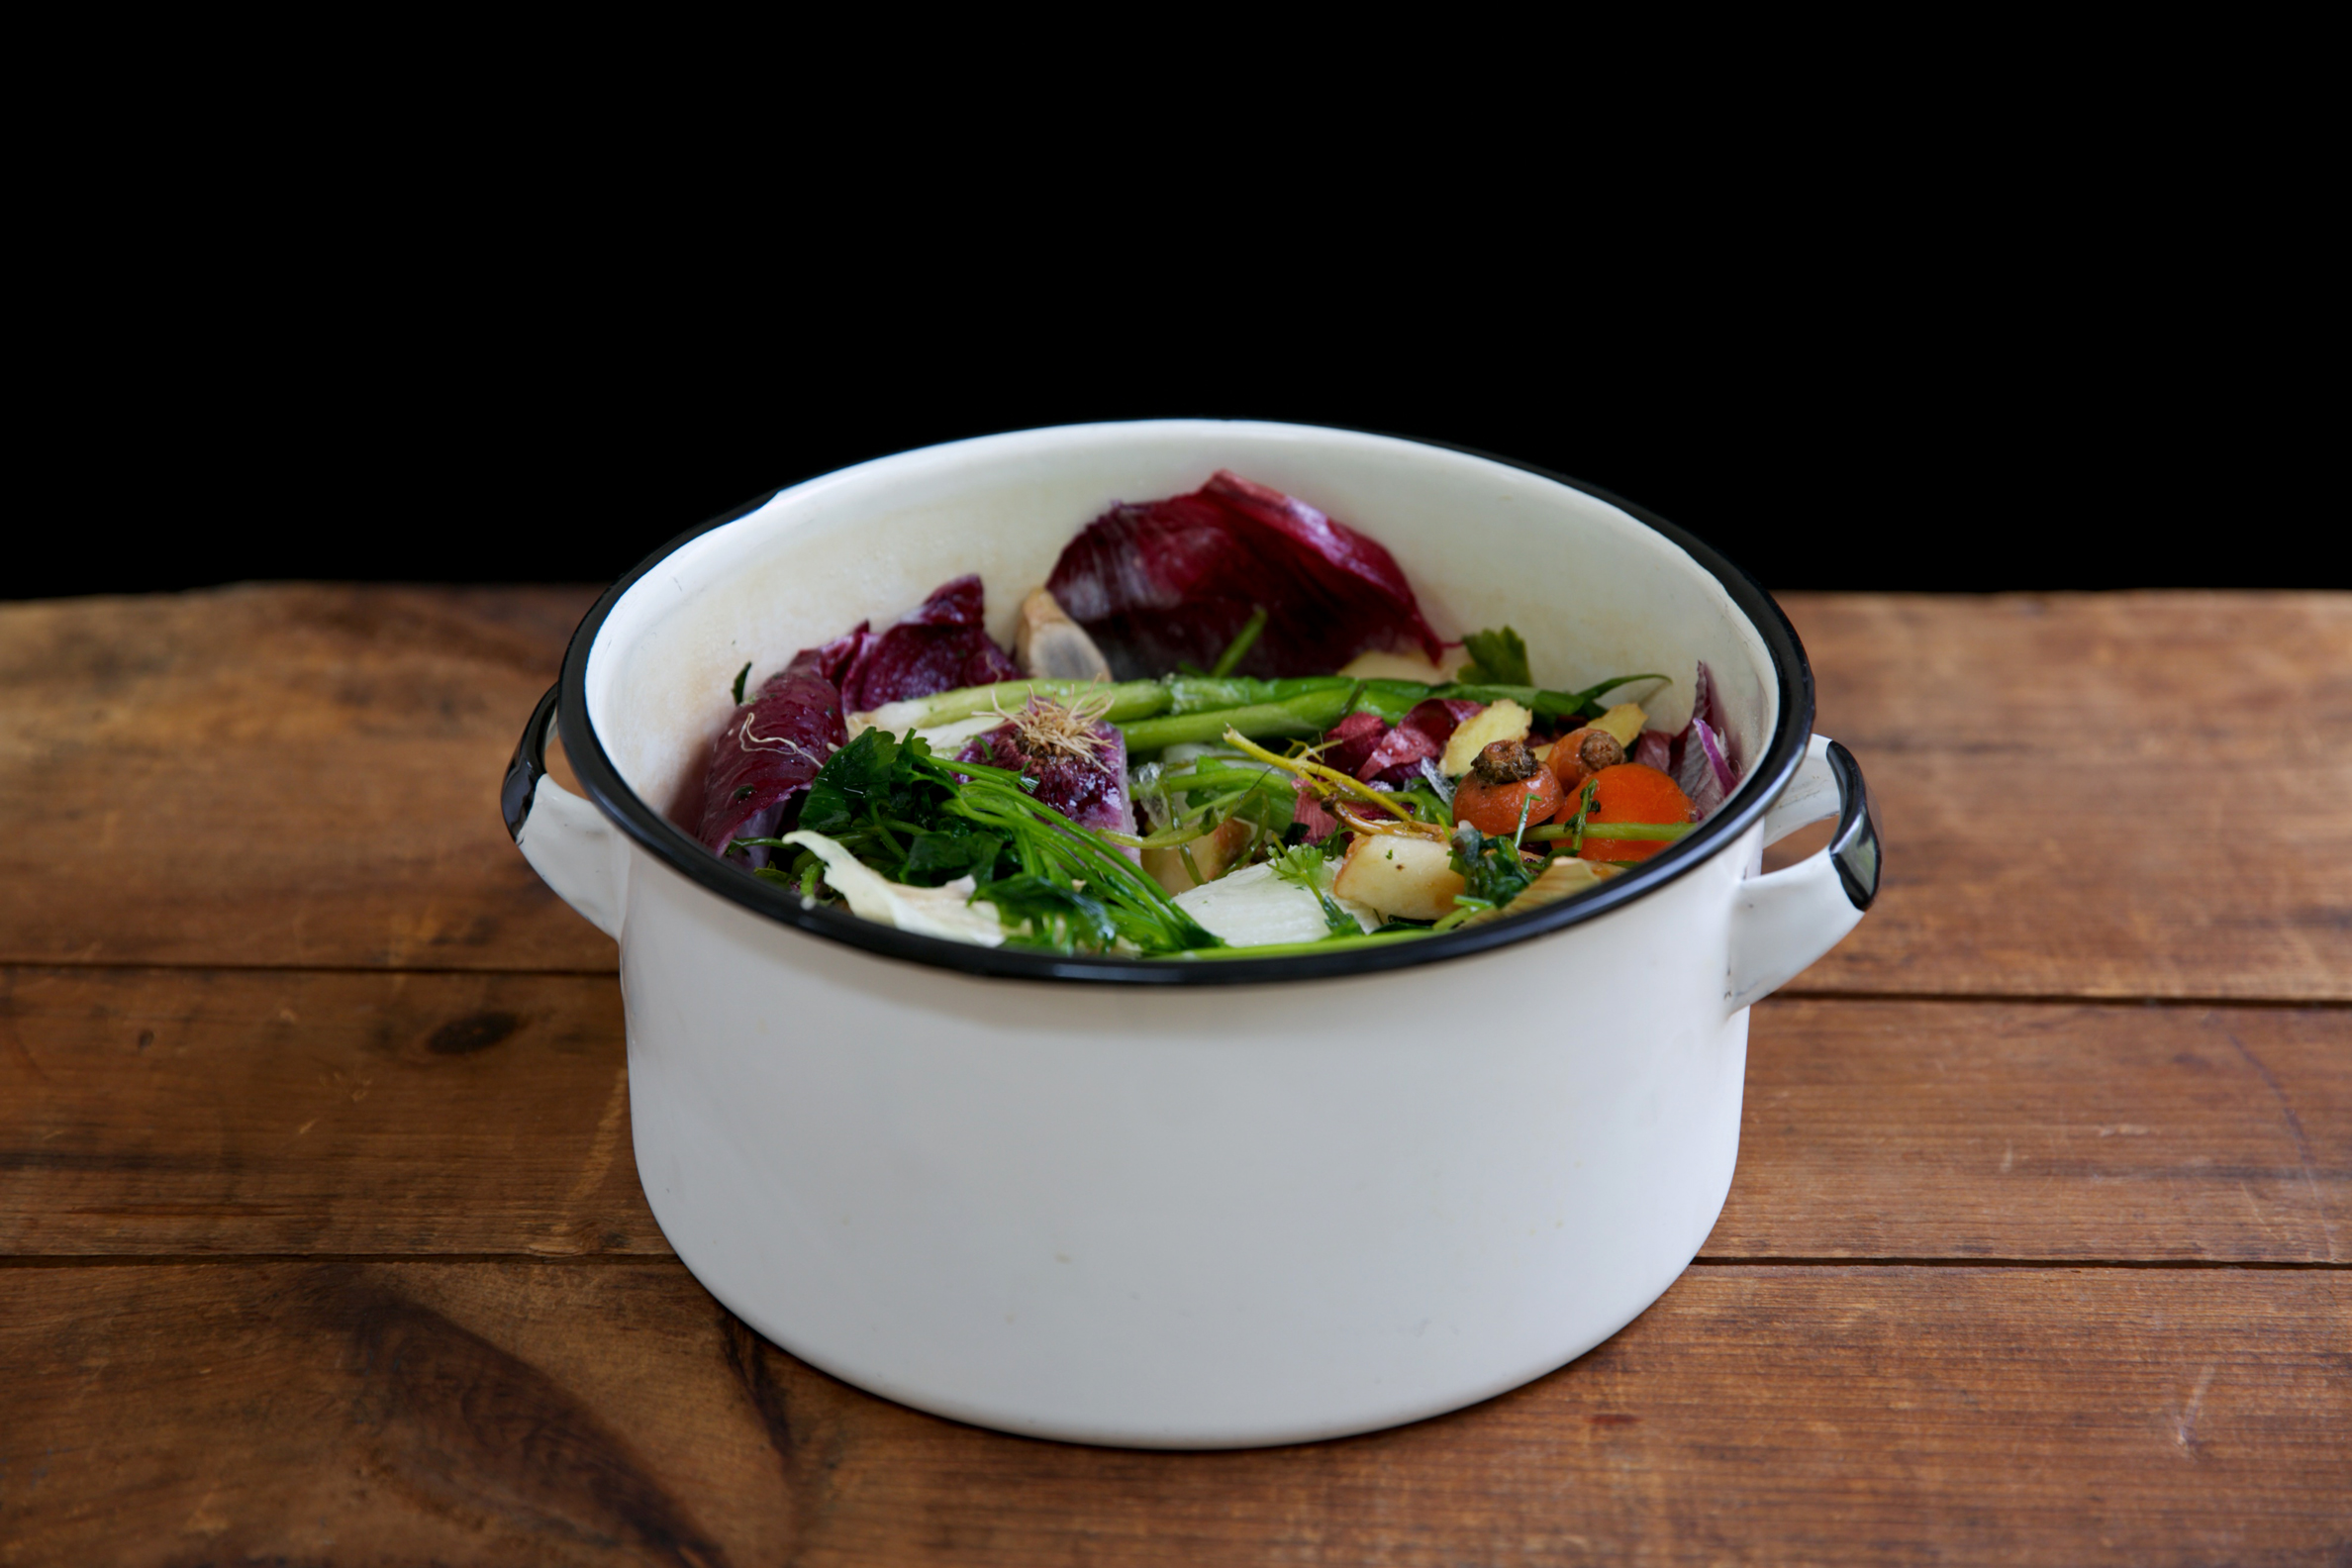
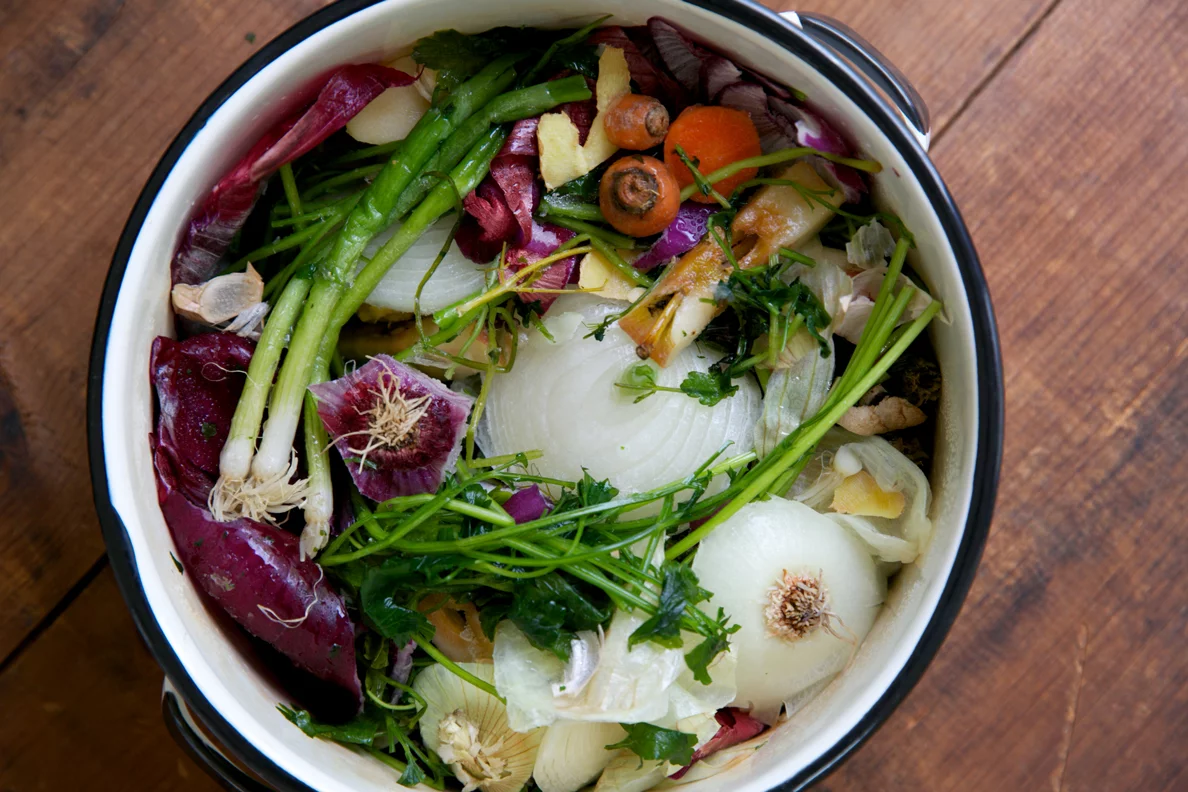
Washing vegetables properly is an important skill to master for everyone, whether you’re in culinary school or an at-home cook. While learning how to clean vegetables doesn’t take much time, it can make a big difference for your meals.
Properly cleaning and sanitizing fruits and vegetables can reduce your risk of food-borne illnesses such as E. Coli and norovirus. Produce grows in the ground and may pass through many hands before ending up in your kitchen. While cooking can eliminate some bacteria, other germs can persist.
A good clean will reduce your risk of encountering bacteria and germs and help you stay safe. Properly cleaning vegetables and fruits also can remove preservatives or pesticides, insects and debris such as pebbles that you don’t want on your plate.
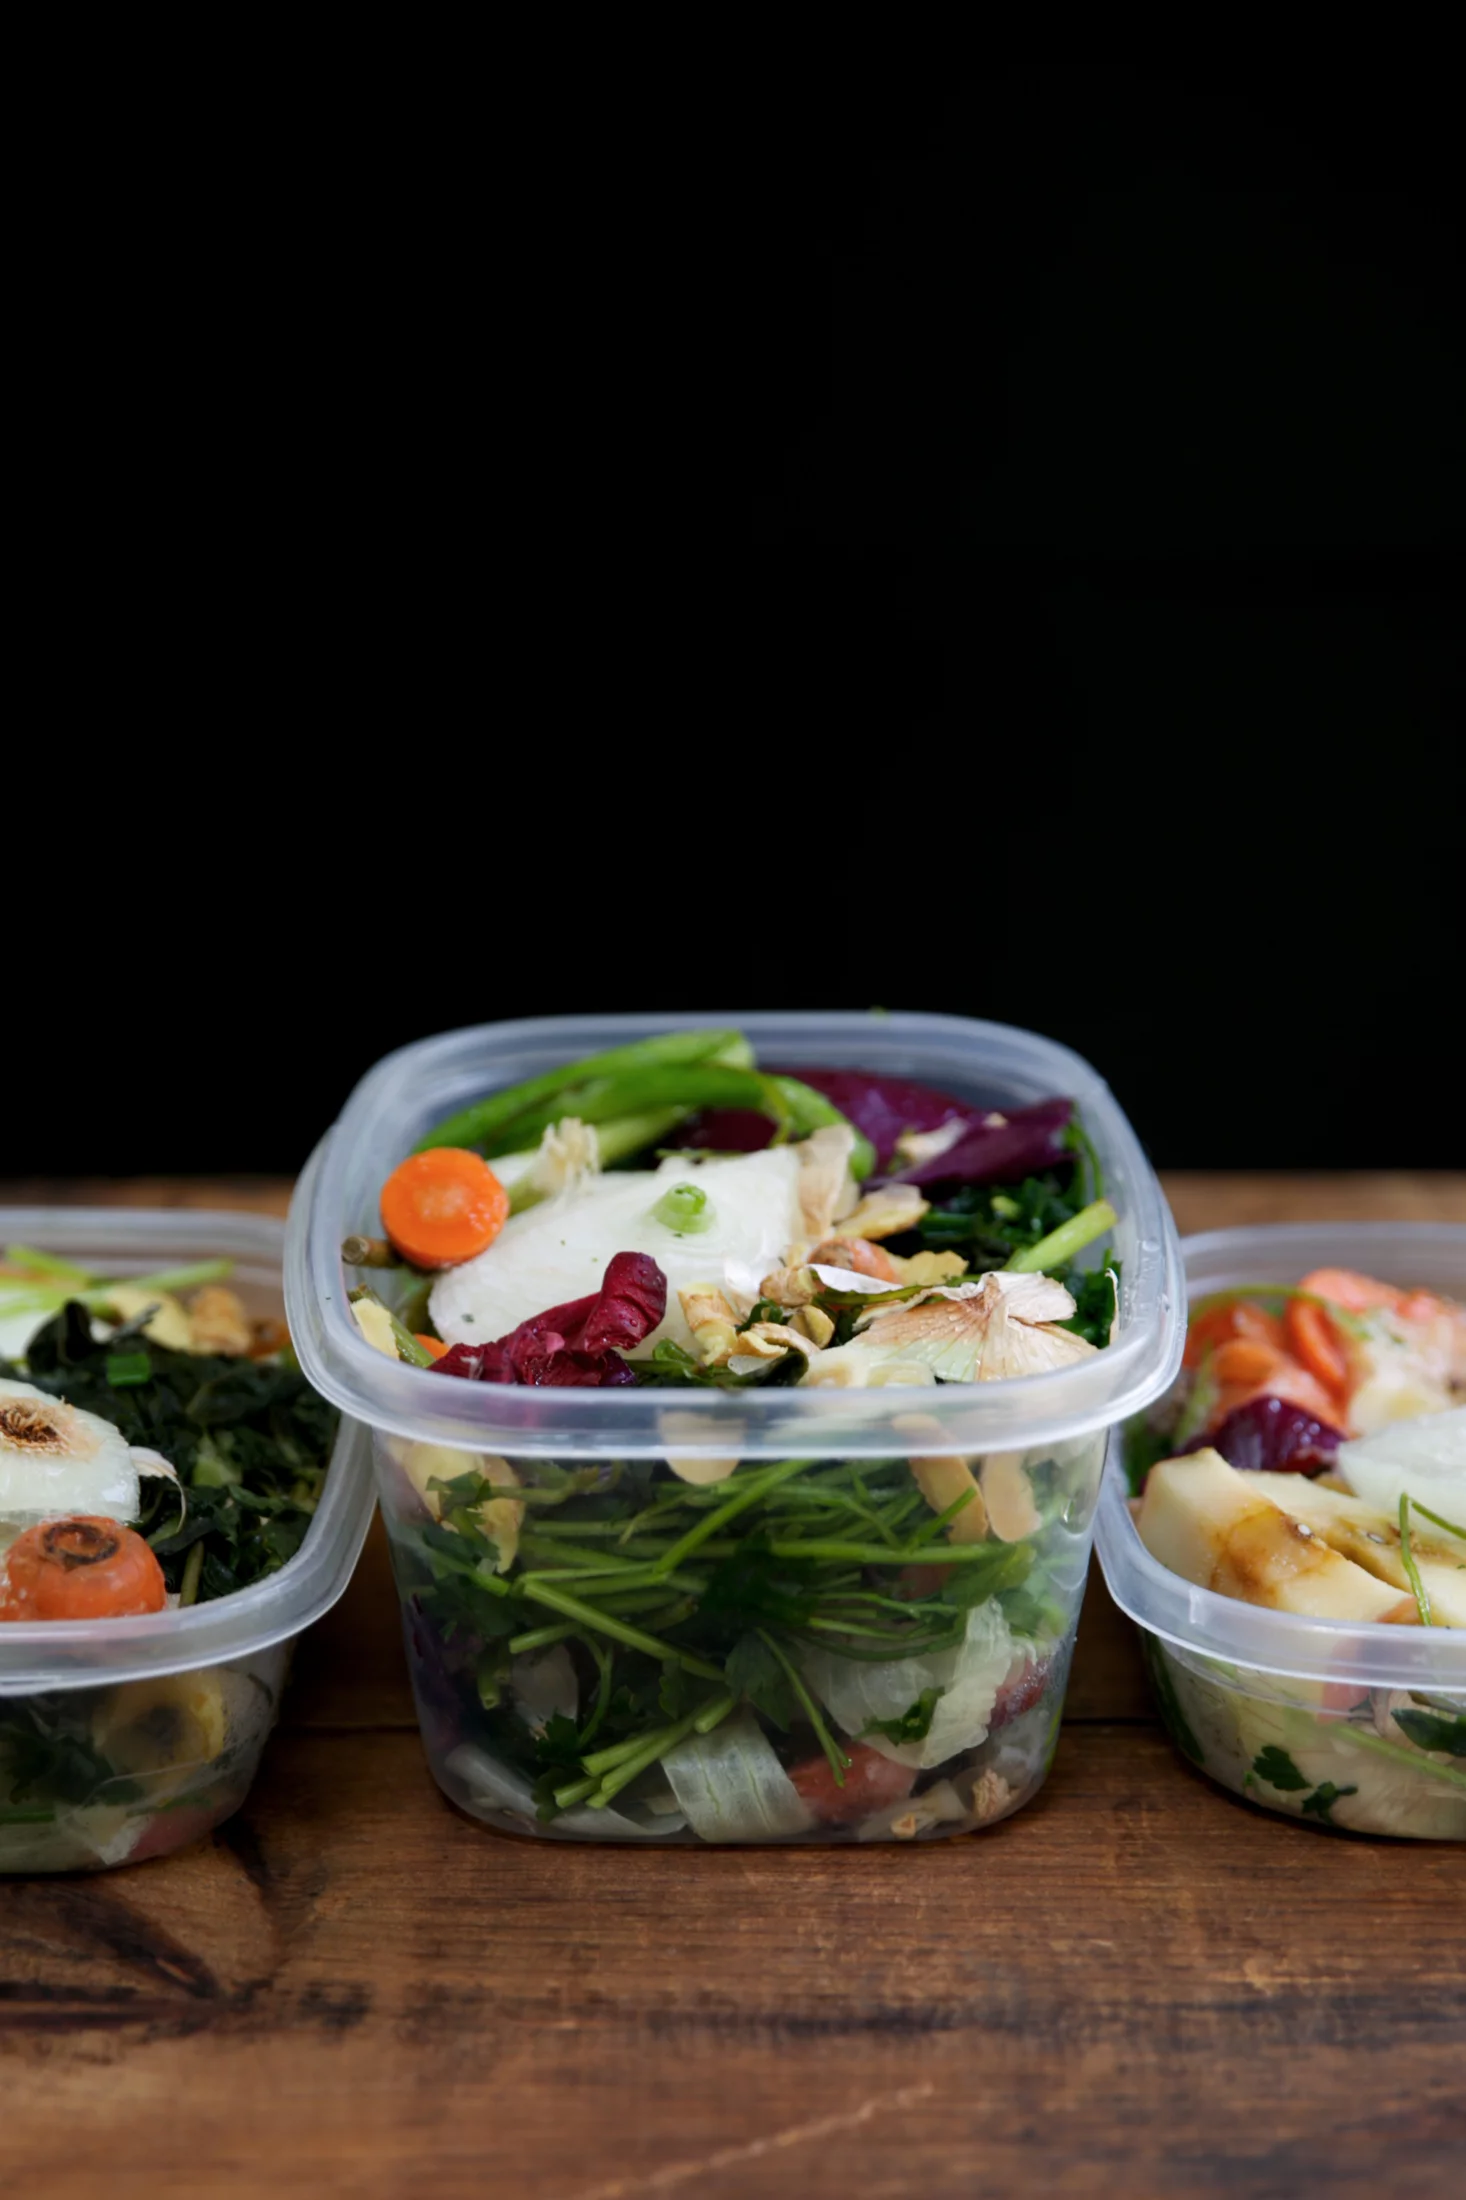
How to Clean Your Vegetables
Cleaning your fruits and vegetables is a simple process. Follow these steps for clean food:
Wash your hands: Before and after handling raw produce of any kind, thoroughly wash your hands with soap and warm water. This method ensures you’re not transferring bacteria from your hands to your food.
Check for damage as you wash: Bruises and cracks on produce can harbor germs. Wash the outside of the fruit or vegetable and then cut away the damaged portion.
Wash before you cut or peel: Washing first prevents contaminants on your knife or hands from getting into the fruit.
Use the right force: Run delicate fruits or vegetables under rapid-running, cool water and use your hands and fingers to gently scrub the produce for about 20 seconds. If you have vegetables and fruits with tougher skins, use a vegetable brush to thoroughly scrub the outside of the produce. Cabbage, cauliflower and similar vegetables have outer leaves which you can discard to further reduce any risk. You can use plain water to wash all fruits and vegetables.
Dry your produce: Drying your produce with a paper towel is another chance to scrub fruits and vegetables and ensure a clean product.
Learn More About Our Products Today
Now that you have all these beautifully washed and healthy vegetables and fruits, what are you going to do with them? SAN-J has delicious recipes for you to try. Our family company has a range of soups, cooking sauces and other quality products to help you transform your produce into amazing meals. Browse our products today or check out our recipe collection.
Barbeques are a classic summer party, with burgers and hot dogs at the center of your menu. If you’re excited to see your loved ones and show them something new, these unique burger recipes will be a delicious conversation starter.
When you use these innovative ideas to spice up your barbeque, you can expect restaurant-quality burgers. You and your guests can enjoy the taste of specialty burgers that will keep them coming back for more.
How do you make burgers more interesting? Consider how you use spices when you’re cooking on the grill. The way you season a burger changes its taste and creates a unique flavor profile for your meal.
At SAN-J, we specialize in brewing Asian cooking sauces that are great bases for the rest of your food’s flavors and seasonings. Here are three innovative burger ideas you can make with our delicious sauces:
Teriyaki black bean burgers: For the vegetarians in your crowd, Teriyaki black bean burgers are a stand-out take on a typical recipe. To complement the spicy-sweet taste of Teriyaki sauce, you can add glazed pineapple rings and sriracha mayo to this burger.
Tamari umami burgers: Our Tamari umami burgers take the savor of soy sauce and the juiciness of ground beef to the next level. You’ll love the way these flavors work together and pair well with tomatoes and onions. Skip the buns and enjoy these unique burgers on a bed of lettuce for a gluten-free option.
Korean BBQ burgers: This burger combines the sweet taste of pears with the savory flavor of ginger puree, soy sauce and garlic, and that’s just the sauce! You can cook our Korean BBQ burgers with ground beef and top them with quick pickles, sriracha mayo and onions.
Complete with toppings, a toasted bun or lettuce wrap and our Asian cooking sauces, your burgers will go quickly at any summer party. These unique burger recipes will be a barbeque favorite when you and your guests give them a try at your next event.
Spice Up Your BBQ With Burger Ideas From SAN-J
Our cooking sauces will enhance your burgers’ flavor when you use them as a marinade, glaze or topping for your next meal.
Holiday Recipe Roundup: Our Top Asian-Inspired Dinner Ideas
Written by: San-JPosted on: December 18, 2022
Holidays are the perfect time to create and enjoy tasty dishes. That’s why we’ve gathered some of our favorite Asian-inspired recipes, including appetizers, main courses, side dishes and desserts. These unique and delicious recipes will surely make a statement at the dinner table. Read on for all the tasty details!
Asian-Inspired Holiday Appetizer Ideas
You’ll want to give your guests something tasty to munch on as they eagerly await holiday dinner. That’s where these delicious Asian-inspired appetizers come in handy. Consider making one or more of these hors d’oeuvres for your upcoming gathering:
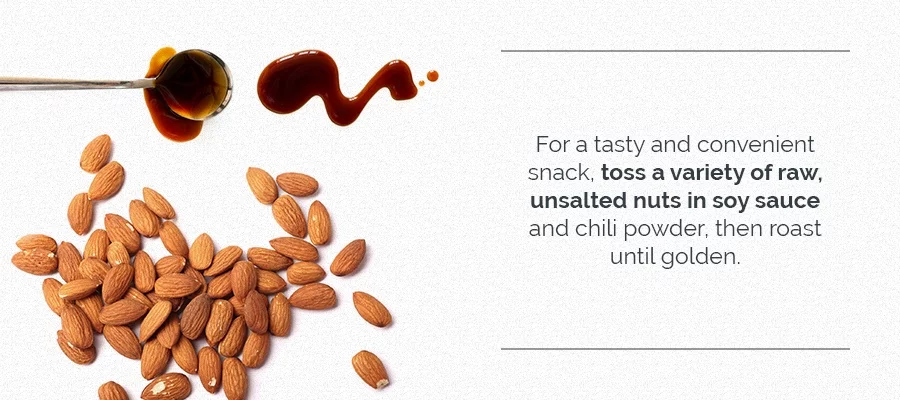
When whipping up these Eastern Tamari-roasted nuts, we like to combine walnut halves, pecan halves and whole cashews. Get creative and customize with more or less variety.
Start by blanching the nuts and adding sugar and oil. Roast them, turning them every 10 minutes until browned and crispy. Transfer to a bowl and toss with a whole slew of seasonings, including SAN-J Tamari Soy Sauce. Spread them into a single layer to cool, then store them in an airtight container — preferably a large jar with a ribbon tied around the rim to share with your favorite foodie friend. Alternatively, try out roasted tamari almonds recipe for an appetizer.
Combine honey, ginger, chili garlic sauce and SAN-J Tamari Lite in a small saucepan. Boil the mixture for about two minutes or until thick, then let it cool. Pour your dipping sauce into a serving bowl alongside a platter of cooked shrimp, and you’ve got a tasty appetizer for your seafood-loving guests.
Asian-Inspired Holiday Dinner Ideas
Deciding what to serve your guests during the holidays can be a challenge, but we’re here to help. If you’re looking for nontraditional Christmas Eve dinner ideas, here are some delicious Asian-inspired holiday dinner recipes to try out:
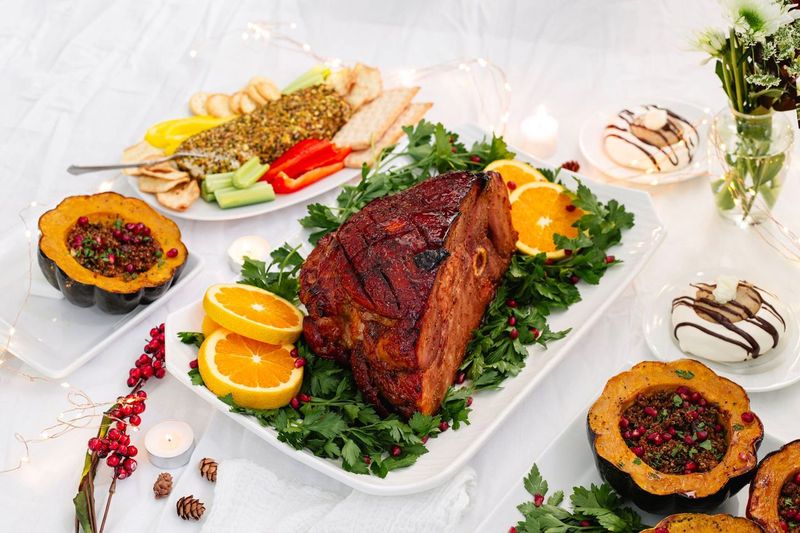
Polynesian Glazed Ham
You’re just two ingredients away from the star of your holiday table — this Polynesian glazed ham. All you need is about half of a bottle of SAN-J Sweet & Tangy Sauce and half of a ham. Put them together and this gluten-free holiday recipe will make you whole! Or at the very least, it’ll make everyone wonder what your secret is.
The flavor of the sauce perfectly complements the ham while ensuring a nice glaze to prevent the meat from drying out. There is a bit of effort involved in the timing to add more sauce throughout the cooking time, but it’s so worth it. If you would rather serve up turkey, we have the perfect brine to bring out delicious flavors.
Turkey-Stuffed Pork Loin
Everyone knows turkey is a classic Thanksgiving and Christmas dinner, but this turkey-stuffed pork loin takes it to a delicious new level. This recipe features a mixture of cream cheese, nutmeg, spinach and turkey sausage, all stuffed into a boneless pork loin seasoned with salt and pepper.
Brush the pork with a mixture of SAN-J Tamari Soy Sauce and maple syrup, then bake until the meat reaches 145 degrees Fahrenheit. Bringing this feast out to the table will surely impress your family and friends — and chances are it won’t last long.
Asian-Inspired Holiday Side Dish Ideas
While having a superb main course is essential, you’ll also need a delicious side dish to accompany your Asian-inspired holiday food spread. Here are two excellent recipes to consider:
Pecan Orange Sweet Potatoes
If you like the traditional sweet potato casserole — the one with the marshmallows — try this one, which trades the marshmallows for a sweet pecan topping. These pecan orange sweet potatoes will be a perfect conversation topic for the dinner table with your guests.
Blend cooked sweet potatoes with SAN-J Orange Sauce, brown sugar, vanilla extract and eggs. Then, mix pecans with orange sauce and brown sugar to create a simple topping. It all gets baked to sweet perfection.
If you want to simplify the recipe, skip the steps of peeling and cooking the sweet potatoes by swapping them with a can of sweet potato puree.
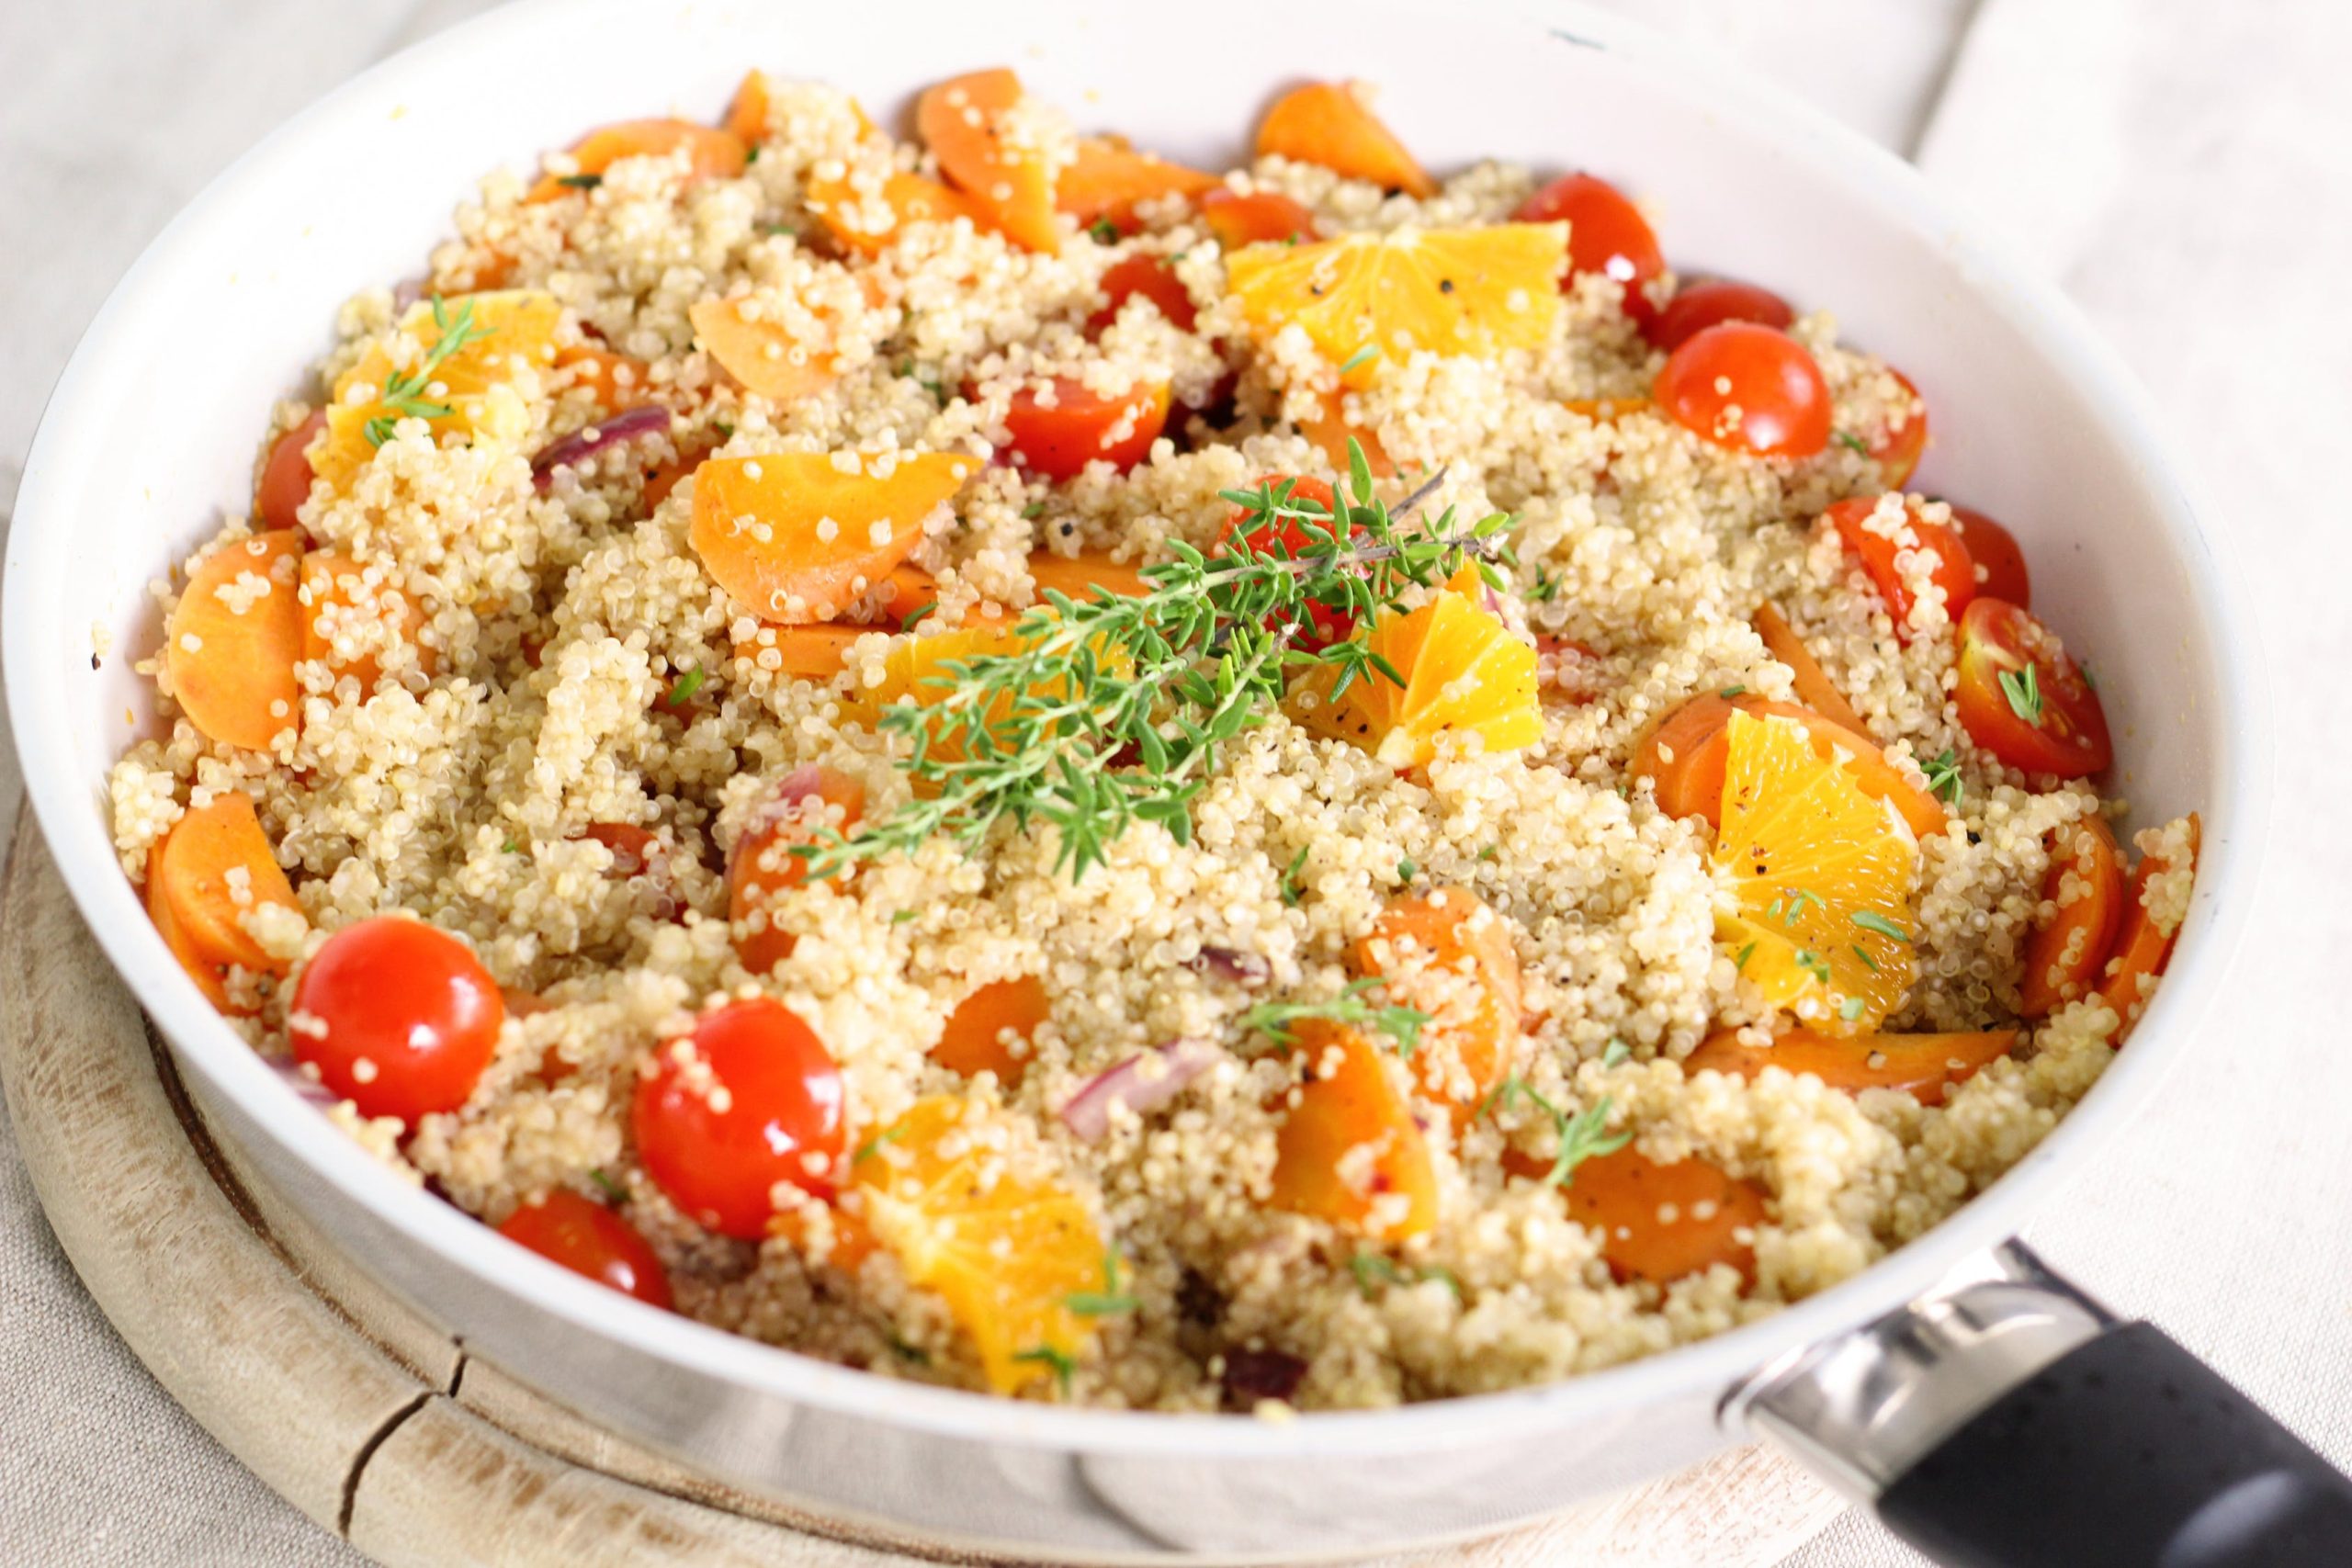
Orange Cranberry Quinoa Salad
Lighten up the meal with this side dish that you can serve warm, cold or at room temperature. The classic seasonal flavors of orange and cranberry are the main components of this recipe.
To make this orange cranberry quinoa salad, combine cooked quinoa with SAN-J Orange Sauce and a medley of textures and flavors. Pistachios offer the crunch, dried cranberries lend a tart and sweet chewiness, red onion sharpens the flavor, mint leaves freshen it up, and black pepper rounds it out with a bit of spice. This is a perfect dish if you’re looking for easy gluten-free holiday entertaining.
The instructions are as simple as can be — stir to combine.
Asian-Inspired Holiday Dessert Ideas
If you’re serving Chinese food for holiday appetizers, entrees and side dishes, it only makes sense to add an Asian-inspired holiday dessert to the menu, as well. Here are two dishes to sweeten up any holiday gathering:
Thai Peanut Bars
Grab your apron and your sweet tooth! These Thai peanut bars are a nice addition to any cookie swap. They’re easy to customize — try almond butter and almonds instead of peanut butter and peanuts. Alternatively, use cashew butter and cashews. Maybe even a blend of your favorites.
Start by mixing the wet ingredients including SAN-J Thai Peanut Sauce, mixing the dry ingredients, then stirring them all together. Stir in the chopped peanuts and refrigerate the dough.
Then, you’ll form the dough into two rectangles and brush them with egg white before baking. After they’ve baked and cooled, slice and share. Don’t forget a glass of egg nog or some cashew milk.
Chocolate Pecan Pie
One slice of this smooth, rich chocolate pecan pie will instantly have everyone swooning. Top it off with a cool dollop of homemade whipped cream to set the dessert bar even higher.
Start by microwaving chocolate chips and butter until they’re melted. Add a splash of SAN-J Tamari Soy Sauce, then let the mixture cool for a bit. In a separate bowl, whisk together four eggs, maple syrup, vanilla extract, brown sugar and cocoa powder. Add it to the chocolate and butter mixture, then pour it all into a premade, gluten-free pie crust.
Top the pie with pecan halves, then bake it in the oven at 350 degrees Fahrenheit for 45-55 minutes, or until the crust is golden brown. To make the whipped cream, whisk together vanilla extract, heavy whipping cream and Tamari. Put it in a serving dish beside the pie, then let guests slice and scoop.
Enjoy Our Asian-Inspired Dinner Ideas for Your Holiday Meal
We hope you’ve gathered some inspiration from our alternative Christmas dinner ideas. In addition to these Asian-Inspired Holiday recipes, you can search our full collection of recipes for more delicious dishes. We have recipes for every course, occasion and special diet.
If you need high-quality ingredients to craft your holiday recipes, browse our product selection for Tamari soy sauce, shoyu sauce, Asian cooking sauces and more. Our sauces are umami-rich and certified gluten-free by the Gluten-Free Certification Organization, making them a flavorful, diet-friendly addition to your seasonal dishes.
Perhaps you’ve been tasked with making a holiday dinner for your family or friends, or you simply want to try some new gluten-free recipes this season. Either way, we’ve got you covered! Explore various Asian gluten-free recipes, including appetizers, entrees, side dishes and desserts.
Gluten-Free Holiday Appetizers
Start your holiday meal right with a gluten-free, Asian-inspired appetizer. Here’s an idea to get you started!
Wasabi Dip With Crudités
Crudités consist of whole or sliced vegetables, usually served on a tray or platter alongside a dipping sauce. While they’re a French appetizer, this wasabi dip with crudités adds a touch of Japan to this hors d’oeuvre.
Combine SAN-J Tamari Soy Sauce, mayonnaise, sugar and wasabi paste in a bowl, then cover and refrigerate for at least an hour. Serve this dip on a tray with assorted veggies. It’s that simple!
Gluten-Free Holiday Main Course
You can’t have a holiday dinner without the most important part — the main course! Here’s a delicious, gluten-free entree if you need something to make.
Turkey-Stuffed Pork Loin
Nothing says a holiday feast quite like a juicy, tender turkey-stuffed pork loin. The aroma alone is enough to tantalize your senses.
This main course contains a delicious mixture of turkey sausage, cream cheese, spinach and nutmeg spread into seasoned, boneless pork loin. Brushing the pork with a sweet and savory blend of Tamari and maple syrup enhances the flavor all the more.
Gluten-Free Holiday Side Dishes
What’s a main course without a tasty side dish? Below are some fantastic recipes to try.
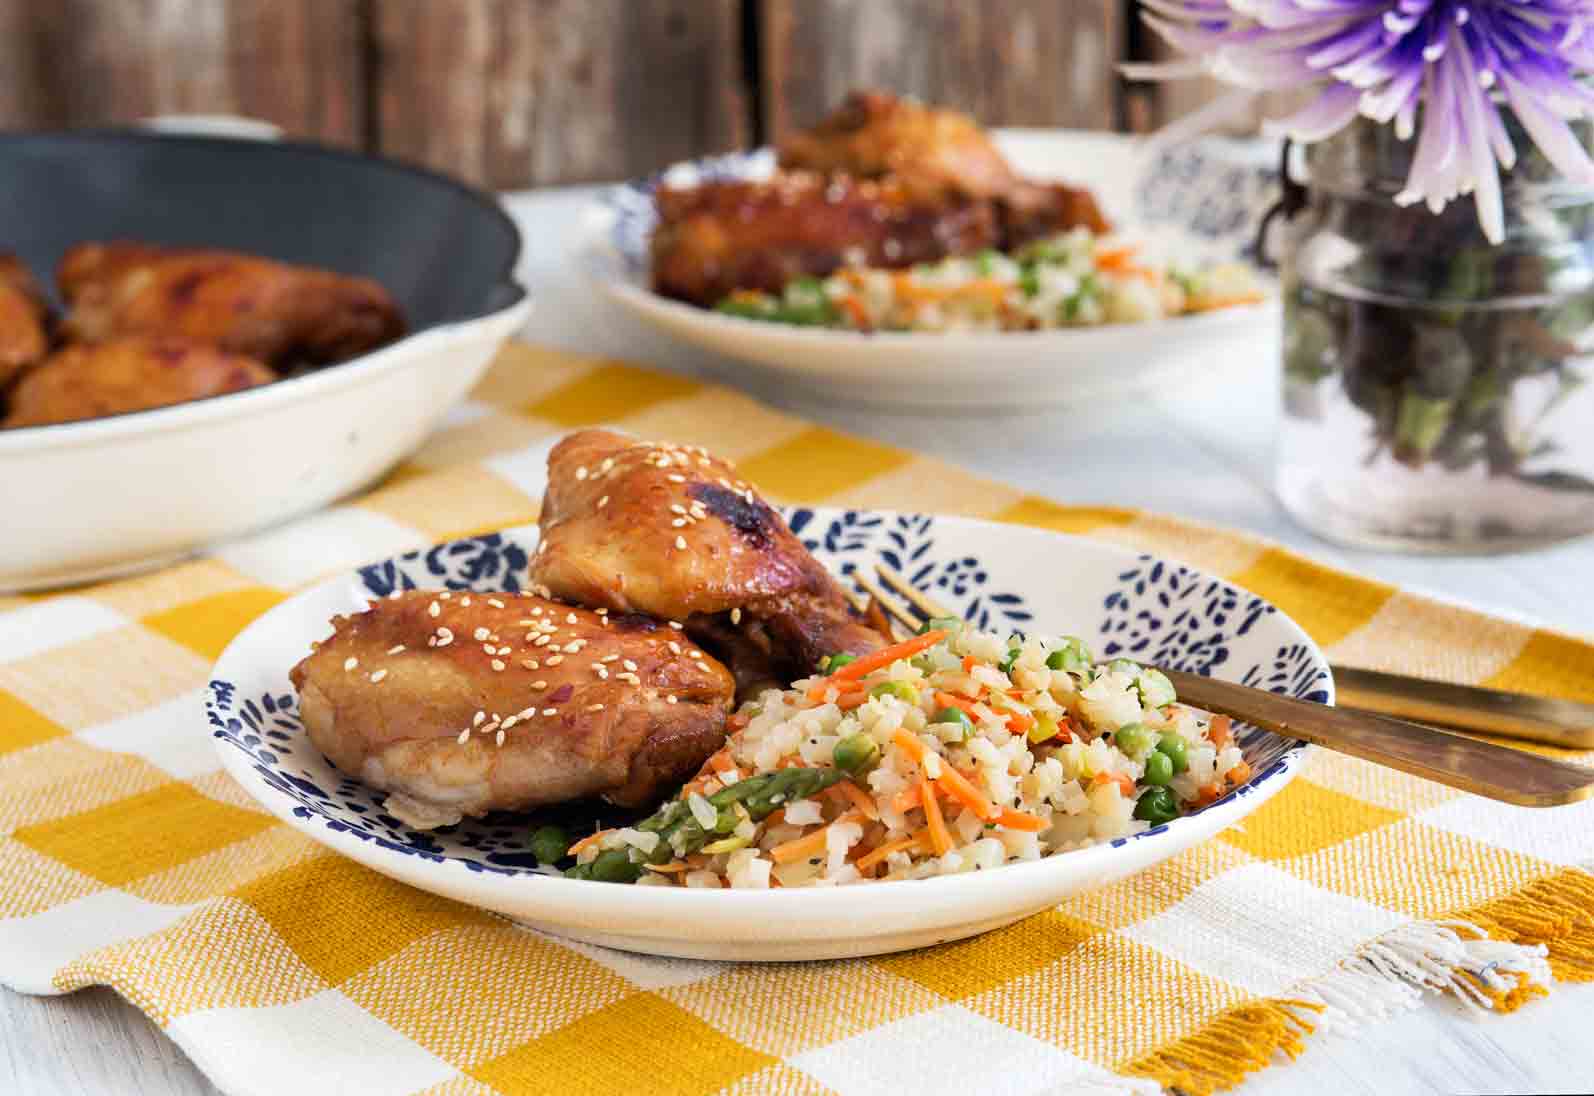
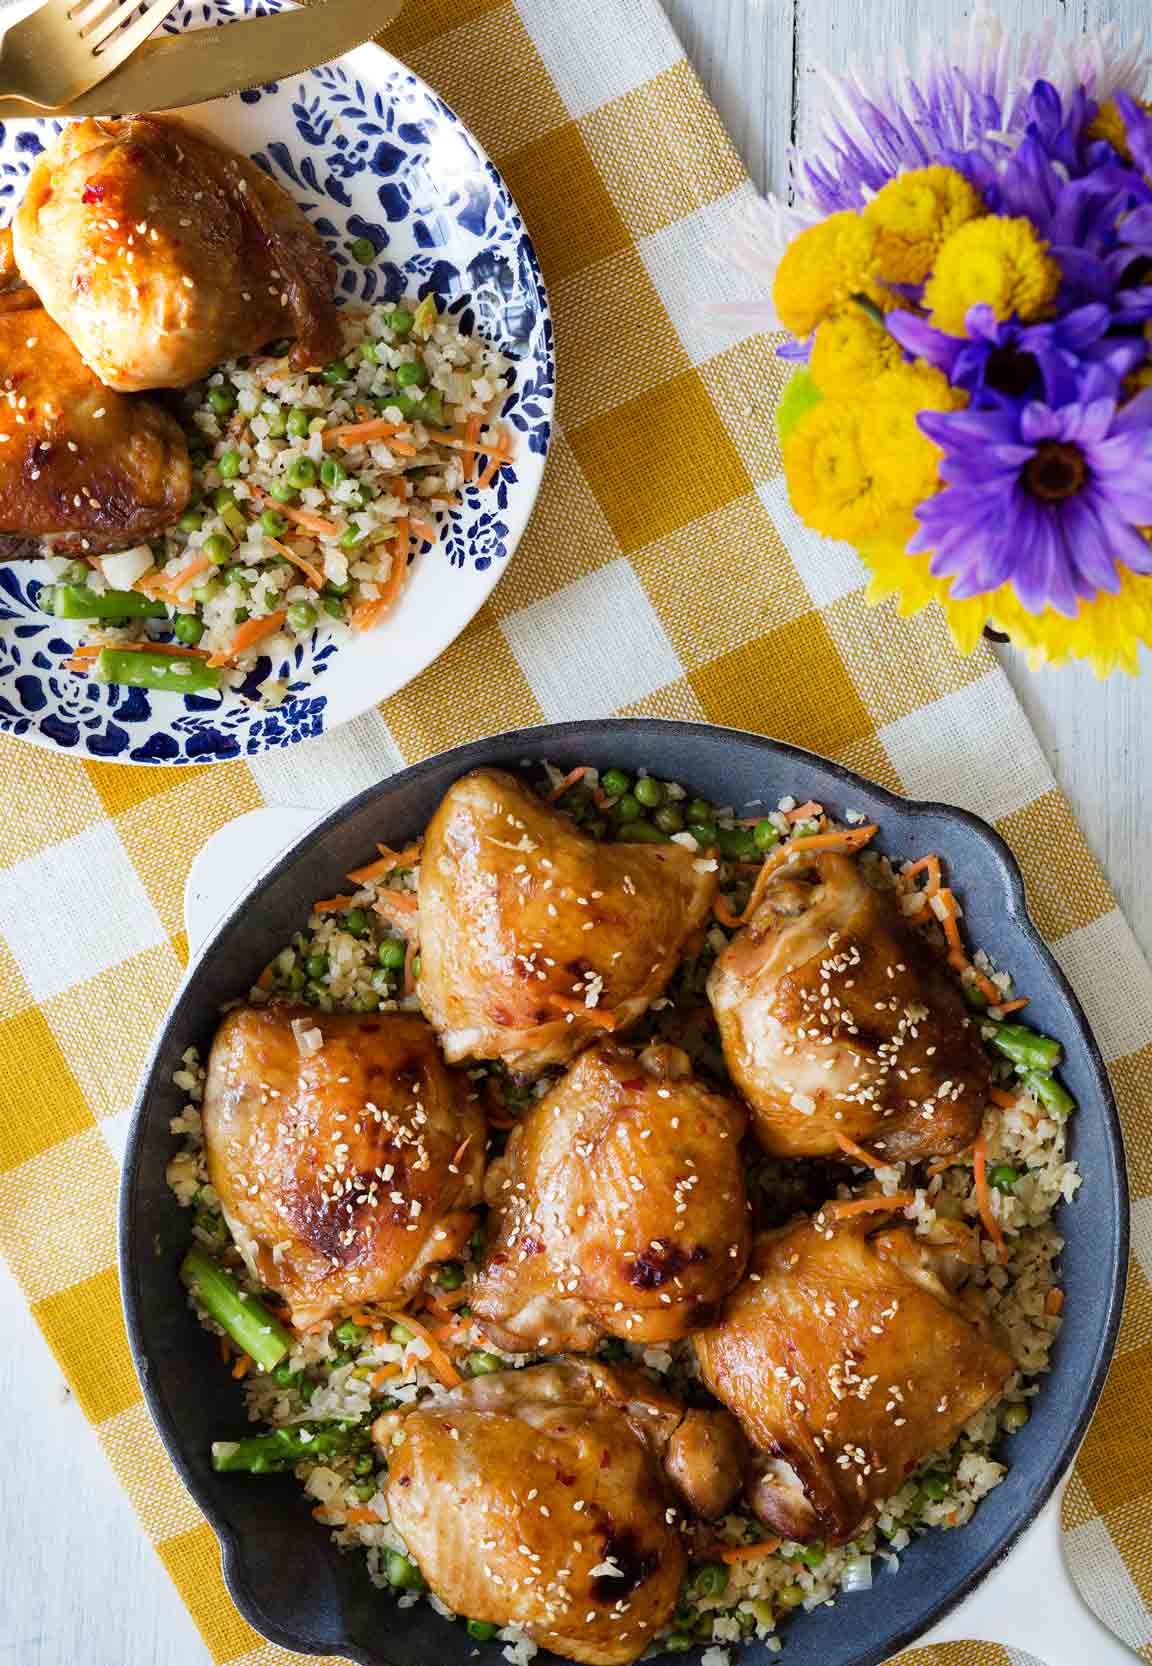
Maple Tamari Roasted Brussels Sprouts With Candied Bacon
These maple Tamari roasted Brussels sprouts are a sweet and sizzling gourmet treat, perfect to accompany nearly any main course. Maple syrup and Tamari give way to crisp, hearty Brussels sprouts for the ultimate holiday delight.
Coat strips of bacon in a mixture of brown sugar, maple syrup and SAN-J Tamari Soy Sauce, then bake them in the oven. Chop them into smaller pieces, then combine with cooked Brussels sprouts coated with Tamari, maple syrup, vegetable oil and black pepper. These pop-in-your-mouth morsels are sure to be a hit.
Maple Ginger Sweet Potato Casserole With Sesame Crumble
This maple ginger sweet potato casserole is the epitome of comfort food — perfect for the holiday season. Combining the flavors of sweet potato, maple syrup, Tamari and fresh ginger, this swoon-worthy side dish will surely please the palate.
After boiling and mashing your sweet potatoes with butter until fluffy, you’ll combine them with milk, ginger, Tamari and maple syrup. Spread this mixture into a sprayed casserole dish. Mix gluten-free flour, pecans, brown sugar, sesame seeds and some more Tamari and butter in a food processor. Spread this mixture over the sweet potatoes and bake until golden brown.
After removing the casserole from the oven, you can broil it for a minute or two if you want to brown the top some more. Enjoy it while it’s hot!
Gluten-Free Holiday Desserts
Last but certainly not least, there’s no better way to complete your ensemble than with a gluten-free holiday dessert.
Chocolate Pecan Pie
Who knew that Tamari could pair beautifully with desserts? This silky-smooth chocolate pecan pie is a prime example!
After microwaving butter and chocolate chips until melted, stir in some Tamari and let the mixture cool slightly. Whisk together maple syrup, eggs, cocoa powder, vanilla and brown sugar in a bowl, then add the chocolate mixture. Pour it all into a pie crust and top with pecan halves. Bake the pie until the crust is golden brown.
Whisk together heavy whipping cream, Tamari and vanilla extract to form the flavorful whipped cream. Serve it with the pie and enjoy the sweet and savory result.
Good Fortune Cookies
With hints of almond, vanilla and chocolate, these gluten-free holiday cookies are a true delight. This good fortune cookie recipe is an excellent solution if you need a unique dessert or holiday party favors.
Combine egg whites, salt, sugar, vanilla extract, almond extract and almond flour to form the dough. Drop mounds of dough onto prepared baking sheets. Place a blanched almond on half of the cookies, then bake them until lightly browned.
Mix Tamari, chocolate chips and heavy cream in a small saucepan, stirring over low heat until the chocolate chips have melted. Spread some of this mixture over the flat side of each cookie without an almond. Sandwich the cookies together, and you’ve got a new holiday favorite.
Enjoy a Delicious, Gluten-Free Holiday Menu
These gluten-free holiday recipes are just the beginning. When you visit SAN-J’s recipe center, you’ll find a variety of great recipes for any occasion, course or special diet — all featuring our umami-rich Tamari Soy Sauce and Asian Cooking Sauces to add bolder, fuller flavors to your meal.
These sauces are certified gluten-free by the Gluten-Free Certification Organization, making them a delicious addition to your holiday spread. Check out some of our favorite recipes, and don’t forget to browse our product selection to enhance your dishes this season.
Best Easy Asian Appetizers: Perfect for the Holidays or Any Time of Year
Written by: San-JPosted on: December 6, 2022
Brighten the holidays with these fresh new bites. They’re an impressive addition to your next party and so easy to make. Plus, they’re gluten-free!
SAN-J Tamari Soy Sauce and Asian Cooking Sauces add rich and delicious flavor without adding any artificial preservatives, flavors or colors. Our famous Tamari is made with all soy, unlike most soy sauces which include wheat — you get a full, bold flavor due to the higher soy protein concentration.
Our Asian Cooking Sauces are made with our Tamari and are all gluten-free, backed by the Gluten-Free Certification Organization. These sauces are excellent for crafting many Asian holiday recipes, some of which we’ll explore below!
5 Easy Asian Finger Foods for the Holidays
With so many options, finding the perfect holiday appetizers can be challenging. Luckily, we have some of the best Asian appetizers for a party or gathering right here! Browse our list of favorites for some inspiration.
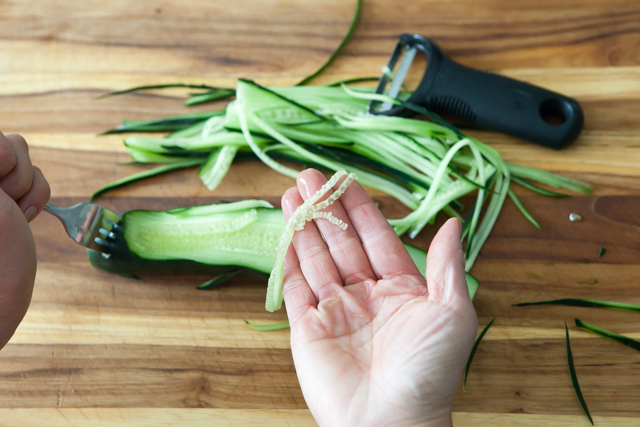
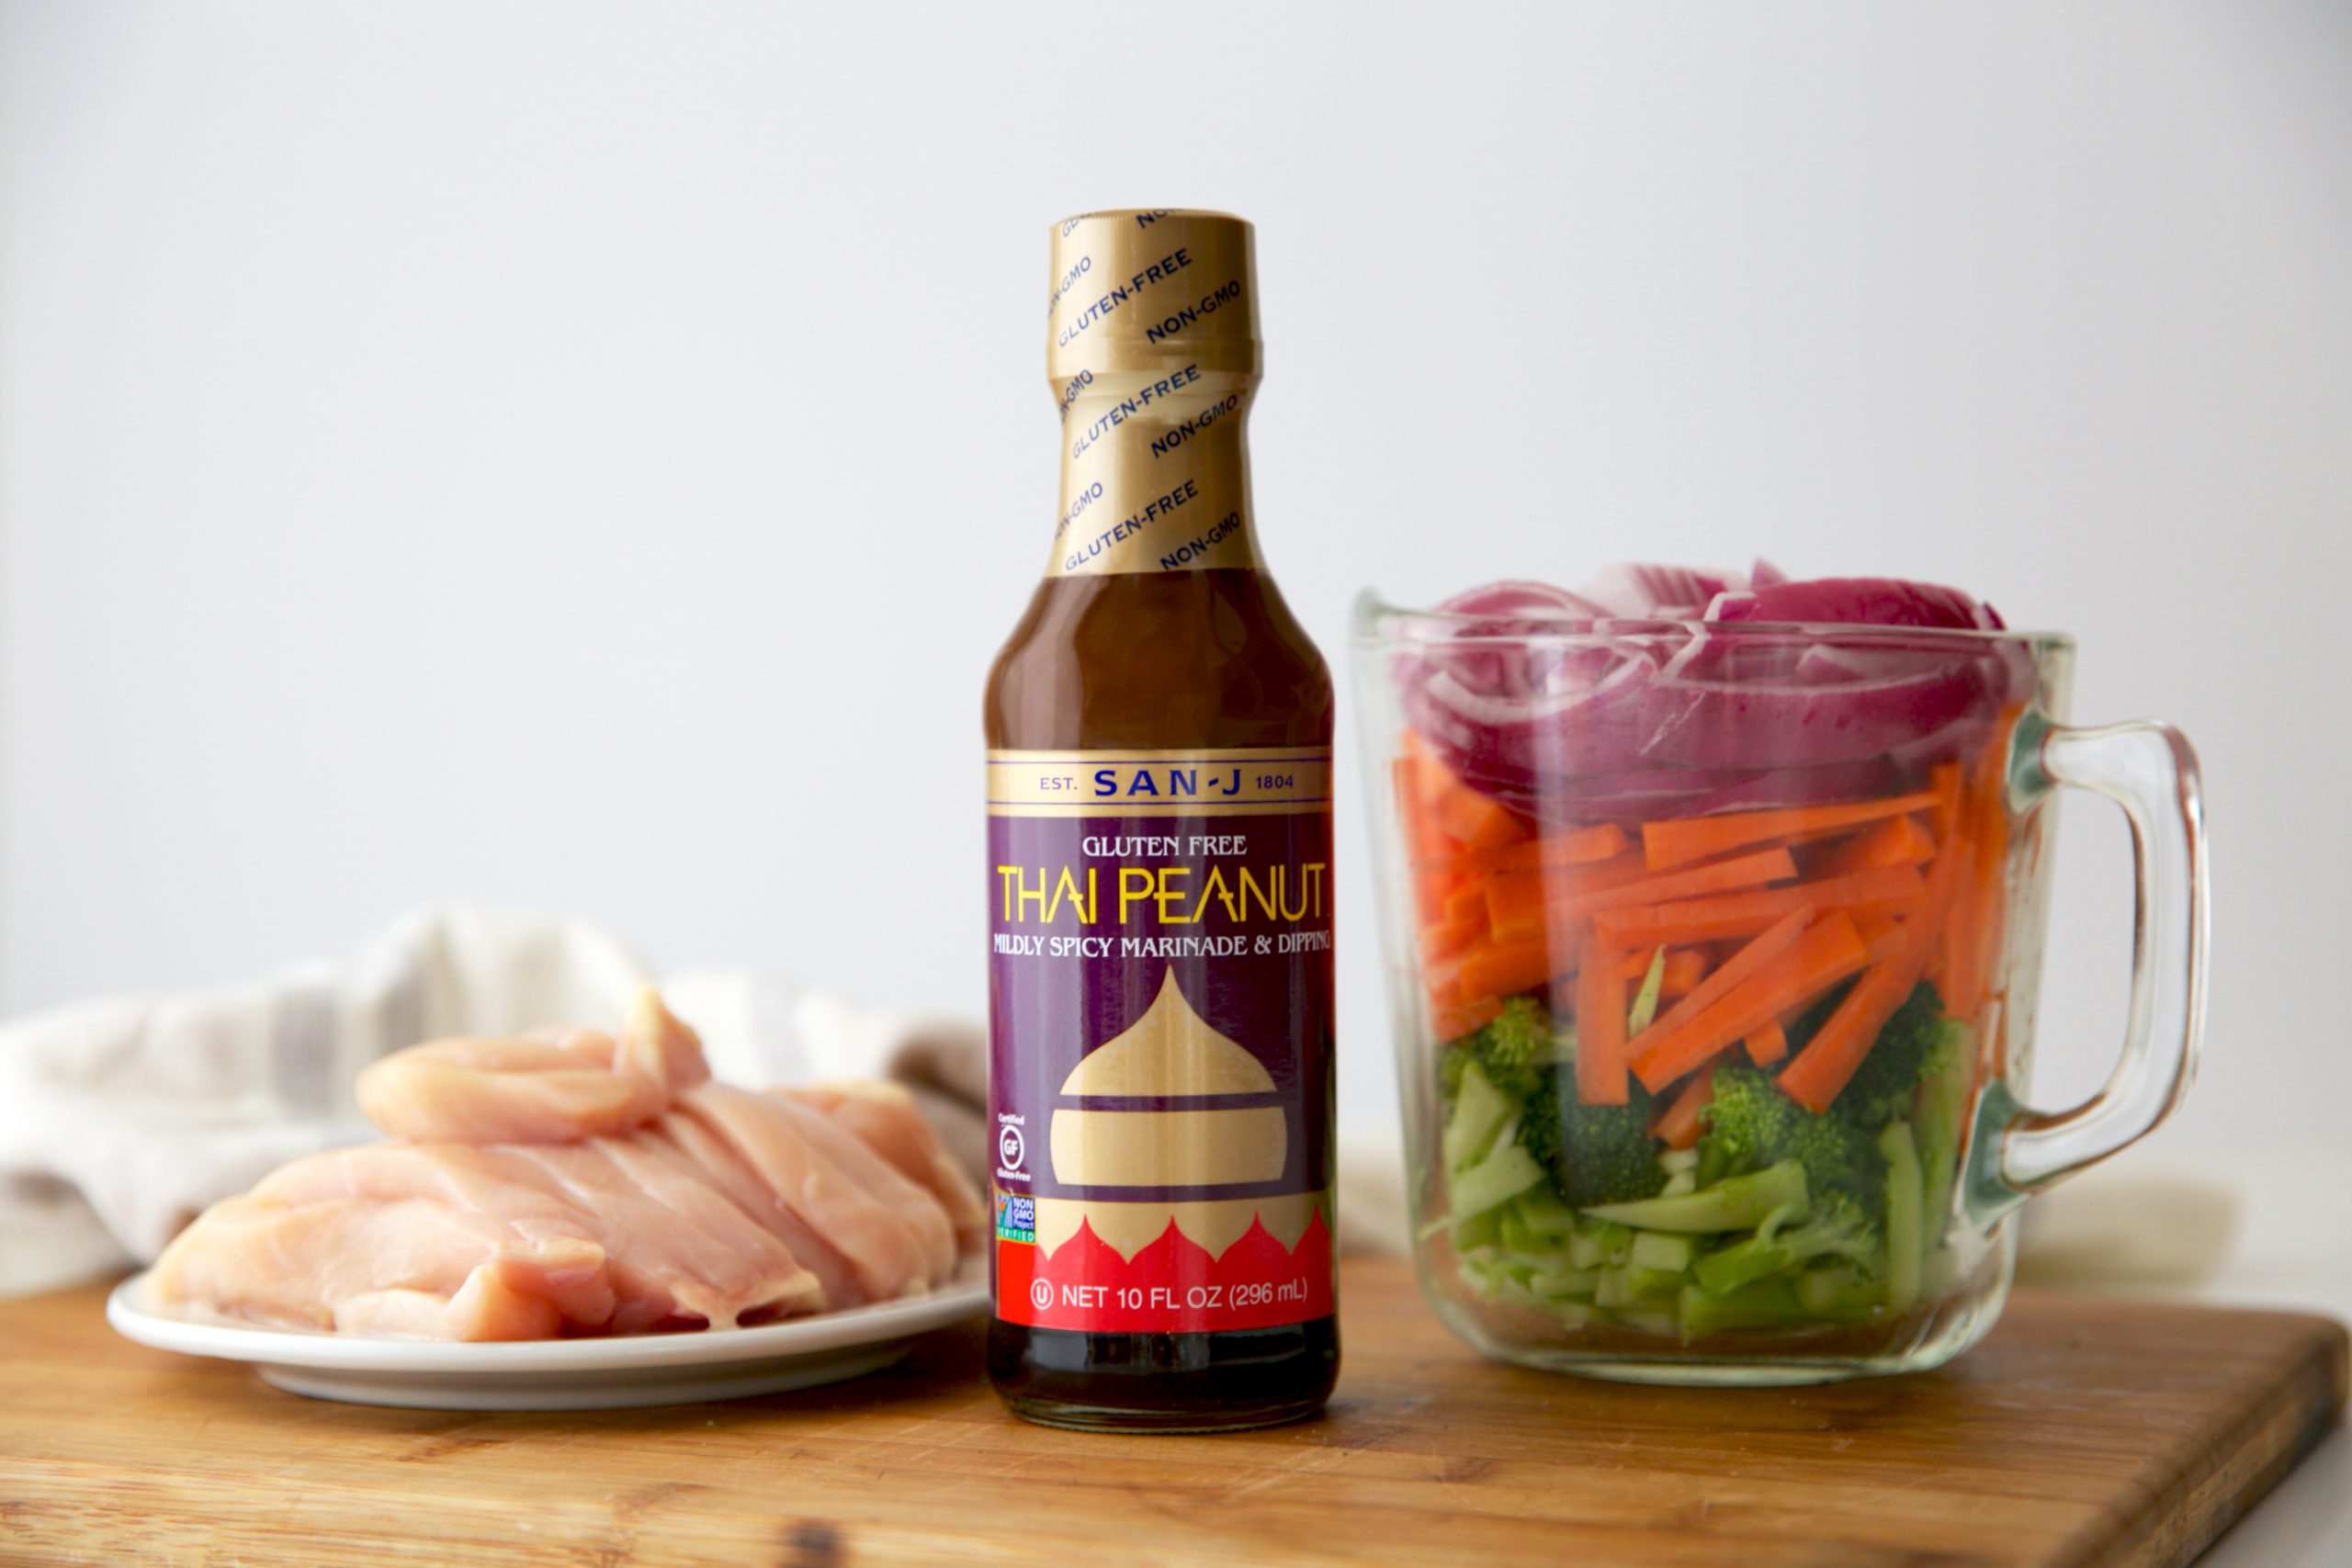
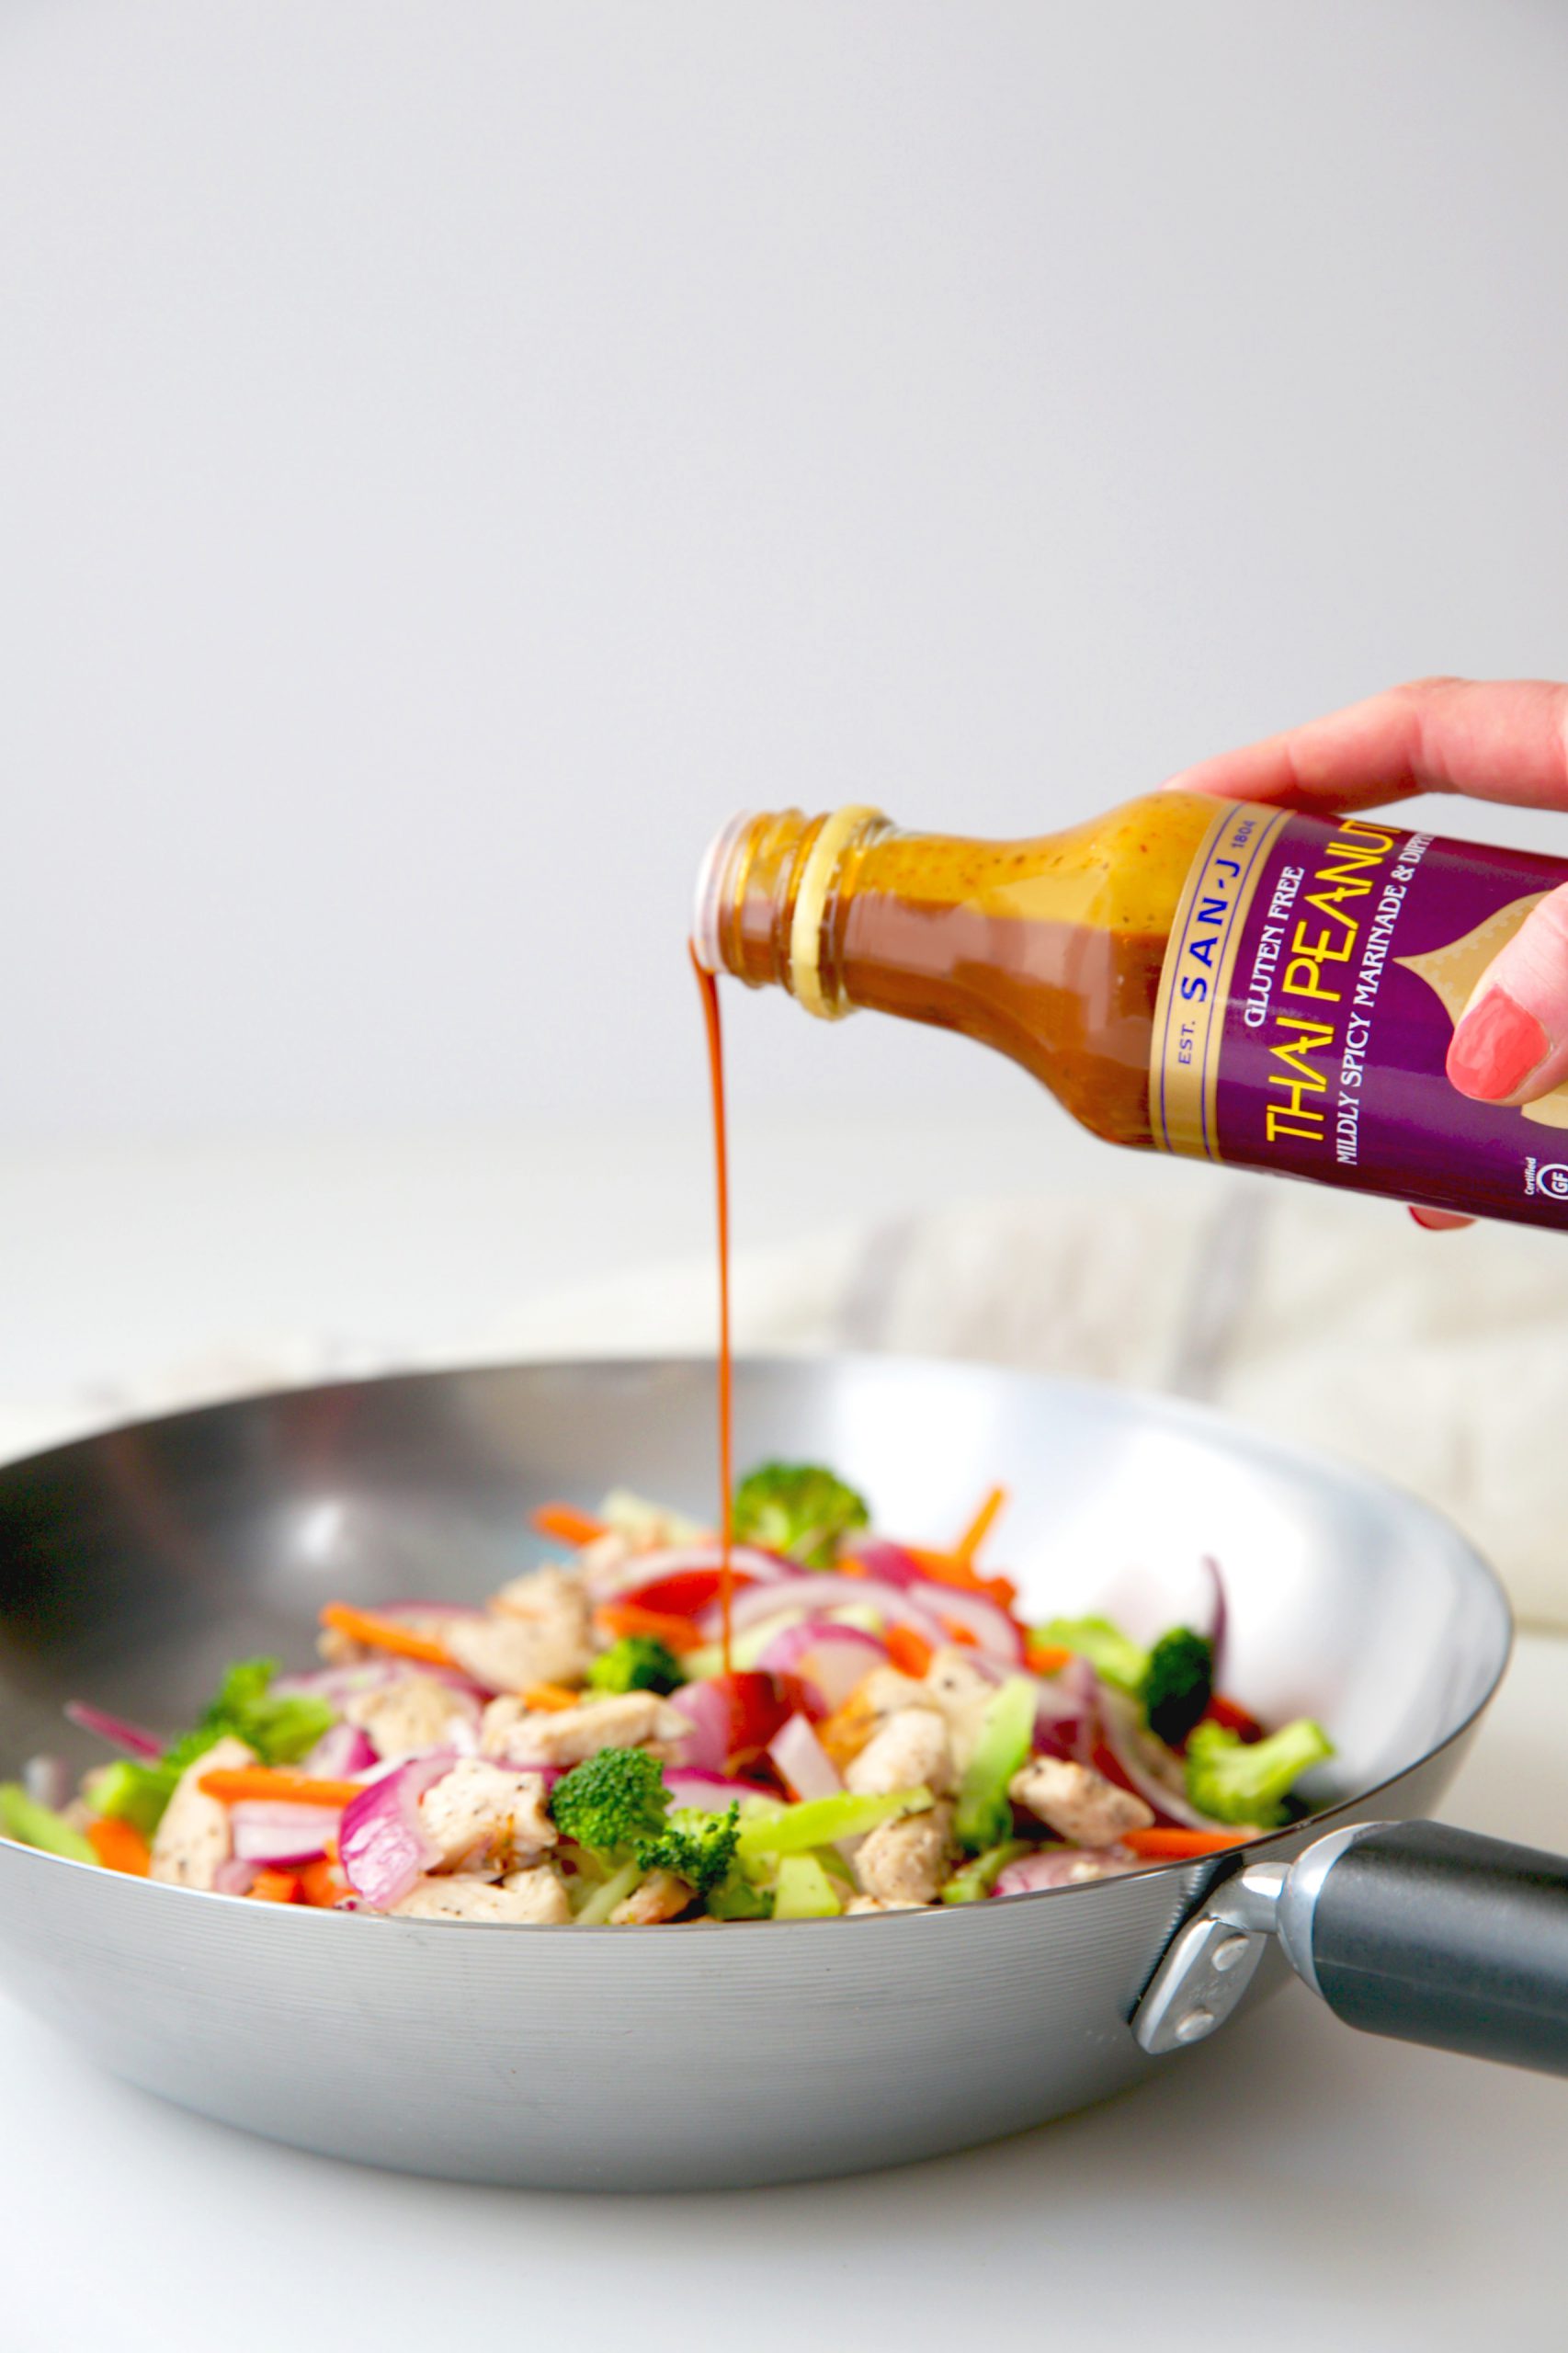
1. Cucumber Cups With Creamy Peanut Chicken
We love the simplicity of combining all ingredients into a blender or food processor, piping the mixture into these cuts of fresh cucumber, then sprinkling with garnish. Super simple!
These cucumber cups with creamy peanut chicken are a light, savory blend of cream cheese, seedless cucumbers, chicken, mayonnaise, SAN-J Thai Peanut Sauce and SAN-J Tamari Soy Sauce.
After slicing your cucumbers into 1-inch pieces and discarding the ends, spoon out the center of each cucumber slice. Combine your cooked chicken, cream cheese, mayo, peanut sauce, Tamari, garlic powder and optional Sriracha in a food processor. Blend the ingredients until smooth, scraping down the sides of the bowl if necessary.
Pipe the mixture into your cucumber cups. Don’t forget to top them with chopped peanuts for that added crunch, along with fresh cilantro leaves!
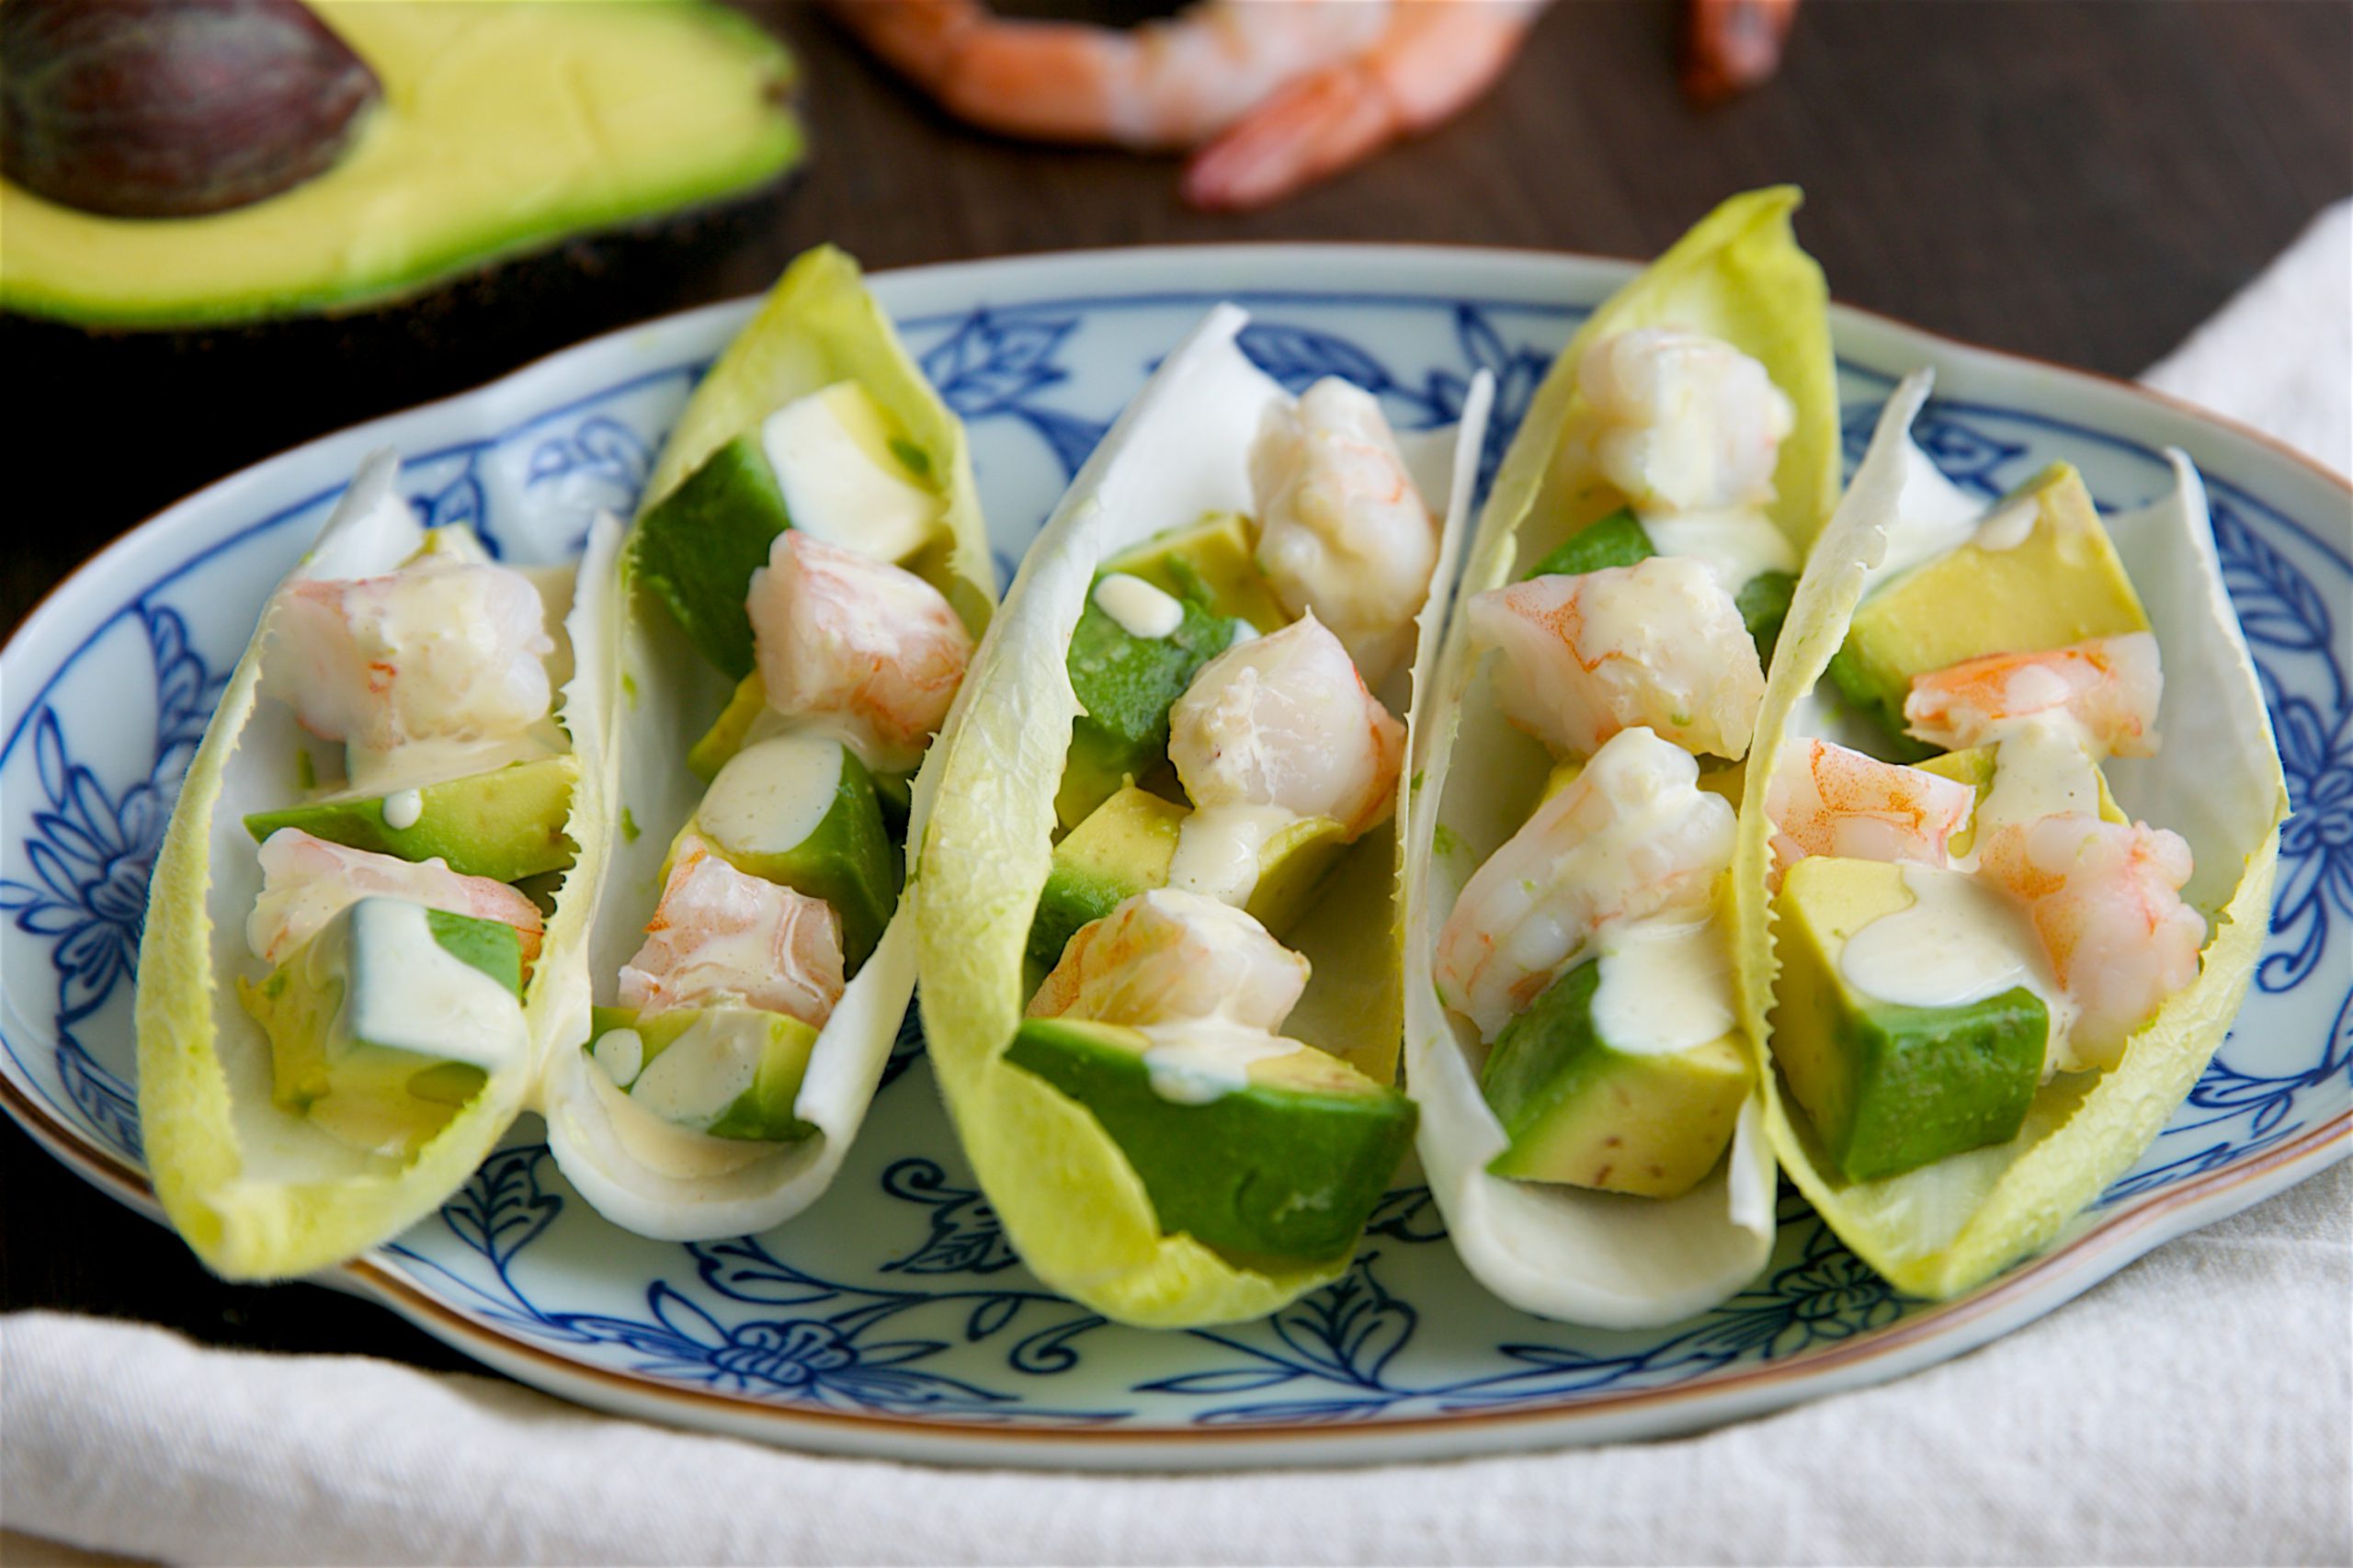
2. Endive With Orange Cranberry Goat Cheese
Mix up just four ingredients, divide the mixture into crisp endive leaves, then top with nutritious microgreens. You’ll love the pairing of our slightly sweet Orange Sauce with the tartness of goat cheese and bits of dried cranberry.
This endive with orange cranberry goat cheese recipe is perfect for a holiday party appetizer that only takes minutes! Simply combine 8 ounces of goat cheese and 4 tablespoons of SAN-J Orange Sauce until smooth. Reserve a tablespoon each of cranberries and pistachios for garnish, then stir the rest into the cheese and orange sauce mixture.
Spoon or pipe the mixture into the bottoms of endive leaves. Garnish them with your reserved cranberries and pistachios, add some microgreens and enjoy!
3. Hoisin Crab Deviled Eggs
Deviled eggs are a staple for holiday parties — or any type of party, for that matter! However, these are not your typical deviled eggs. Crab meat and Hoisin Sauce are the stars here. Top them with microgreens, and you may have found a new favorite deviled egg.
These hoisin crab deviled eggs are sure to be a crowd-pleaser. Hard-boil a dozen eggs, remove the peels and cut each egg in half lengthwise. Drop the yolks into a food processor with garlic powder, mayonnaise, green onions and mustard powder. Blend the ingredients until smooth. Taste the mixture and season it with salt, if necessary. Pipe or spoon this mixture into the empty egg whites.
You’ll then combine crab meat with SAN-J Hoisin Sauce in a separate bowl and top the eggs with a dollop of this crab mixture. Garnish the eggs with microgreens and they’re ready to go! If you want to spruce up the presentation, drizzle some Hoisin Sauce over a serving platter and place the eggs on top.
4. Teriyaki Stuffed Mushrooms
These Teriyaki stuffed mushrooms are nothing short of gourmet. They’re coated in Teriyaki Sauce, then filled with a mixture of sausage, mushroom stems, cream cheese and green onions. A sprinkling of parsley at the end freshens the flavor.
After cleaning and removing the stems from your large white button mushrooms, combine 3 tablespoons each of olive oil and SAN-J Teriyaki Sauce in a large mixing bowl. Add the mushrooms, then toss them to coat with the mixture.
Line a baking sheet with parchment paper and preheat your oven to 325 degrees. Cook a pound of Italian sausage over medium heat in a large skillet, then add green onions, mushroom stems and a tablespoon of Teriyaki Sauce. Cook for about 3-4 minutes, stirring occasionally. Add in your cream cheese and continue cooking until the cheese melts completely. Stir in bread crumbs.
Fill the mushroom caps with the sausage blend, then bake them on the prepared sheets for 35 minutes. Garnish with parsley if desired and enjoy while they’re hot!
5. Wasabi Dip With Crudités
You’re just four blended ingredients away from your new go-to veggie dip. This creamy take on wasabi and Tamari adds just the right spice to the mix. This wasabi dip with crudités is a must-try if you’re looking for vegetarian Asian appetizers.
A vegetable platter makes a colorful addition to any holiday party! Combine SAN-J Tamari Soy Sauce, mayonnaise, sugar and wasabi paste. Cover and refrigerate the mixture for at least an hour or up to a day. Serve with assorted veggies for dipping.
Enjoy Our Asian Appetizers During the Holidays or Any Time of Year
These fresh bites are just the start if you’re looking for delicious Asian party foods. Check out our latest Gluten-free Holiday Menu for the full spread this season.
And, of course, don’t forget to browse our selection of Tamari Soy Sauce, Asian cooking sauces and other products to craft your amazing recipes this season. Happy and tasty holidays from SAN-J!
The ingredients you use affect the final taste of your recipes, but your cookware also plays a factor in each dish’s success. Creating a masterpiece often involves understanding the best pans for cooking a given meal. Below, we’ll discuss common cookware types’ pros and cons, as well as the impact each can have on your food.
We’ll start with a wildly popular type of cookware — nonstick. With nonstick coatings, you can use less fat as you cook, and they generally won’t alter the flavors of your dish. They may conduct heat differently than other cookware, so opt for lower temperatures when you’re first experimenting with a nonstick pan.
Iron Cookware
Many people swear by their cast iron frying pans. Cast iron is easy to use and clean up, and it conducts heat well. Additionally, it can add a tinge of iron to your food. You may taste it through intensified flavors, especially if your cast iron cookware has been around for a while and is seasoned from years of cooking.
Aluminum Cookware
Pots and pans made from aluminum are shiny and attractive. They distribute heat evenly, making them excellent options for boiling water or quickly heating stews and sauces. They tend to intensify the strong undertones and aromas of cruciferous veggies, so reconsider your cookware if you like your broccoli a little less bold.
Terracotta Cookware
When baking, terracotta (ceramic) cookware can help you achieve juicy, delicious dishes every time. Typically, ceramic pots add minimal flavoring to foods. Just be cautious if you have an older pot or a glazed model, which can contain chemicals like lead that aren’t food-safe.
Stainless Steel Cookware
You’ll find a lot of stainless steel in professional kitchens. The only issue with these tried-and-true pots and pans is that they can start to discolor with continued heat exposure. In time, starchy foods like pasta can change your shiny new pot’s appearance.
If you have a nickel allergy, stainless steel might not be the best option. Cookware made with this material may release trace amounts of nickel, leaving food with a metallic flavor — and you with an allergic reaction.
Selecting the Best Pans to Cook With
Ultimately, you need to experiment and discover which types of pots and pans are best suited for your habits. Over time, you’ll feel more confident knowing when to reach for your stainless steel saucepan and when to grab your cast iron skillet.
Looking for the highest-quality soy sauce to diversify your meals, no matter what cookware you use? Trust our store locator to find SAN-J products or buy online at your convenience.
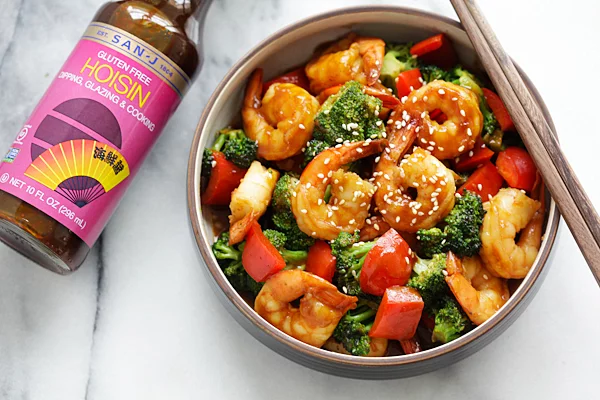
If you love barbecue sauce and Asian food, you’ll adore hoisin sauce. This sweet and pungent sauce can help you add a new touch to your favorite meals. Quality matters when it comes to your ingredients, which is why so many home cooks and professional chefs trust SAN-J hoisin sauce for their menus.
Hoisin sauce is a condiment most often used in Chinese and Vietnamese cooking. While many people associate hoisin sauce with Peking duck, you can also use it with Vietnamese rolls or as a dipping sauce for other dishes.
We make hoisin sauce from red miso, garlic, ginger, brown sugar, and spices. This sauce has tangy, sweet and umami flavors and does not include animal products. Hoisin sauce added to ingredients that are seared or sauteed in a pan will bring out a delicious flavor.
How to Add Hoisin Sauce to Any Meal
While Asian cookbooks include many hoisin sauce dishes and recipes, you can prepare many other types of food with hoisin sauce, too. You can substitute it in any dish you might use barbecue sauce. Still looking to learn how you use hoisin sauce? Here are a few ways you can use hoisin sauce:
Noodles: Add a tablespoon or two of hoisin sauce to noodles and serve with steamed vegetables, soft-boiled eggs and a savory broth for a filling meal.
Salmon: Combine equal parts soy sauce, hoisin sauce and lime juice. Use this mixture to glaze salmon fillets on the grill.
Beef: Hoisin sauce pairs wonderfully well with beef, so add a tablespoon of sauce to any Asian-flavored beef dish you create.
Hoisin peanut sauce: Combine about two tablespoons of hoisin with about half a cup of peanut butter and enough water to make a smooth sauce you can use for dipping Vietnamese rolls with rice paper.
Chicken: Coat chicken drumsticks with equal parts hoisin and orange juice and add in a tablespoon each of honey, garlic and lime juice before cooking in the oven.
Marinades: Create delicious marinades for meat, seafood or vegetables when you combine hoisin, honey, lemon, salt and garlic.
Carrots: Glaze carrots with equal parts maple syrup and hoisin sauce for a flavor twist.
Wraps: Brush vegetables or meat with hoisin sauce as you grill and then wrap up them in a toasted tortilla for a fresh take on a sandwich wrap.
Learn More About Our Products & Recipes With Hoisin SAuce Today
Have you ever tried making slow cooker chicken? You’ll create an even better meal when you know the best way to make chicken in a slow cooker. Use our proven tips to raise the bar on your slow cooker recipes.
Tips for Slow Cooking Chicken
We recommend following these five steps to improve the flavor of your slow cooker recipes:
1. Sear the Chicken Before Adding It to the Slow Cooker
Pre-cooking seals in the juices in the poultry and makes it even more tender as you cook it. A caramelized piece of meat will always taste better in your dish.
2. Don’t Use Frozen Chicken
Thaw the chicken ahead of time so that the slow cooker doesn’t have to thaw and then cook the chicken, which can lead to a blander taste.
3. Use Chicken Thighs or Legs
The thighs and legs are the most flavorful parts of the chicken. These parts become moist and tender when you cook them, and they take in flavor more easily than other parts of the chicken.
4. Don’t Wait Until the End to Add the Sauce
You want the chicken to absorb the flavor and robust quality of the sauce. Adding sauce earlier gives your chicken more time to marinate, creating a more flavorful meal.
5. Layer the Chicken on Top of Other Ingredients
The chicken will cook better when you put it on top of vegetables or grains instead of covering it with those ingredients. The chicken juices will also flavor everything beneath it.
Use Our Tips on Asian Sesame Chicken
One of our popular recipes is our Slow Cooker Asian Sesame Chicken, which employs many of our tips for how to cook chicken in a slow cooker. First, you’ll pan-fry your chicken pieces in your skillet, allowing you to see what a difference it makes to precook the chicken and seal in those natural juices.
We use flavorful chicken thighs in the recipe, which are more tender and tasty than other parts of the chicken. We also advise adding the sauce early in the process, giving the chicken time to absorb the flavor.
Buy Ingredients for Your Chicken Slow Cooker Recipes
A few years ago, the popular TV show “This Is Us” featured a fire started by a slow cooker accidentally left on. Were the writers just using their imaginations, or were they onto something? Many people wonder if slow cookers can really catch fire and if they’re safe to leave on. Get the facts about cooking safely with these versatile tools.
Why You Can Leave Your Slow Cooker On
Are slow cookers safe to leave on? Yes, it’s safe to leave a slow cooker on when you leave the house. The purpose of a slow cooker is to allow you to cook while you aren’t home. Slow cookers simmer food slowly, killing bacteria and raising meat to the perfect internal temperature. Slow cooker recipes are often designed for an eight-hour cook so that the food is ready when you return home after a long day.
Is it safe to leave a slow cooker on for 12 hours? Yes, you can use your slow cooker for longer than eight hours, as long as you keep an eye on it. Many slow cookers do have an automatic shutoff after 24 hours.
Tips for Leaving Your Slow Cooker On (Even if You’re Not Around)
Slow Cooker Safety
You can use these tips to minimize the chance of fire or other problems and make your slow cooker experience even safer:
Keep the slow cooker on low heat: When you use the low setting, you ensure the slow cooker won’t overheat, which may lead to bubbling or spillover of ingredients. Low heat keeps the food cooking at a steady rate.
Keep the slow cooker on a hard, flat surface, away from edges: You don’t want anything potentially flammable or prone to melting to come in contact with the slow cooker. You also want your cooker to stay securely on the counter, tabletop or wherever you put it. Positioning the slow cooker away from the edge to avoid accidents with kids or pets.
Keep cords away from liquids: Keep all electrical objects clear of liquids, or you could get an unpleasant surprise. A short in the cord could start a fire. Clean up any messes on the counter before you plug in your slow cooker.
Explore Slow Cooker Recipes
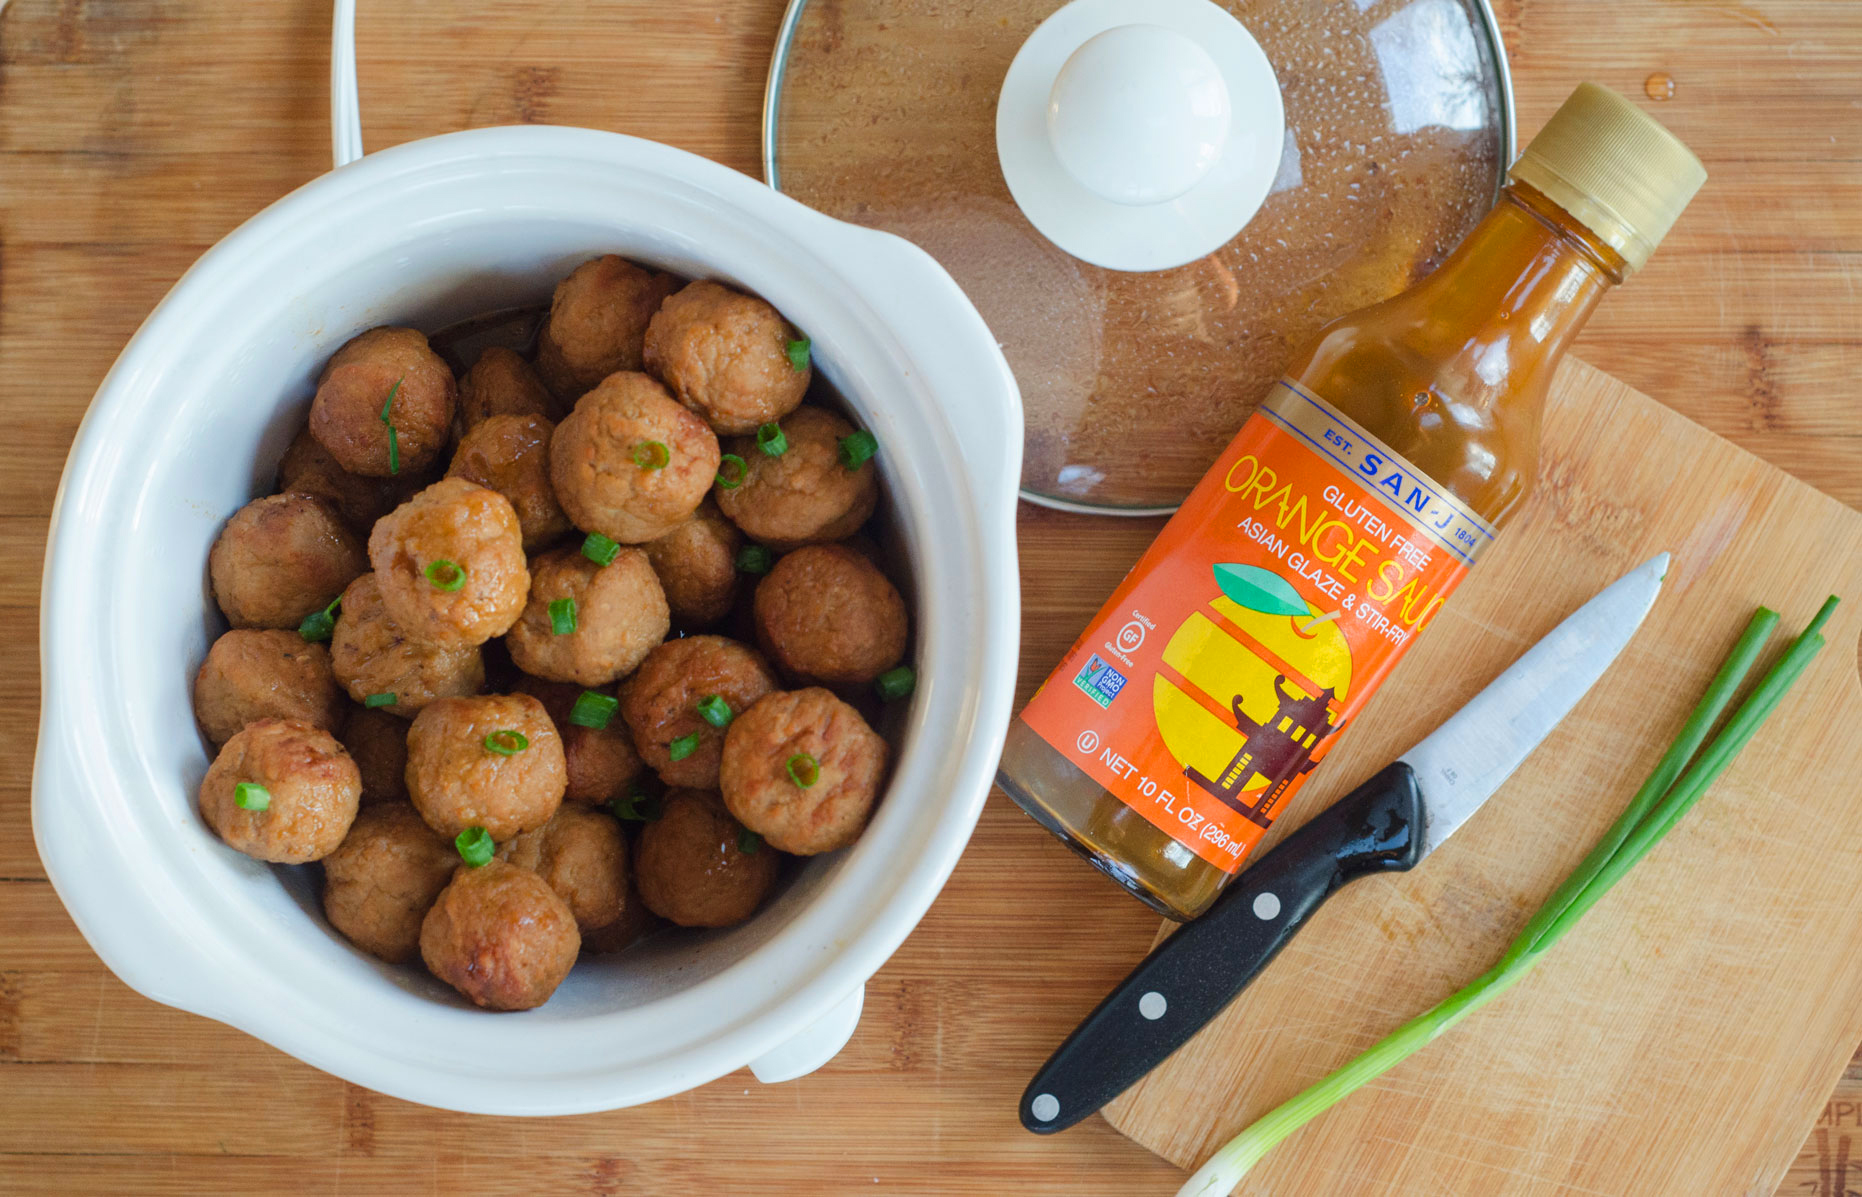
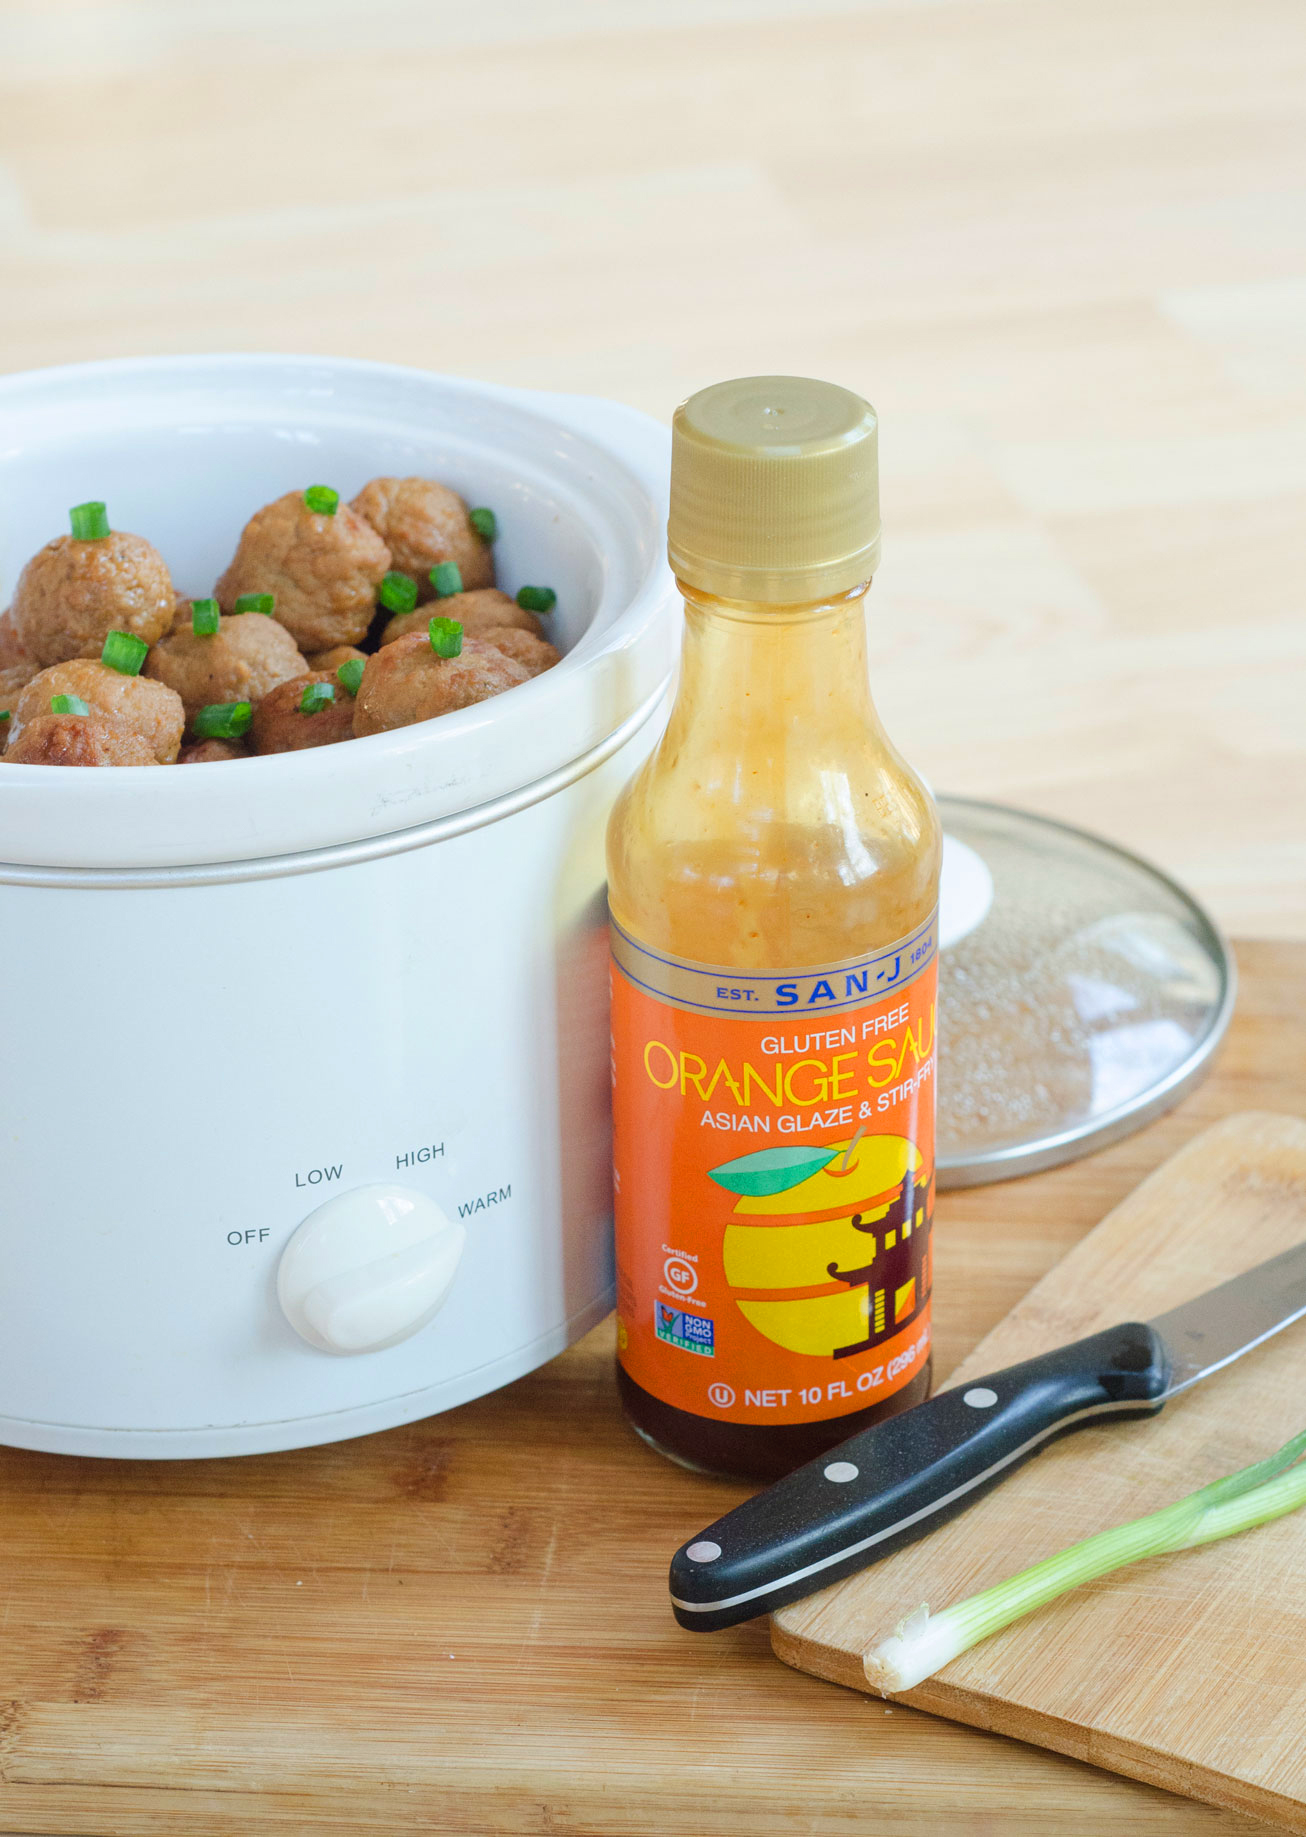
Slow cookers provide a secure and efficient method for crafting delightful family dinners. When you need dinner ideas, explore our collection of flavorful recipes. Delight your taste buds with dishes like Slow Cooker Asian Sesame Chicken, Orange Crockpot Meatballs, and more. The bold and intricate flavors of these recipes will surely be a hit at your table, all while saving you valuable time in the kitchen.
Discover the joy of cooking with our exceptional recipes. Purchase our products online or locate them in stores today.
You may know how to use an Instant Pot or pressure cooker to make your meal, but when you’re done cooking, how do you release the pressure? You have several options that can work while preserving your food, too. For your safety, be sure to follow the cooking instructions that come with your pressure cooker’s release valve.
Quick Pressure Release
The quick-release option works best for those nights when you need to get the meal on the table quickly before your meeting or the kids’ sports practice. When your food finishes cooking, hit the “cancel” button, then move the valve to “venting.” The quick-release method has many benefits, including saving you time and avoiding the mushiness that can occur when the instant pot overcooks the ingredients. If you often overcook your food, the quick release may be your best option.
It takes about two or three minutes to finish this type of release. Don’t use cold water to stop the pressure cooker or you may damage your instant pot.
Natural Pressure Release
The natural-release method takes more time than quick-release, from 10 to 60 minutes based on the meal you make. Instead of finishing up fast, you slowly let the pressure on the pot decrease until you’re ready to serve. You may choose to wait until the pressure naturally lowers and the lid-lock disengages, or you can wait 10 minutes until the recipe finishes cooking and open the valve for a slightly faster method. Either way will offer several benefits, including:
Keeping food warm.
Allowing meat to tenderize.
Encouraging grains to cook thoroughly.
Intermittent Pressure Release
Intermittent pressure release combines the best aspects of natural and quick releases. This method allows you to get to your food quickly while ensuring it’s properly cooked. We recommend this approach to avoid spitting, which can occur with a quick release, or overcooking with a natural release.
Toggle the pressure release valve between open and closed several times, allowing pressure to decrease naturally while also stopping foam from escaping through the valve. While it may only take one or two toggles before the food is ready, you should check if it’s still foaming before you dig in.
Buy Ingredients for Your Next Pressure Cooker Meal
Now that you know how to release pressure from a pressure cooker, you may already be looking forward to your next meal! Find the ingredients you need from SAN-J to make a delicious recipe. Our Slow & Pressure Cooker Sauces are great for slow cooking, pressure cooking and simmering. Whether you’re making Korean beef, Hawaiian teriyaki meatballs or Thai green curry chicken, SAN-J Slow & Pressure Cooker Sauces make it easy to bring bold Asian flavors to your favorite dishes.
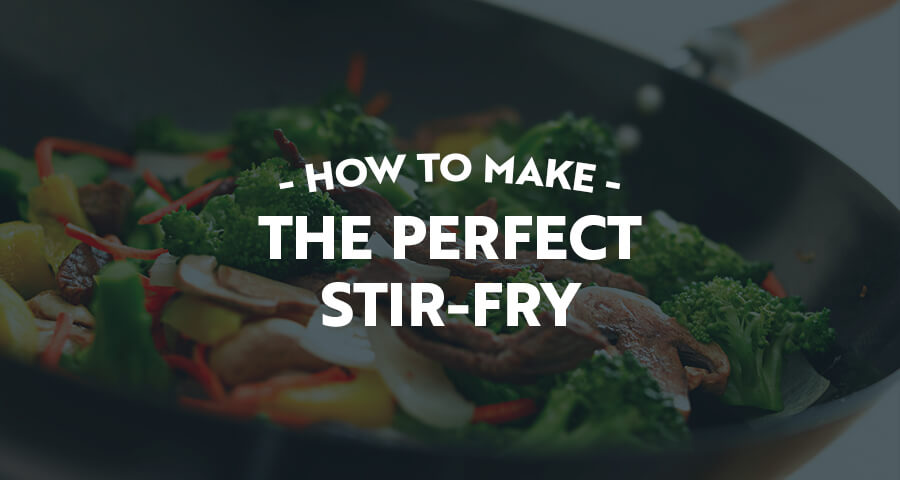
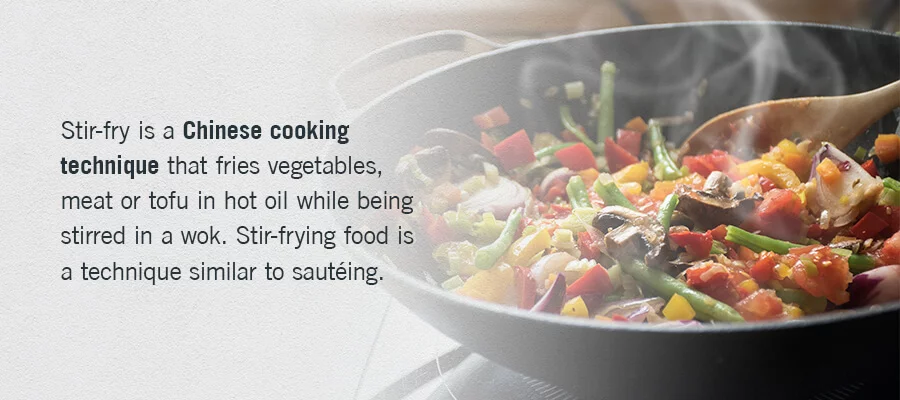
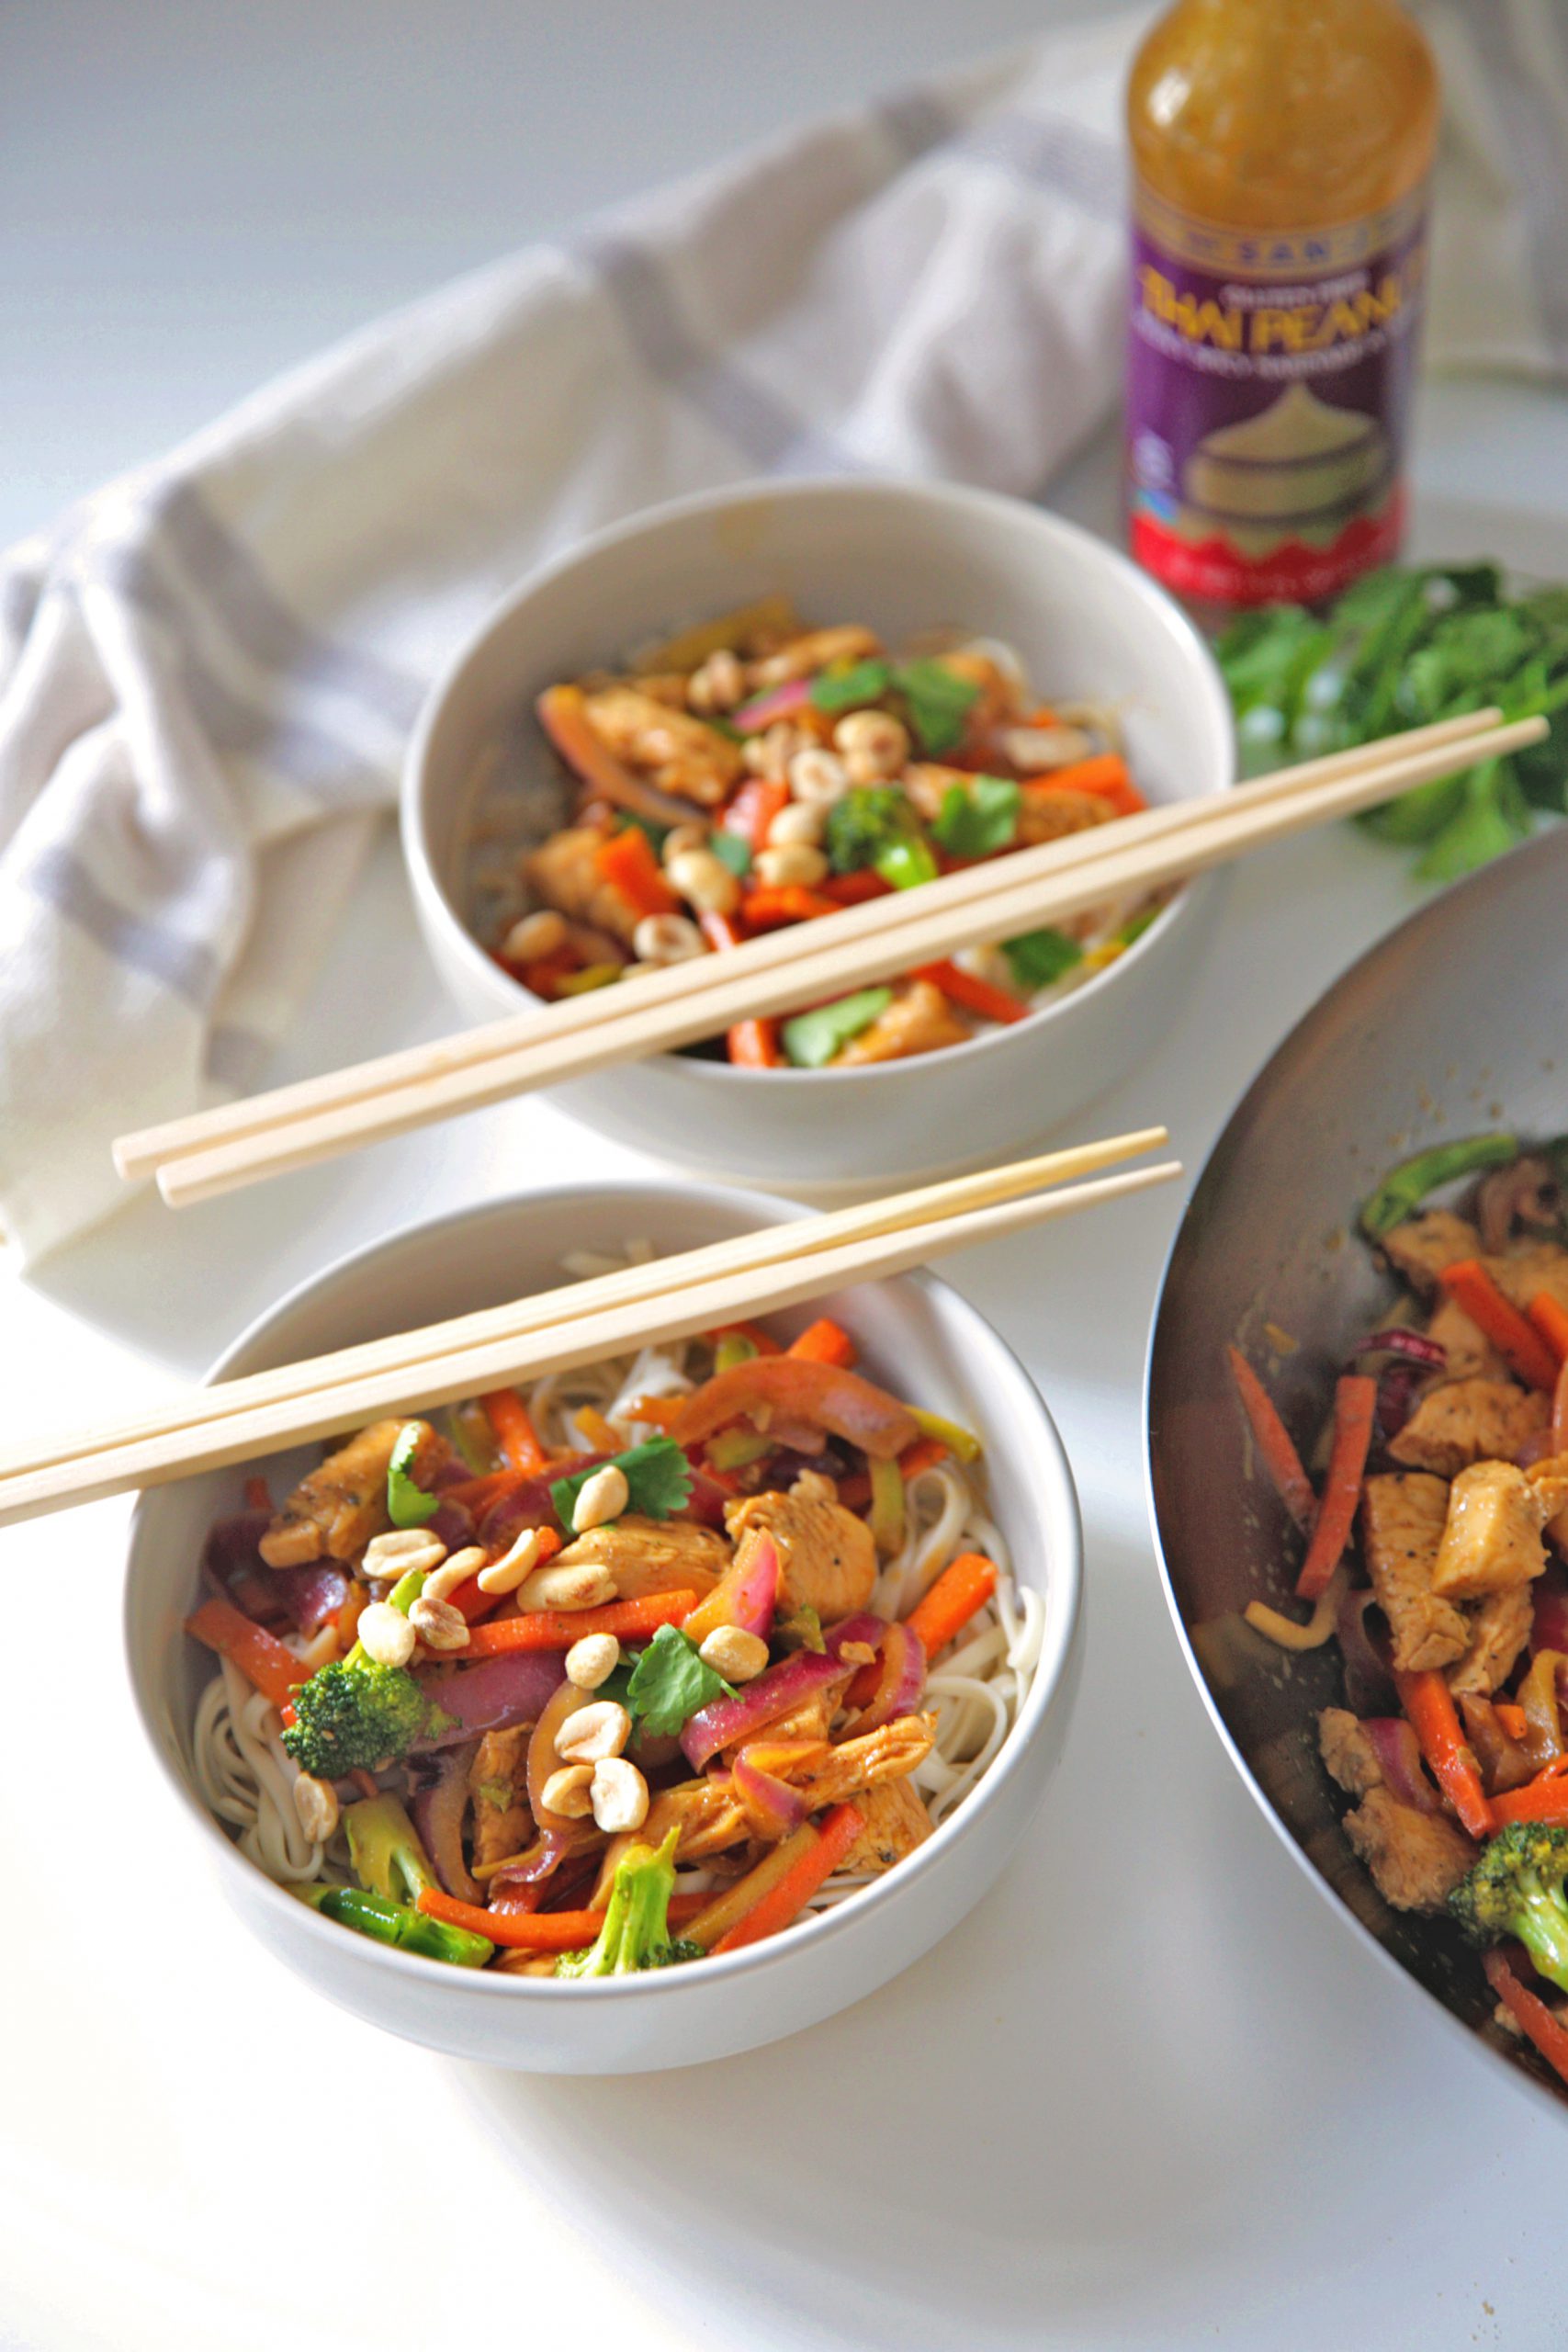
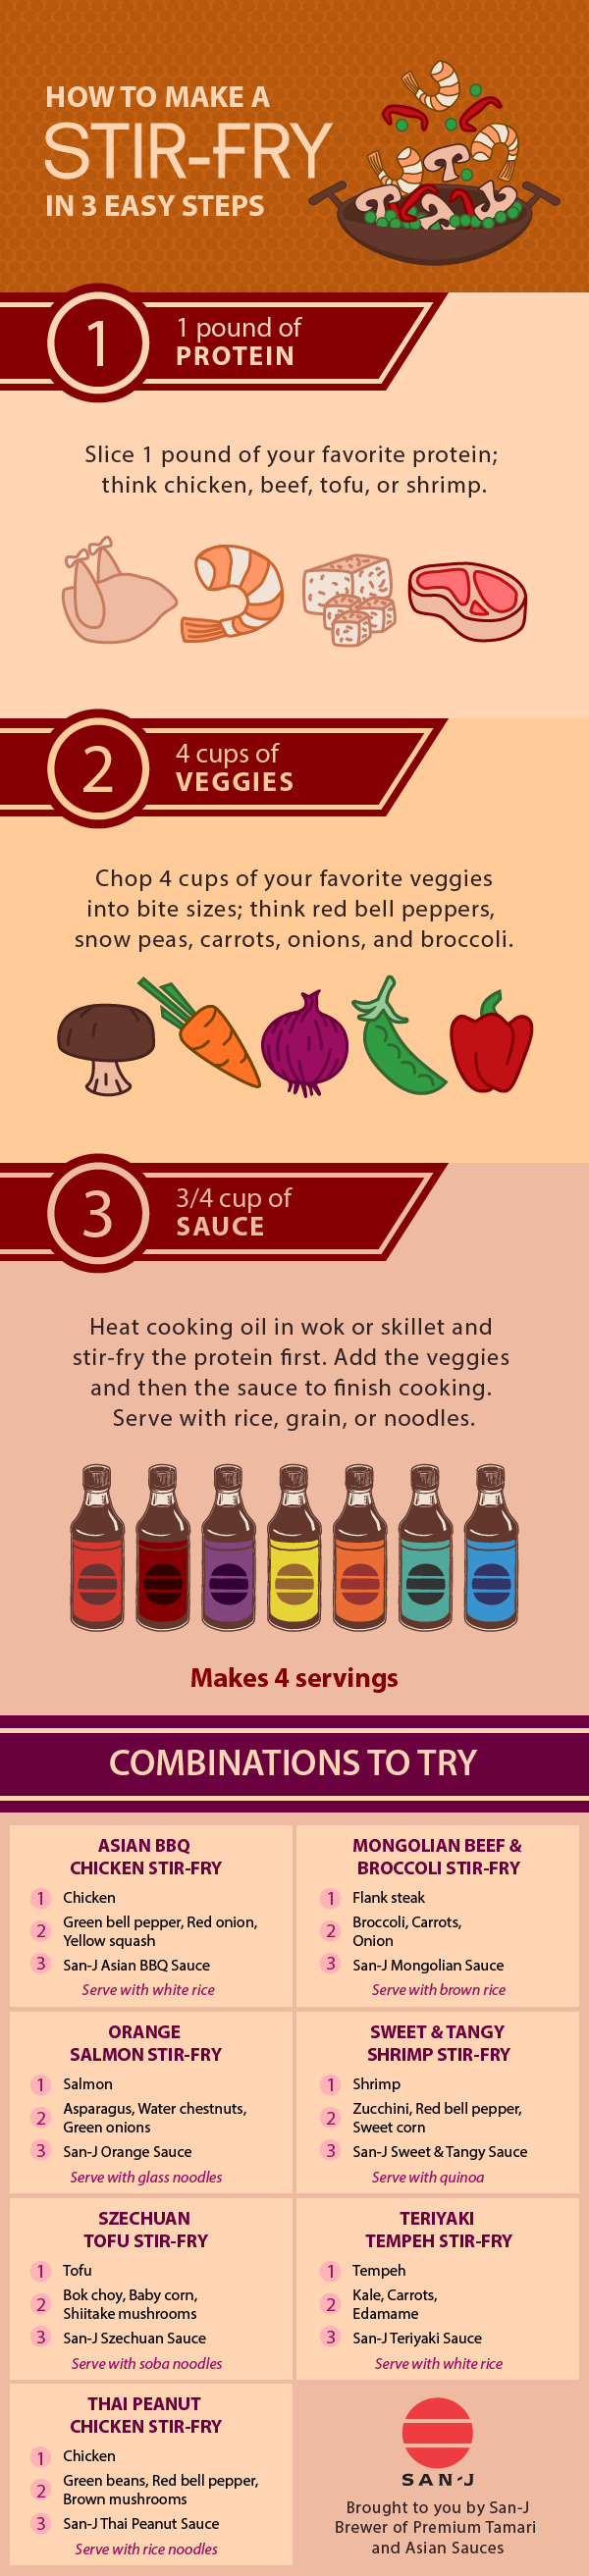
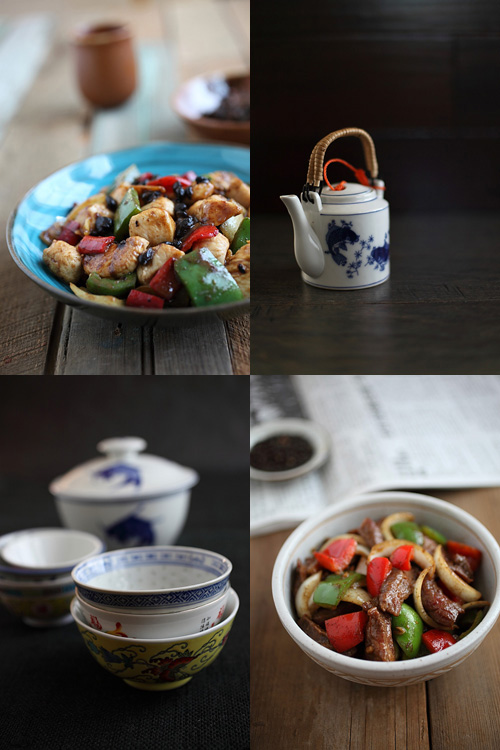
When making the perfect stir-fry, one of the most important steps is to study Asian stir-fry history and the best tips and tricks to make a delicious dish. Stir-fry is a classic staple of Chinese cuisine, which has grown in popularity and is enjoyed worldwide. A stir-fry is an easy-to-make and delicious meal to enjoy that also provides numerous health benefits.
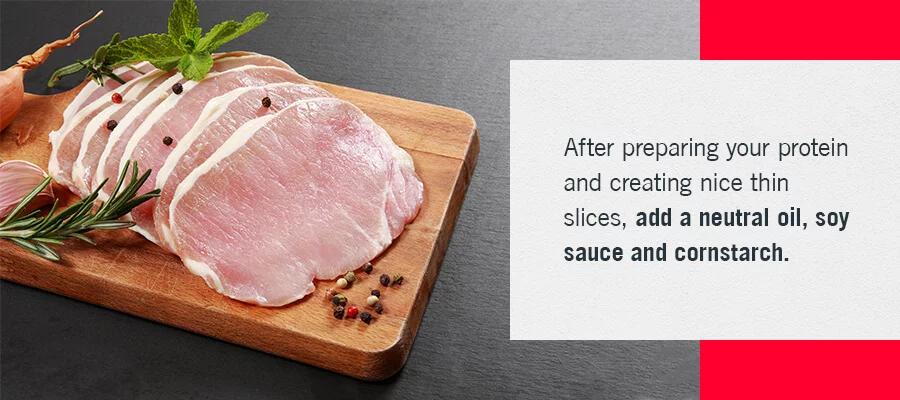
Stir-fry is exceptionally versatile, as you can add almost any protein or vegetable for a unique twist on this fan-favorite meal. You can make a vegetable stir-fry or replace meat in a recipe with tofu, seitan or other plant-based meat alternatives for a tasty meal. One of the most important steps to creating an authentic stir-fry is to cook this meal in a wok. Learn more about cooking stir-fry and standard stir-fry ingredients.
Stir-fry is a Chinese cooking technique that fries vegetables, meat or tofu in hot oil while being stirred in a wok. Stir-frying food is a technique similar to sautéing. Stir-fry is a versatile dish, allowing you to incorporate your favorite meats, meat alternatives and vegetables. The three main categories of standard stir-fry ingredients include proteins, vegetables and aromatics.
Proteins can be meat or plant-based, and some of the most popular include beef, chicken, pork, shrimp and salmon. Meatless protein options include tempeh, tofu and seitan. Common aromatics for stir-fry include ginger, green onions, garlic and shallots. You can use almost any vegetable in a stir-fry, including broccoli, snap peas, bell peppers, cauliflower, carrots and more.
In addition to being a delicious and easy-to-make meal, stir-fry is healthy and nutritious. A stir-fry often features nutritious vegetables and lean meats, providing your body with the nutrients it needs. Most people choose to serve stir-fry over white or brown rice, an excellent carbohydrate.
You can even swap out the oil you use for a healthier alternative, including grapeseed or avocado oil. Most foods in a stir-fry have a low-fat content and caloric value. Limiting the amount of oil you use when making a stir-fry can also reduce fat and calorie intake.
How to Make Stir-Fry
Stir-fry is a popular dish that is tasty, delicious and easy to make. A stir-fry is also a great way to incorporate a medley of vegetables into your meal. If this is one of your first times making a stir-fry, follow these simple directions for a tasty meal.
Select Your Ingredients
One of the first steps to making a stir-fry is ensuring you have all the ingredients you need. If you are following a special stir-fry recipe, you may want to stop at the store to pick up any ingredients you may need. One of the benefits of making a stir-fry is the dish is versatile, allowing you to create a tasty meal with the ingredients you have at home.
If possible, a stir-fry is always more delicious with fresh vegetables and ingredients. While you can use frozen or canned vegetables, fresh ingredients tend to provide a better taste to your meal. Once you are ready to cook your stir-fry, place all the ingredients on your counter and begin prepping.
Slice the Protein
When preparing your protein, slice or cut your meat or tofu into small pieces. The thinner your protein, the more quickly it will cook. If you add pork shoulder, steak or chicken thighs to your stir-fry, you should cut thinly against the grain. Scallops and shrimp are also delicious proteins for a stir-fry. While cutting your protein is an important step, you can keep smaller proteins, such as shrimp and scallops, whole because they are much more delicate than other protein types.
You should use extra-firm tofu if you plan to use tofu because softer tofu may be too delicate to stir-fry effectively. When preparing and cutting any protein for your stir-fry, the goal is to create small or thin pieces to achieve a tasty sear and flavor.
Coat Your Protein
After preparing your protein and creating nice thin slices, add a neutral oil, soy sauce and cornstarch. While coating your proteins in this mix, the soy helps to season the proteins, while the cornstarch helps the protein to brown more quickly and is essential for thickening the sauce later on. Finally, a neutral oil helps to keep the meats evenly coated and prevents sticking on your wok or pan.
Prepare Vegetables
After preparing your protein, you can start prepping your vegetables, which are a delicious addition to your dish’s nutrition, flavor and overall presentation. Because the meat is cut thin, choose vegetables that do not need a long time to get tender. Like your protein, slice and cut your vegetables into small or thinner pieces, maximizing surface area.
While you can add almost any vegetable to your stir-fry, some of the most popular vegetables include snap peas, asparagus and string beans. You can also choose bok choy and other greens as a delicious addition to your stir-fry. If you add denser vegetables, like carrots or cauliflower, cut them even smaller or cook them beforehand. Aromatics like scallion, ginger and garlic add a great base flavor to your vegetables.
Choose Your Sauce
A delicious stir-fry is not complete without the perfect sauce that provides delicious flavors and ties the dish together. An ideal sauce should complement and enhance the overall flavors of the dish without overwhelming specific ingredients.
Stir-fry is one of the dishes that are easier to make it gluten free. Make sure to choose certified gluten-free sauces to make a gluten-free stir fry as there may be hidden gluten ingredients in sauces.
Cook the Vegetables
Preheat your oil over medium-high heat in your wok or pan. Once your wok or pan is preheated, add your vegetables and aromatics and cook them for about three to five minutes, depending on the vegetable. Stir and shake the pan often to get an even sear on your vegetables and prevent burning one side.
Stir-Fry Your Protein
After you have cooked and set your vegetables aside, cook your proteins. If you are cooking meat, lay the slices down on a single layer to brown nicely for two to three minutes. You will want to get a nice sear and color on each side of meat, being careful not to overcook it. Turn or stir your meat to cook and brown the other side.
Once the fat renders and juices begin to pool at the bottom of the wok or pan, give your protein another stir and add your cooked vegetables back into the pan to combine the flavors. If you are cooking a plant-based meat alternative, like tofu, provide a nice golden sear before adding the vegetables back to your stir-fry.
Add Your Sauce
Now, it is time for the star of your dish to shine — your sauce! After selecting the perfect sauce for your stir-fry, add it to your protein and vegetables. When adding your sauce, you should make sure all of your ingredients are evenly coated and the sauce has thickened slightly. Thicken your sauce if needed with a cornstarch slurry. A cornstarch slurry can be made by mixing cornstarch with the same amount of water.
Plate and Enjoy
It is time to enjoy your hard work and taste the delicious flavors of your stir-fry! You can serve your stir-fry over white rice, brown rice, Japanese rice, quinoa or even glass noodles. Adding a simple garnish like chopped scallions can elevate your dish’s overall appearance and presentation. Dig in and enjoy your tasty stir-fry!
Choosing the right ingredients is essential to making a delicious, easy stir-fry. If your recipe calls for soy sauce, choose a high-quality, flavorful soy sauce for the most delicious meal. A high-quality soy sauce should have bold flavor and superior flavor-enhancing properties. Additionally, a soy sauce that is made of 100% soy and no wheat can have a richer and more complex flavor.
In addition to traditional soy sauce, you can choose a less-sodium soy sauce if you are conscious of your sodium intake. There are also organic, gluten-free soy sauce options available. In addition to your sauce, it is typically best to use fresh vegetables and meats for a truly delicious meal. If you use a meat alternative, such as tofu, you should use extra firm tofu when making a stir-fry.
2. Prepare Your Ingredients
One of the most important steps to making a delicious stir-fry is preparing your ingredients beforehand. While a stir-fry may be simple in terms of ingredients and steps, it happens fast. If you do not have all ingredients prepared and chopped before cooking, you may become overwhelmed and risk missing a step or undercooking a vegetable.
It is helpful to have all ingredients chopped and sliced before you start cooking. Any dry or wet ingredients should be measured out and set aside for when you need them. You will have to be ready to add ingredients quickly, so having them measured and set aside is extremely helpful. Once your pan is heated, you do not need to leave your spot, meaning all ingredients should be prepared and easily within reach.
3. Slice and Chop Ingredients
Slicing and chopping your vegetables and meats is essential to preparing your ingredients before cooking your stir-fry. When slicing and chopping your ingredients, the main goal is to create as much surface area as possible to provide a nice sear. When cutting your vegetables, you can slice them thinly or on a diagonal to increase surface area.
On the other hand, you should finely chop aromatics like ginger or garlic. Meats and proteins should be sliced against the grain to increase tenderness and flavor.
4. Use a Wok or Cast-Iron Pan
If you have a wok, you should always use this when making a stir-fry. Because a wok retains heat well and has a larger surface area, it is ideal for cooking the perfect stir-fry. A cast-iron pan is a great alternative if you do not have a wok. It is important to remember that you want the pan to remain hot and sizzling even when adding additional ingredients. Woks and cast-iron pans retain heat better than other pan types.
5. Preheat Your Pan
Preheating your pan or wok is an important step. You do not want to be ready to cook and add your ingredients to a cold pan. A higher pan temperature helps achieve a nice sear on the vegetables and proteins of your dish while imparting flavor to the ingredients.
Your pan should give off a nice sizzle and remain sizzling from the start of your cooking to when you take your pan or wok off the heat. To determine if your pan is hot enough, add a drop or two of water to your pan. If the water drop evaporates in a second or two, it is properly preheated. While preheating is effective, you do not want to burn your ingredients, so keep an eye on your heat.
6. Use High Smoke Point Oils
While you may be tempted to grab your bottle of olive oil for a stir-fry, this may not be the best oil for stir-fry. Instead, use a high smoke point oil. Because a stir-fry is cooked on high heat, a lower smoke point oil, such as olive oil, may be easier to burn, creating an unpleasant taste. Use grapeseed, canola, peanut, ghee or avocado oil.
Best Stir-Fry Variations
While traditional stir-fry is a delicious dish to enjoy, there are numerous flavors and ingredients you can choose from for a refreshing take on one of your favorite meals. If you are looking for a healthy stir-fry with soy sauce, orange sauce or other unique flavors, consider some of these stir-fry recipes:
Spicy Beef and Vegetable Stir-Fry
If you are a fan of traditional stir-fry but like a bit of spice and an extra kick in your meals, you may enjoy spicy beef and vegetable stir-fry! This deliciously bold recipe can be adjusted to fit your preferred spice level. You can also use fewer chili flakes for a milder stir-fry, or you can kick up the heat with a little extra spice if you prefer.
Spicy beef and vegetable stir-fry is flavored with red chili flakes, fresh ginger and Chinese five spice for a unique and zesty flavor. Chili garlic paste is also one of the main ingredients, largely responsible for the overall spiciness of your dish. This Tamari Lite stir-fry sauce recipe also calls for brown sugar for a little sweetness to balance the overall spice of the dish with half the sodium than regular Tamari.
Szechuan Tofu Stir-Fry
Szechuan tofu stir-fry is a healthy soy sauce stir-fry if you are vegetarian or looking for a plant-based meal. This dish is deliciously flavored with gluten-free Szechuan Sauce, letting you raise the heat with a tasty, tongue-tingling flavor. Szechuan sauce features notes of ginger, sesame, plum and a blend of spices along with Tamari Soy Sauce for a umami-rich flavor profile.
This dish is full of unique flavors, with shiitake mushrooms, bok choy, grapeseed oil and baby corn cobs. Of course, this delicious stir-fry would not be complete without golden brown tofu to complement the tasty vegetables. Add as much or as little Szechuan sauce to your stir-fry to achieve the perfect level of zing.
Sweet and Tangy Shrimp Stir-Fry
A sweet and tangy shrimp stir-fry is a great way to switch up your dinner, especially if you prefer sweet flavors rather than spicy. This stir-fry gets its tasty flavor from the gluten-free Sweet & Tangy Sauce. SAN-J’s Sweet & Tangy Sauce is inspired by Polynesian cuisine, making it a unique and exciting addition to any meal. This sauce is made of various spices, a blend of fruit juices and honey for the perfect smooth glaze.
The rich flavor of sweet and tangy sauce makes it the perfect addition to a tofu or shrimp-based dish. Along with sweet and tangy marinated shrimp, this stir-fry calls for slices of zucchini, red bell pepper and sweet corn for a delicious medley of vegetables. You can serve this shrimp stir-fry with a side of white rice, brown rice or even quinoa for a twist.
Hoisin Pork Stir-Fry
Hoisin pork stir-fry gets its unique flavor from gluten-free Hoisin Sauce, an excellent substitute for soy sauce in a stir-fry. Hoisin sauce is an ideal blend of sweet, savory and salty flavors and is a traditional Chinese condiment, ideal for an Asian stir-fry recipe. Hoisin sauce is made of ginger puree, brown sugar, garlic and a delicious blend of seasonings for a refreshing flavor.
Hoisin sauce pairs perfectly with pork tenderloin for this stir-fry dish. This stir-fry also calls for sliced onions, trimmed snow peas and sliced bamboo shoots and serves perfectly over white rice.
Thai Peanut Chicken Stir-Fry
Thai peanut chicken stir-fry gets its tasty flavor from Thai Peanut Sauce, which offers a splash of seasonings inspired by Thai cuisine’s rich and delicious flavors. Thai peanut sauce provides a sweet, spicy and nutty flavor for a mouthwatering stir-fry. While Thai peanut sauce features complex flavors, pairing this sauce with food is easy.
Thai peanut sauce is exceptionally versatile and complements pork, chicken, tofu and more. The flavors of Thai peanut sauce perfectly pull together the ingredients for this dish, including green beans, brown mushrooms and red bell peppers. After preparing your Thai peanut chicken stir-fry, serve it over delicious rice noodles.
Orange Salmon Stir-Fry
If you are a salmon lover, you may want to try orange salmon stir-fry for a unique meal. One of the main ingredients of this dish is Asian Orange Sauce, which introduces citrusy sweet flavors to any meal. Orange sauce features delicious spices and seasonings and a hint of Tamari Soy Sauce and is certified gluten-free.
Orange salmon stir-fry calls for salmon fillet along with fresh asparagus, water chestnuts and green onions for a refreshingly delicious taste. While you can serve orange salmon stir-fry over white or brown rice, it can be exceptionally delicious served over glass noodles.
Gluten-Free and Non-GMO Soy Sauce and Sauces
At SAN-J, we are dedicated to making and distributing high-quality soy sauce and other Asian sauces. The Sato family first began making miso and soy sauce in 1804. Eight generations later, we continue to brew the highest quality sauces from the finest soybeans for exceptional and unrivaled flavor.
Our Tamari Soy Sauce contains no wheat and is made of 100% soybeans for the best flavor possible, meaning our finished products contain more soy protein and complex flavors. Our brewing methods create authentic soy sauce and ingredients to be the perfect addition to your kitchen.
Fermentation is a technique that has been used to preserve foods and beverages long before refrigerators could do it for us. Through fermentation, microorganisms like yeast, bacteria, and fungi use organic compounds to produce alcohol and acids. Foods that undergo the fermentation process tend to take on added benefits, and fermented soy sauce is no exception.
Tamari is a type of Japanese soy sauce that is made using fermented soybeans. Tamari is typically darker in hue than typical soy sauces and has a strong umami flavor. Most Tamari is gluten-free, vegan and doesn’t contain wheat, making it an excellent ingredient in special diet recipes. Please check ingredients and certification seals on product labels to ensure if it suits your diet as some tamari brands can contain a small amount of wheat.
What Is the Tamari Fermentation Process Like?
As a Tamari brewer, we hold ourselves to high standards when it comes to the quality of our fermented Tamari soy sauces — that’s why we pay attention to every detail of our small-batch fermentation process.
SAN-J Tamari is made using only the highest-quality soybeans, which are soaked and cooked in large steam cookers. Once cooked, the soybeans are made into nuggets and coated with “seed koji,” a special type of mold imported from Japan that starts the fermentation process. The nuggets spend two days in a special temperature- and humidity-controlled chamber.
After two days, they develop a mold or koji, which is mixed with water and salt in fermentation tanks. At this stage, the koji is known as moromi. The moromi is carefully monitored and allowed to age for four to six months to reach its full flavor potential. It is then pressed and pasteurized before being bottled and shipped to your table.
How Tamari Fermentation Creates the Rich Taste of SAN-J Tamari
Understanding Tamari fermentation allows you to appreciate the rich taste Tamari has. During the fermentation process, soy proteins are broken down into amino acids, the building blocks of proteins. This gives Tamari Soy Sauce its rich and complex flavor, with hundreds of flavor components.
The amino acids produced during this Tamari fermentation process create a rich, carefully balanced and complex flavor. This process gives Tamari its flavor, which combines sweetness, sourness, saltiness, bitterness and umami. Umami refers to the Japanese idea of a savory, pleasant flavor and it can be found in Tamari, seaweed and some aged cheeses and meats. Tamari has a pronounced umami experience because of its soybean content and careful fermentation. SAN-J Tamari contains 18 amino acids including 9 essential amino acids.
Why Choose SAN-J Tamari?
SAN-J Tamari is brewed with 100% soybeans, using a brewing method that has been in our family for eight generations. Since it has no wheat— unlike typical soy sauce on the market—our Tamari has a large balance of soy protein, creating a rich and smooth taste.
Only our unique Tamari fermentation process can create the prized taste of SAN-J Tamari. The slow and careful process is what transforms the product into something new, much like the process of creating a fine wine. There is no way to add flavoring or take other shortcuts to create the balanced taste of SAN-J Tamari. It is time and fermentation which allows the proteins to break down into amino acids and allow the flavor to become richer.
SAN-J Tamari is brewed with no additives and no artificial preservatives, which helps the fermented soybeans’ authentic taste to shine through. Our unique process and commitment to quality allow us to create a Tamari that you can trust and use to enhance your favorite dishes. SAN-J Tamari is certified gluten free, vegan, kosher, Fodmap friendly, and Non-GMO Project verified. We also have organic and less sodium varieties.
How Tamari Can Elevate Any Dish
We brew our Tamari Soy Sauce with 100% soybeans and no wheat to bring on the richest flavors. Because SAN-J Tamari has a higher concentration of soy protein than most typical soy sauces, it contains over 30% more umami and embraces a richer, smoother, less bitter taste. The complex, savory flavors of SAN-J Tamari Soy Sauce make it ideal to enhance natural flavors of any ingredients.
With an unbeatable taste and countless benefits, you can implement Tamari into nearly any dish, including special diet recipes.
Upgrade Your Next Meal With Fermented Soy Sauce
If you’re looking for a sauce that embraces fermented deliciousness, try SAN-J Tamari Soy Sauce. Our fermented soy sauce brand is brewed using methods that have been passed down for over two centuries so that you can enjoy timeless rich flavors in every meal.
Organic vs. Non-GMO Soy Sauce: Is There a Difference?
Posted on: December 2, 2021
In a world of artificial flavorings and genetically modified products, it’s more important than ever to understand what’s in the foods we eat. Many people recognize the health value of non-GMO vs. organic foods, but not everyone can distinguish the differences between them. Though these certifications often go hand in hand, they don’t mean the same thing.
When it comes to purchasing soy sauce and other food products, it’s best to aim for organic and non-GMO soy sauce varieties. When you choose your foods with care and seek out nutritious options, you ensure that you can enjoy all of your favorite meals without compromising your health.
When inspecting your food labels, you’ve probably noticed that some products include both non-GMO and organic certifications, whereas others only feature one of the two. But what do these designations mean?
Non-GMO
The term “GMO” stands for “genetically modified organisms,” which are plants, animals or other organisms that have been scientifically modified to comprise genes that do not occur in nature. Products labeled “non-GMO” do not contain genetically altered materials that change the chemical makeup of food, meaning they are Non-GMO Project verified.
Because non-GMO products don’t rely on genetic modification, they minimize the risks that come with it. Non-GMO Project verified foods don’t contain harmful bacterias, toxins or synthetic herbicides.
Organic
Organic products are grown and processed according to the United States Department of Agriculture (USDA)’s federal guidelines regarding prohibited substances. Goods that earn the certified organic label are free of harmful pesticides, chemicals, herbicides, antibiotics, drug residue and other additives.
Here’s where the confusion often comes in regarding non-GMO vs. organic foods — products that are certified organic are also considered non-GMO due to their overlapping standards. However, this doesn’t necessarily mean that all non-GMO foods are organic since they may contain various pesticides, antibiotics and hormones that are not permissible for organic labels.
The bottom line is that foods can be organic, non-GMO or both, depending on the standards they adhere to, but each label is fundamentally different.
What Is the Non-GMO Project?
The Non-GMO Project is a nonprofit organization that aims to maintain and protect non-GMO food items. This group is famous for creating the Non-GMO Project Standard, a set of stipulations derived from a team of industry experts used to determine whether products are considered non-GMO.
The Non-GMO Project verifies products through on-site inspections and annual audits conducted by independent technical administrators and inspectors involved in the Non-GMO Project Product Verification Program. When a product is confirmed non-GMO, it is marked with the Non-GMO Project Verified butterfly label to indicate that it adheres to the Non-GMO Project Standard.
Purchase Non-GMO Soy Sauce at SAN-J Today
If you’re looking for a soy sauce that’s organic and non-GMO, choose SAN-J. Our soy sauce hits the mark on numerous benefits and certifications, such as gluten-free, vegan, kosher and plant-based. At SAN-J, our non-GMO soy sauce is made with no artificial preservatives, colors, flavors or additives, so you can enjoy a meal that’s flavorful and health-conscious.
Use our product locator to find SAN-J soy sauce in a store near you!
When visiting a Japanese restaurant, you may have seen noodle soups on the menu with the option of udon or soba noodles. What’s the difference? While both udon and soba noodles — and even ramen — are often used interchangeably, there are actually quite a few differences between all three.
Udon noodles are made by combining salt, water and wheat flour. These white Japanese noodles are sold frozen, fresh or dried.
While shelf-stable udon noodles are a convenient option, frozen or fresh varieties have an exceptionally thick, chewy texture. Make sure to jump on the opportunity to buy them when possible!
What Kind of Dishes Are They Used For?
Udon noodles are known for their pleasant, mild flavor, and they are usually served in a noodle soup in a light broth. They can also be served cold with a dipping sauce or made into a mouthwatering noodle stir-fry.
Cooking Recommendations for Udon Noodles
Recipes that call for udon noodles — such as this delicious Japanese Noodle Soup recipe — usually outline the best cooking recommendations.
Here’s how to cook both fresh and dried udon noodles so that they retain their thick, bouncy, irresistible texture:
Bring noodles to a boil in well-salted water until just tender — about eight minutes for dried, three minutes for fresh.
Drain noodles and rinse them briefly under cold water before using them in a soup or another dish. This helps remove some of the surface starch and prevents the noodles from sticking together.
Soba Noodles
Soba noodles are made from buckwheat and are known for their robust and nutty flavor.
While some buckwheat noodles also have some wheat flour in them, you can find pure buckwheat soba noodles that are gluten-free, stronger in flavor and undeniably delicious.
Dried soba noodles closely resemble flat spaghetti and are usually dark brown to light beige in color.
What Kind of Dishes Are They Used For?
You can use soba noodles in salads, tamarind tofu dishes and soups. You might also try tossing them in with toasted sesame seed sauce and crunchy vegetables for a delectable treat.
Cooking Recommendations for Soba Noodles
Looking to make the perfect soba noodles? Try the following:
Bring a pot of lightly salted water to a boil.
Fill a large bowl with ice water and set aside.
Boil the soba noodles for three minutes or until tender.
Drain noodles in a colander and set the strainer in ice water.
Toss the noodles to cool and drain.
Shake out excess water and transfer noodles to a bowl.
Ramen Noodles
Ramen noodles are made from water, salt, various vegetable oils, flavorings and wheat flour.
Ramen noodles can be straight, curly, hard, soft, thin, thick, flat or round. Toppings commonly include vegetables, meats, oils, seasonings, sauces and dairy. Many ramen dishes are flavored with either soy sauce or miso. Two delicious ramen noodle recipes to try are Plant Based Miso Ramen Bolognese and authentic Japenese Hiyashi Chuka.
What Kind of Dishes Are They Used For?
Known around the world as noodles served with vegetables and meat in a hearty broth, ramen is a popular choice for anyone who can get their hands on the dish.
Cooking Recommendations for Ramen Noodles
Before you start cooking, make sure you have a pot big enough to hold 10 times the weight of the noodles you’re about to boil.
To cook ramen noodles well, the cooking water temperature needs to be at boiling.
Cooking ramen for exactly two minutes is the standard for firm noodles. However, cooking them for just 30 seconds more will give you a softer noodle. For hot soup noodles, ramen noodles need to be boiled a bit longer.
Differences Between Other Types of Noodles
Other types of noodles such as chow mein and lo mein have differences as well. These types of noodles vary in texture, taste, and the dishes they are primarily in.
Easy Tamari Soy Sauce Recipes for Your Favorite Japanese Noodles
At SAN-J, we want you to dress your noodles with sauce varieties that only add to their flavor. Check out our SAN-J Tamari Soy Sauce featured recipes for delectable ways to dress your noodles and vegetables. Our soy sauce is certified vegan and contains zero by-products or animal products.
Find More Healthy Recipes You Can Make With Soy Sauce
Thanksgiving is right around the corner, which means it’s time to thaw the turkey and gather ingredients for your Tamari turkey brine.
A soy sauce brine is a unique way to unlock and enhance the delicious flavor that’s already in your turkey. By creating a simple turkey brine with soy sauce, you can add your own twist to this Thanksgiving staple.
Why You Should Brine
Brining serves as a safeguard to avoid a tough, dried out bird. A brine is a simple mixture of salt and water to help the turkey absorb moisture and seasoning.
We’ve enhanced the typical approach to brine in this recipe, minimizing the amount of salt and allowing Tamari Soy Sauce to bring an umami flavor to the dish. The resulting soy turkey flavor is subtle and will blend perfectly with your traditional Thanksgiving menu.
Follow these tips for the juiciest Thanksgiving turkey.
One Day Before Roasting
Whether this is your first time making a Thanksgiving turkey or you’re a seasoned pro, you probably know that it’s important to start prepping before the big day. The turkey needs at least 8 hours to brine, so you’ll need to start the process the day before you plan to roast it. If you want crispier skin, start the process two days before roasting to allow a 24-hour drying period.
Gather Your Brine Ingredients
Next, you’ll want to make sure you have all of the ingredients you need to create your soy sauce turkey brine.
A soy sauce brine is easily customizable. For a 16- to 24-pound turkey, start with these simple ingredients:
Tamari is a type of soy sauce that is made with all soybeans or a small amount of wheat. At SAN-J, we make our Tamari with 100% soy. By using Tamari Soy Sauce, you can enhance your turkey with all of the flavors of typical soy sauce without gluten — so everyone at your Thanksgiving table can enjoy your dish. You’ll also end up with a richer and more complex flavor.
This step is where the opportunity for customization comes in. After you gather the three primary ingredients, consider boosting the flavor of your soy brine with some herbs, aromatics, and sugar. These ingredients are optional, so pick and choose your favorite combination, or simplify the recipe by skipping them entirely:
1/2 cup sugar
Orange or lemon, wedges or peels
Red pepper flakes
Garlic cloves or powder
Peppercorns
Ginger root or powder
Sage, dried or fresh
Thyme, dried or fresh
Bay leaves
Whole cloves
You can use granulated sugar, coconut sugaror any liquid sugar. You can also use sugar alternatives to boost the sweetness of your dish while sticking to a healthier lifestyle. Try molasses, agaveor maple syrup. For the best results, consider choosing a mix of sweet, salty, savory and spicy additions to your soy sauce brine.
Prep Your Equipment
It’s also important to prepare your equipment ahead of time. Start by gathering your brining container and making space in the fridge or cooler.
You need a container large enough to hold your turkey submerged in 2 gallons of water. You’ll also need to keep it cool while it soaks at least 8 hours or overnight.
Here are a few options, depending on where you have space:
A large lidded stock pot or a food-safe bucket with lid
The crisper drawer from your fridge, lined with a large brining bag or oven-roasting bag (you’ll need to tie this bag once it’s filled)
A cooler with ice
How to Brine a Turkey With Tamari
Once you’ve gathered your ingredients and prepped the space and equipment, you can start the process of brining your turkey. Follow this step-by-step guide for the best results:
Remove the neck and giblets from the turkey. Rinse the turkey well, inside and out. Place the turkey breast side down in your prepared container.
In a medium saucepan, heat a small amount of the water, about 1 cup. Add the salt and heat until dissolved. Once dissolved, remove from heat and add the bottle of Tamari Soy Sauce. Then, if using, add sugar and/or aromatics of choice.
Pour the brine solution over the turkey, and then pour the remaining cold water over the turkey.
Cover and place in the fridge to brine for 8 hours or overnight.
Once brining is complete, rinse the turkey with cold water, then pat dry with paper towels. Next, thoroughly clean your sink to get rid of any residue from the raw turkey.
You can then roast the turkey or loosely cover it and return it to the fridge for another 24 hours until ready to cook. Waiting another 24 hours will result in crispier skin.
Roast the turkey as usual. Check the turkey’s temperature about an hour before the end of cooking time, as brined turkeys may cook more quickly.
If you’re not familiar with the roasting process, you can check out this recipe for Honey Soy Glazed Turkey with complete roasting instructions.
Helpful Tips for a Successful Turkey
Now that you know how to make a simple turkey brine with soy sauce, you can follow these helpful tips to ensure you get it right on the big day.
1. Start With a Basic Bird
Since brining will add salt to your turkey, you’ll need to start with one that hasn’t been pre-seasoned. Check the label to make sure nothing has been added to the turkey and that you’re getting just the meat and bones.
2. Make Sure There’s Enough for Everyone
When determining the size of turkey you need, estimate 1 pound per serving. One pound per person may sound like a lot, but this measurement accounts for bone weight. Plus a generous measure is always good to allow for leftovers — a staple of the Thanksgiving tradition.
3. Thaw Before Brining
Start with a thawed turkey. Thaw in the fridge, allowing 24 hours per 4 pounds of turkey. That’s 4 days for a 16-pound turkey. A partially thawed turkey will also brine well, continuing the thaw while soaking.
4. Keep Your Turkey Covered
Make sure the soy brine solution completely covers the turkey. If more solution is needed, prepare at a ratio of 1/4 cup salt to 4 cups water. If the turkey starts to float, use a dish to weigh it down.
5. Keep It Cool
Keep the turkey chilled at all times during the brining process, either in the fridge or an iced cooler. If you live in a colder region, consider setting the cooler outside.
6. Don’t Overdo It
Do not brine your soy turkey for over 24 hours. More than this will make the meat too salty.
7. Plan Ahead for Crispier Skin
If you want the turkey to have crispier skin, after rinsing the brine and patting the turkey dry with paper towels, place back in the fridge loosely covered to dry for 24 hours.
8. Boost the Flavor With Bone Broth
After you roast your turkey, save the bones to make bone broth. You can use this broth to make gravy or keep it as a base to make soup with your delicious Thanksgiving leftovers.
You open a recipe and realize it calls for soy sauce. But before adding the soy sauce you have in your pantry, stop. Is it the type of soy sauce that would work best to bring out the dish’s flavors? Is it the most healthy soy sauce or the best non-GMO soy sauce you can find?
If you’ve always thought that soy sauce was a single condiment, get ready for a fun, delicious education.
Below, we’ll explore some basic soy sauces that originated over the past 3,000 years in Asia. Choose the one you want to try the next time you need a splash of soy sauce to liven your meal.
Soy Sauces From China
Authentic Chinese soy sauces tend to be made mostly from fermented soybeans with few add-ins except for the bacterial cultures. Pure soybean, sometimes called “thin,” soy sauce is light in color and mellow in flavor. It’s perfect when you need to add a slightly salty twist to your cuisine. It’s also a wise choice for almost any Chinese dish that requires soy sauce but gives no other explanation.
Dark Chinese soy sauce provides less saltiness than the thin type. Not only is it fermented longer than thin soy sauce, but it may have a few sweeteners added to give it a complex “tang versus sweetness” overtone. A dark soy sauce is ideal if you want to dash it on at the final moments to breathe an extra level of taste into your food.
Soy Sauces From Japan
For Japanese recipes such as sushi and teriyaki, you’ll want to grab a bottle of shoyu. Don’t worry, though — it’s still soy sauce. Shoyu is just the Japanese counterpart to China’s soy sauce.
The main difference between Chinese and Japanese soy sauce is that the Japanese chose to add wheat to at least two kinds of shoyu. The ratio of soybeans to wheat varies depending upon the desired soy sauce outcome. However, the inclusion of wheat in the brewing process leaves the soy sauce with a natural sweetness.
Like Chinese soy sauce, Japanese soy sauce comes in both light and dark choices. Light Japanese soy sauce has been augmented by a bit of rice wine, leaving it characteristically pleasing and intense. You certainly don’t need to overdo it with light soy sauce. On the other hand, dark Japanese soy sauce is rich in body but plays lightly on the tongue. It’s probably the most readily available commercial type of Japanese soy sauce in American grocers. Use it to breathe excitement as a marinade or dipping sauce.
Two final types of Japanese soy sauce are tamari and shiro. Tamari, which lacks wheat, offers an assertive tang and makes a terrific sauce for dipping. Truly wheat-free, organically produced and non-GMO tamari is especially sought-after by people following gluten-free diets.
Shiro is simply white soy sauce, created by adding a higher proportion of wheat to the soybeans during fermentation. Because white Japanese soy sauce doesn’t add any coloring to food, it’s often favored by cooks who want to deliver taste without making light-colored foods, such as fish, an unnatural hue.
The Best Soy Sauce for Your Kitchen
Which soy sauce belongs in your cool, dark pantry or refrigerator? That’s up to your taste buds and preferred recipes.
Ideally, though, you’ll want to pick a soy sauce with no added MSG and as pure in flavor as you can get, such as SAN-J Tamari Soy Sauce and other Asian Cooking Sauces. After your purchase, experiment with several kinds of soy sauce as you test new healthier snacks and dishes at home.
Follow us on Facebook to receive a deal on your next purchase.
Are you looking to experience the renowned flavor of our Tamari Soy Sauce or our other Asian Cooking Sauces for less? We have a deal for you! Whether you’re trying our products for the first time or you’re restocking your favorite soy sauce varieties, our coupons are convenient ways to save.
For your next home-cooked meal, try adding the rich taste of our Tamari in the recipe. Our sauce varieties offer a delicious accent to foods that the whole family will enjoy. Pour out a serving to dip your seafood or sushi, cook a tasty stir fry or drizzle onto a plant-based dish or salad. To cut down on meal prep time, pick up a bottle of our Tamari during your next grocery store trip and save with our soy sauce coupons.
If you want to receive deals directly within your inbox, be sure to sign up for our newsletter. We’ll also send our latest news to your email.
What Products Can You Save On?
Print out our coupons to obtain our premium Tamari Soy Sauce for less. Use our soy sauce in the many ways your family already loves with this condiment. Our Tamari and Shoyu also comes in organic, distinguished by its blue label and USDA Organic and Quality Assurance International certification mark. Plus, making smarter choices for your diet is easier with coupons for our Reduced Sodium Tamari Soy Sauce varieties — all the flavor with less salt intake.
The possibilities are endless with our discounts for Asian Cooking Sauces. You’ll find delectable flavors for your meals, ranging from sweet and tangy to spicy and savory. They make easy marinades, tender glazes for meats and vegetables and will serve as multiple seasonings for your recipes, so you spend less time measuring and mixing.
More special deals are on the way and will appear on this page, so check back often!
Taste the Difference of SAN-J Tamari Soy Sauce
Our Tamari is carefully brewed from a method that has been passed down through eight family generations. We eliminate the wheat content that’s found in other soy sauces, and that makes the taste accessible to those who are looking for gluten-free products. Our Tamari is certified gluten-free by the Gluten-Free Certification Organization. This technique of using 100% soybeans originates from early Japan, and today, it helps bring authentic Asian cuisine to your home kitchen.
We believe it’s valuable to share a pure product with health-conscious eaters nationwide. Our soy sauce is created with no flavor or color additives and no added MSG. It is also verified by the Non-GMO Project. Additionally, with SAN-J, you’ll find products that are certified kosher by the Orthodox Union and certified vegan by Vegan Action as well.
There are so many reasons and ways to enjoy SAN-J products — we invite you to take advantage of our exclusive deals and experiment!
Find a Store With Our Product Locator
See where you can redeem your soy sauce coupons discover the varieties at your local market with our product locator tool.
We hope you love the taste of our products as much as you appreciate the savings. Feel free to message us if you have any questions about our products. We’d be glad to answer!
Rice is a staple plant-based food consumed all over the world. It’s enjoyed on its own as a meal and pairs with many dishes like stir fry and salads. Better yet, it’s easy to make, whether boiled in a pot or steamed inside your rice cooker.
If you cook at home, this source of carbohydrates and protein goes great with anything from meat to vegetables, and there are many varieties of rice to choose from. We’ll help you get started telling them apart so you can get cooking on some amazing new rice dishes.
Different Types of Rice
The length of the grain influences the texture and composition of the rice, so that influences your recipe. Rice grows in three different size varieties:
Long grain: When milled, these grains remain over three times as long as they are wide. The rice stays dry, fluffy and separated after cooking.
Medium grain: Measuring twice as long as they are wide, medium grain is a bit more moist and clumpy.
Short grain: Short grain is less than twice as long as the width of the grain and tends to stick and cling together.
White rice: This long grain rice has a mild taste, so many at-home cooks enhance the flavor of rice with seasonings and sauces. Milling and polishing removes the hull, bran and germ for a shiny look. Since the process takes out some nutritional value, white rice is often enriched with B vitamins and iron.
Brown rice: This variety comes from the same grain as white rice, but is processed less and keeps its bran layer for a slightly nutty flavor. As a whole-grain rice, it also has denser nutrient content for your dishes. But since the bran can spoil, try to use it within six months of purchase.
Black rice: Sometimes called forbidden or purple rice, this type is soft and especially nutty. Its distinct color is a good contrast with lighter rice in a pilaf.
Wild rice: This rice variety is actually a species of aquatic grass, but the cultivated seeds are prepared and eaten. It has tougher texture but loads of nutritional benefits, including proteins and B vitamins.
Great-Tasting Rice Recipes
A serving of this grain is beneficial on its own, but the real value and taste comes by pairing rice with other foods. Try out our favorite recipes featuring rice:
Orange Turmeric Wild Rice Salad: A perfect recipe for trying the exotic flavor profile of wild rice with a medley of vegetables, seasonings and a tangy hint of our Orange Sauce.
Rice is rather inexpensive and you can buy it in bulk. Keep a few of these helpful guidelines in mind when making your purchase:
What’s the length of the grain? Remember, short grain’s stickiness is good for creamier dishes, while long grain is lighter and drier, clumping less with other ingredients.
Is it whole grain? Non-white rice will give you more nutrients because of the bran, so you can try choosing whole grain if you want diverse nutrition in your meals and a distinct taste.
Is it “instant rice”? This means the rice has been pre-cooked and dehydrated, so it requires a brief reheat at your home.
We hope you’re eager to explore the possibilities of rice in all kinds of cuisine! For more ideas, explore our recipes section!
SAN-J is renowned for making rich tamari soy sauce, but there are many ways to love the taste of every meal you cook at home with a line of Asian-style sauces.
Each variety of cooking sauce uses SAN-J Tamari Soy Sauce and a careful blend of ingredients, inspired by the best of Asian cuisine. These products are also certified to be gluten-free, kosher and made with no GMOs. They make it easy to eat healthy and enjoy the full flavor of your food regardless of dietary restrictions and preferences.
From Hoisin Sauce to Szechuan Sauce and more, try using these selections in meal prep or as a complement to foods that could use a little lift.
Your choice of sauce in a stir fry affects both the meats and vegetables, so it’s important as a home cook to get it right. Luckily, SAN-J Cooking Sauces complement all of it. Whether you are going strictly vegetarian or adding beef, chicken, shrimp or pork to your stir fry, you can sample a distinct regional style, whichever sauce you add.
2. Marinades
Let the seasonings of SAN-J Cooking Sauces infuse with your food overnight in the refrigerator or even for just a few minutes, and you’ll notice the difference. Classic marinades like SAN-J Teriyaki Sauce pair perfectly with chicken or tofu, soaking up the great taste throughout the cooking process.
3. Salad Dressings and Vinaigrettes
The same-old oils and processed dressings can ruin the healthiness of a nutritious salad, but you can try a drizzle of our products over your bowl of greens or noodles. Many plant-based meals can become sweet, savory or spicy with a touch of non-GMO SAN-J sauce.
4. Glazes
Before you serve your dish, try completing it with a light slathering or a coat of cooking sauce. SAN-J Orange Sauce brings out restaurant-quality flavor, especially on chicken. And the secret to a mouthwatering glaze on grilled steak or pork? SAN-J Korean BBQ Sauce delivers all the smoky and tender highlights of ribs or flanks.
5. Dips and Condiments
You can pour SAN-J Cooking Sauces right from the bottle to dunk your preferred foods with chopsticks or your fingers. They’ll accentuate the taste of seafood and rolls. Or, they spread on sandwiches to liven up layers of meat, cheese and veggies. The versatility of these sauces is vast and open to your imagination.
Quick, Delicious Methods to Experiment With in Your Cooking
With SAN-J Cooking Sauces, it’s easy to bring many world flavors to your home kitchen without having to travel far or spending money or time on prepping ingredients. If you’re looking for a diverse new take on your chosen foods, all it takes is a splash or a dab of one of our sauces.
Browse the complete list of SAN-J Cooking Sauces online and discover your go-to choice. Don’t forget you can also explore all the recipes that use these sauce products to find a variety of both traditional favorites and bold twists on Asian-inspired cuisine.
Most people picture soy sauce as one simple condiment for dipping sushi. However, many types of sauces are soy-based and widely used in Asian-style cooking. Variations of soy sauce are used throughout Asia, and each one contributes a slightly different taste, color and consistency to a dish depending on which type you use.
From aminos to tahini, you see lots of soy sauce-related terms tossed around online and feel overwhelmed by the sheer amount of soy-based sauces and alternative options available nowadays. And although each one of these Asian soy-centered sauces offers its own unique flavor, Tamari sales have surged in recent years as many began to turn to it as a gluten-free soy sauce. But as you see the word “Tamari” popping up more and more among your favorite recipe blogs, you may be left wondering: What is Tamari sauce used for?
No need to despair — we have compiled an ultimate guide to soy sauce to clear up any confusion and help you navigate the grocery aisles with ease the next time you’re cooking stir-fry. This extensive collection of soy sauce information will walk you through the different versions of soy sauce by exploring how each kind is made and what it has to offer in regard to taste and texture. We’ll also cover the potential dietary benefits, how each sauce is most commonly used, differences in cost and how you can best incorporate the sauce into your cooking.
Types of Soy Sauce
There are several main types of soy sauce to be aware of:
Tamari: A type of soy sauce made from fermented soybeans, with no or minimal wheat content. Tamari has a richer, more complex flavor compared to regular soy sauce.
Shoyu: The most common type of soy sauce, originating from China. Shoyu is brewed from a mixture of soybeans, wheat, and other grains.
Dark Soy Sauce: A thicker, darker soy sauce that is aged longer. It has a more robust, slightly sweet flavor.
Light Soy Sauce: A thinner, lighter colored soy sauce that is saltier and more delicate in flavor.
Shiro (White) Soy Sauce: The lightest variety, made mostly from wheat rather than soybeans.
To keep this handy soy sauce manual as streamlined as possible, Tamari will serve as our baseline for comparing other types of soy sauce.
Tamari is a type of soy sauce made from miso paste, a fermented soybean paste. Dating all the way back to the seventh century, the protein-rich liquid that accumulates as miso ripens was labeled Tamari, meaning “that which accumulates,” and quickly became known for its tasty cooking properties.
The process of making Tamari soy sauce, known as “brewing,” involves pressing the liquid that flows from miso paste as it ages, which could take up to six months. Unlike most other variations of soy sauce, no other ingredients go into producing Tamari, making it a 100% soy-based sauce.
What Is Tamari Soy Sauce Used For?
Before diving into what each type of soy sauce brings to the table, we have to get comfortable with our standard of measurement — Tamari. In this section, we’ll find out what kinds of recipes Tamari is used for and why it’s such a good all-purpose soy sauce to keep in your cupboard. But first, we must understand exactly what Tamari is and explore its taste profile as well as the potential benefits of using the sauce.
What Does Tamari Taste Like?
Because it is brewed differently from any other kind of soy sauce, Tamari has a distinct taste that is mellow and slightly more nuanced than other soy sauces. Tamari’s central characteristic is umami, the fifth and least known foundational flavor. Umami is the savory, rich flavor most commonly associated with the “mouthwatering” flavor found in beef, cooked mushrooms and aged cheeses. Because of its unique but subtle taste, umami is frequently used to give vegetarian and vegan dishes a “meaty” flavor.
What Does Tamari Look Like?
Some soy sauces are lighter or darker than others, which indicate their flavoring. Here are the main categories of coloring to keep in mind when considering soy sauces:
Dark: Strongest aroma, most common type
Light: Milder aroma, made from more soybeans than wheat
Shiro: Lightest in color, made from mostly wheat
Tamari: Darker in color with faint aroma, made from only soybeans
Why Use Tamari?
Tamari offers a wide range of vitamins and minerals, including manganese and iron, as well as antioxidant phenolic acids and protein. As a fermented food, Tamari contains nutrients like peptides that can boost your cardiovascular, digestive and immune systems. These health benefits combined with Tamari’s umami flavor make it a deliciously nutritious way to work more plant-based protein into your diet.
Additionally, as we just learned above, Tamari is made purely from soy. This means that Tamari soy sauce does not contain any gluten, making the condiment extra appealing to those who must adhere to a gluten-free diet. Even though Tamari is typically gluten-free, make sure you always double-check the label to ensure you are completely avoiding gluten.
SAN-J Tamari Soy Sauce is certified gluten-free by the Gluten-Free Certification Organization and non-GMO verified by the Non-GMO Project.
How to Use Tamari
Now that you understand the what and why behind Tamari soy sauce, it’s time to find out how you can use Tamari. Both Tamari’s flavor and consistency lend themselves to supporting other flavors to help them stand out more. Essentially, Tamari is the unsung hero working hard behind the scenes to enhance a dish’s main spotlight ingredients. Tamari never truly gets the recognition it deserves but without it, many dishes would go from stellar to mediocre.
More specifically, you can use Tamari whenever you would typically use Chinese soy sauce — in everything from dips, dressings and marinades to stir-fries, soups and stews. Don’t be afraid to get creative with your Tamari use and do something outside the box like season roasted nuts with the sauce for either topping salads or future snacking. If you need some culinary inspiration, here are some of our favorite Tamari recipes to get your creative juices flowing:
Don’t forget, Tamari’s balanced flavor and smooth consistency make it perfect as a dipping sauce all on its own. Many people prefer Tamari to Chinese soy sauce with their sushi because Tamari’s less salty flavor complements the fish, rather than overwhelming the dish with salt. Use as a condiment straight up with noodles, dumplings, tofu, fish and more.
Tamari vs. Soy Sauce
The main difference between tamari and regular soy sauce is that tamari is brewed solely from fermented soybeans, while soy sauce contains a mixture of soybeans and wheat. In fact, up to 50% of soy sauce’s total makeup can be wheat. This also means that regular soy sauce is not gluten-free, whereas Tamari is.
Tamari also tends to have a richer, more complex umami flavor compared to the sharper, saltier taste of soy sauce. It’s less likely to contain additives as well. Soy sauce is generally thinner and saltier, while tamari has a thicker, darker consistency.
The sauces’ difference in brewing methods also gives Tamari 37% more soy protein than Chinese soy sauce. Because Tamari soy sauce has more soy protein to get broken into complex amino acids during its fermentation process, it ends up being slightly richer in protein and taste than regular soy sauce.
In general, Tamari is less likely to contain additives than regular soy sauce, which often includes preservatives like sodium benzoate on its ingredients list. Tamari’s shorter ingredient list — water, soybeans and salt — lends itself to the sauce’s thicker consistency, darker color and richer flavor when compared with Chinese soy sauce.
Tamari’s less salty composition makes it great to cook with when you don’t want an overpowering taste to disrupt the harmony of your dish and steal the attention away from the recipe’s main flavors. Specifically, Tamari performs well in dressings and dipping sauce recipes by contributing an underlying umami flavor to the dish without overwhelming your palate. An added bonus of Tamari is that its flavor doesn’t flash off under high temperatures like regular soy sauce does due to its higher alcohol and esters content, which makes its flavor fizzle under high temperatures.
While Tamari should be used for any Japanese cooking, Chinese soy sauce, of course, goes best with traditional Chinese recipes. Chinese soy sauce also functions well in stir-fries when a more powerful boost of salt is needed to season otherwise dull rice or vegetables.
Despite these distinct differences, Tamari and Chinese soy sauce are quite similar and can easily substitute for each other in recipes if you don’t have one or the other on hand. You might notice a slight change in flavor, but the substitution will by no means ruin the dish.
If you are in the market for soy sauce, keep in mind that Tamari soy sauce is usually priced slightly higher than Chinese soy sauce because it is made from only soybeans, which are more expensive than wheat.
Shoyu vs. Tamari
The main difference between shoyu and tamari is the ratio of soybeans to wheat. Shoyu contains a higher proportion of wheat, while tamari is made from soybeans.
This results in shoyu having a lighter, more delicate flavor, while tamari is richer and more concentrated. Tamari also tends to be darker in color. Both can be used interchangeably in many recipes, but the subtle flavor differences are worth noting
Tamari vs. Dark Soy Sauce
The key differences between tamari and dark soy sauce lie in their composition, flavor profiles, and nutritional content. Tamari is brewed solely from fermented soybeans, while dark soy sauce contains a blend of soybeans and wheat.
This results in tamari having a more complex, nuanced umami flavor, compared to the saltier and slightly sweeter taste of dark soy sauce. Tamari is also naturally gluten-free, while dark soy sauce may contain wheat. Additionally, tamari is thicker and less salty than dark soy sauce. Both work well in marinades, stir-fries, and dipping sauces, but the distinct flavor profiles are worth noting. Tamari is a better choice for those avoiding gluten.
Tamari vs. Aminos
Liquid aminos are a common soy sauce substitute for those who are on a gluten-free diet. As the name suggests, liquid aminos are concentrated amino acids derived from either soybeans or coconuts. The biggest difference between Tamari and liquid aminos is that tamari is fermented, while liquid aminos are not.
Because amino acids are the building blocks of protein, which is essential to the human diet, liquid aminos boast many health perks, especially to anyone sticking to a plant-based diet. But because liquid aminos do not go through fermentation, they do not offer the same digestive and gut health benefits that Tamari does.
However, the option of liquid aminos produced simply from coconut tree sap and salt makes the condiment a good alternative for anyone trying to avoid soy for health reasons. As a grain-free sauce, coconut liquid aminos are a popular choice for those in the paleo community as well.
In regard to taste, Tamari and aminos are extremely similar, with each of the condiments presenting a strong, savory umami flavor. Overall, the taste of liquid aminos is somewhat muted in comparison with Tamari, which offers a fuller flavor. The coconut version of liquid aminos, in particular, is more mild, far less salty and even slightly sweet.
Although liquid aminos are not quite as bold or bursting with flavor as Tamari, they still share its dark color and “meaty” flavor, making it both a great substitute for traditional Chinese soy sauce and a valuable ingredient to keep in the pantry for anyone who follows a vegan, vegetarian, gluten-free or paleo diet. Because liquid aminos are essentially interchangeable with both Tamari and regular soy sauce, you can use it in stir-fries, on veggies or on its own as a condiment.
When shopping for liquid aminos, be aware that you may have to go to a health store to find them and they are typically more expensive than Tamari or regular soy sauce.
Soy Sauce vs. Liquid Aminos
Liquid aminos are a popular soy sauce alternative, made by extracting amino acids from soybeans or coconuts. Unlike soy sauce, liquid aminos are not fermented, so they don’t have the same depth of flavor. However, they are a good gluten-free option.
Liquid aminos have a more muted, slightly sweet taste compared to the bold umami of soy sauce. They can be used as a 1:1 substitute, but the flavor profile will be a bit different.
Tamari vs. Tahini
Tamari and tahini have many more differences than they do similarities. Whereas Tamari comes completely from soybeans, tahini is made purely from sesame seeds. Unlike Tamari, tahini involves no fermentation. Instead, it is produced by grinding sesame seeds into a spreadable paste.
As an oily paste, the texture of tahini is closer to that of a nut butter, whereas Tamari’s sauce-like qualities give it a much thinner consistency. Along with texture, the tastes of Tamari and tahini vary as well. As opposed to Tamari’s umami flavor, tahini has an earthy bitterness from the ground sesame seeds.
Tahini is popular in Middle Eastern and Greek cuisine, while Tamari is a Japanese staple. So although both are used as key dip ingredients, tahini most often appears in thicker dips, such as hummus, rather than thinner sauces as Tamari does. Being a heavier substance than Tamari, tahini offers a different variety of health benefits, such as healthy fats and anti-inflammatory compounds.
After this long list of differences, it may seem like Tamari and tahini would never get along. But opposites attract in this case, and mixing tahini with Tamari in various dipping sauce recipes produces a delicious result! For example, replacing the peanut butter with tahini and Chinese soy sauce with Tamari in your traditional spring roll sauce recipe provides a refreshing twist on a classic.
In the health world, tahini and Tamari find more common ground. Both have gluten-free ingredients, are filled with nutrient-rich minerals and serve as a great source of plant-based protein. These characteristics make Tamari and tahini great additions to vegan, vegetarian and gluten-free grocery lists.
Because tahini and Tamari are vastly different products, it is difficult to compare their prices. If you are interested in trying tahini in your next recipe and looking to save some money, you can easily make your own batch of tahini by buying sesame seeds, toasting them to bring out their nutty flavor and then blending them in your food processor along with some oil and a pinch of salt.
Tamari vs. Tamarind
Despite their similarly spelled names, Tamari and tamarind are nothing alike. As opposed to Tamari’s Japanese roots, tamarind is a product of the pulpy seed pod plucked from an evergreen tree originally from eastern Africa.
Coming from opposite sides of the globe, tamarind and Tamari’s differences don’t stop there. The flavor of tamarind is sweet yet tart, and it is a star ingredient in Indian dishes, such as curries and chutneys. In Pacific Rim countries and the tropics, tamarind is used interchangeably with lemon juice — a much different substitute than that of Chinese soy sauce.
Whereas Tamari is sold in a bottle as a liquid, you will find tamarind offered in many different forms. The concentration of tamarind is contingent on what form you purchase it in, with most recipes calling for a paste or liquid substance to serve as a citrus juice-like component.
Tamarind powder and seedless tamarind concentrate paste come in jars, while dried “bricks” of tamarind are small, pressed flats of the seed pod’s pulp, and give you the option of seeds or seedless. Depending on where you’re shopping, you may even be able to purchase the seed pods fresh and unprocessed.
Yet another difference between Tamari and tamarind is tamarind’s lack of fermentation. Because tamarind is a spice, it is merely picked from its tree and sold without going through any changes to its chemical makeup regardless of how concentrated its form.
Once again, an array of differences makes it hard to do a direct price comparison between tamarind and Tamari. Bear in mind that the price of tamarind may vary depending on what form you buy it in and how much extra effort you have to put in to achieve a workable, diluted substance.
In summary, tamarind is absolutely nothing like Tamari and the two are only ever confused for each other because of their similar names. Now that you know more about them and their differences, you will never get them mixed up at the supermarket.
Make SAN-J Tamari Your Go-To Soy Sauce
If you’re looking for a flavorful gluten-free soy sauce option to elevate your cooking, look no further than SAN-J Tamari Soy Sauce. Our Tamari soy sauce is brewed with 100% soybeans and no wheat. This method of brewing results in a higher concentration of soy protein, which produces a markedly richer and smoother taste than regular soy sauce.
We offer a wide range of Tamari Soy Sauce products, including organic and reduced-sodium — all made without additives or artificial preservatives. Verified by both the Gluten-Free Certification Organization and Non-GMO Project, SAN-J Tamari Soy Sauce qualifies as a certified gluten-free, non-GMO, kosher and vegan product, so you can feel good about adding it to your dishes and serving it to your family.
Now that you’ve read up on your soy sauce varieties and recognize the benefits of Tamari, use our product locator to help you find the SAN-J Tamari Soy Sauce closest to you or you can also buy our products online. With a precise brewing method that’s been passed down for over 200 years through eight generations, SAN-J Tamari Soy Sauce is a tried and true family favorite.
And once you’ve mastered incorporating the flavors of SAN-J’s Tamari into your day to day cooking practices, check out SAN-J’s other gluten-free products, including Asian cooking sauces, soups and brown rice crackers, to stay on the cutting edge of cooking.
7 Things You Didn’t Know You Could Make With Soy Sauce
Posted on: August 17, 2021
Do you only think of sushi and stir fry when you think of soy sauce? If sushi night is the only time you bust out your bottle of this sauce, you’re missing out on a ton of flavor opportunities. By working soy sauce into your regular ingredient rotation, you can give your meals the flavor boost you’ve been craving.
To help you become a soy sauce expert, we’ll explain what soy sauce is generally used for, what to eat with soy sauce, and some lesser-known soy sauce uses. Then, get inspired with a few specific recipes with soy sauce.
Soy sauce is packed with umami flavor from fermented soybeans and contains a substantial amount of salt which makes it the perfect condiment for just about anything that needs seasoning. Overall, soy sauce provides a dish with salt, umami and a hint of sweetness, making it suitable for a wide variety of recipes. For those with dietary restrictions, you can use low-sodium soy sauce or Tamari, which is the Japanese version of soy sauce that contains no wheat and is typically gluten-free.
Once you’ve found the right soy sauce for you, you’ll be ready to start adding it to all your recipes. You can begin by slowly adding soy sauce a dash at a time to any dish that could benefit from a bit of complexity.
What Is Soy Sauce Used For?
Soy sauce is an extremely versatile ingredient that can be used as a table condiment or added to dishes during cooking for extra flavor. The ingredient is made from fermented soybeans, giving it a strong umami taste from the fermentation process. Umami is the fifth basic taste, placing it alongside sweet, sour, bitter and salty. Soy sauce offers a unique taste that can’t be created by mixing other flavors.
The taste of umami can be generally described as savory. It is that deep, rich flavor that comes with foods such as meat, cheese, tomatoes, mushrooms and seafood. Umami is a complex taste that adds an extra layer of flavor to whatever dish it’s in.
These are the three primary properties of umami taste:
Spreading across the tongue: Umami coats the tongue and is experienced all across the taste buds.
Lingering: The taste of umami lingers and has a noticeable effect on the aftertaste of food.
Promoting salivation: Umami prompts the mouth to produce more saliva than the other basic tastes do.
You might already know about cooking with soy sauce in applications like:
1. Meats
Soy sauce has a ton of flavor benefits to offer meat. Essentially, soy sauce will help your meat taste meatier. Because protein already has a considerable amount of umami flavor, adding soy sauce can make it a savory sensation. Soy sauce can also help your piece of protein take on an appetizing burnished, caramelized color.
Adding soy sauce to your meat is easy, too. If you’re prepping a piece of pork, beef, chicken or fish in a wet marinade, all you have to do is pour a bit of soy sauce into the mix. The ingredient will do wonders to balance out the sharpness of the acidic elements of your marinade, such as vinegar or citrus.
2. Vegetables
Soy sauce adds a deep, savory flavor to vegetables that beautifully complements their light, fresh taste. Mixing a few drops of soy sauce into a vinaigrette and using it as a salad dressing will give a simple green salad multiple layers of richness and flavor complexity. Just make sure to add the soy sauce before any other seasonings so you avoid over-seasoning your salad.
Soy sauce can also enhance cooked veggies. Tossing some vegetables in soy sauce, spices and cooking oil before roasting them will encourage better browning and give them an umami boost much like it does for meat. Try drizzling a bit of soy sauce into the pan when you’re deglazing caramelized onions for a savoriness you need to taste to believe.
3. Soups and Stews
Ever been disappointed by a thin, tasteless broth? You never have to worry about dull soups and stews again when you add soy sauce to the recipe. Seasoning your broth with a touch of soy sauce will give the soup a richness that brings out its inherent flavors. The ingredient goes especially well with thick stews and other meaty braises because it adds another layer of depth and complexity to an already savory dish.
What Can I Make With Soy Sauce?
Because soy sauce’s saltiness and umami flavor make it such a versatile ingredient, you can use it to whip up a seemingly endless list of culinary creations. Here are 15 things to eat with soy sauce in the kitchen:
1. Use It as a Salt Substitute
Thanks to its sodium content, soy sauce makes a great stand-in for salt in many recipes. Using soy sauce in place of salt can elevate your cooking game by bringing more to a dish than mere saltiness. The fermented product’s umami-rich flavoring gives dishes an extra depth and deeper color than salt would. Next time you go to add a sprinkle of salt, opt for a splash of soy sauce instead.
2. Turn It Into a Marinade
Soy sauce is a key ingredient for a fast and easy meat marinade. From steaks and pork chops to chicken breasts and salmon fillets, nearly any type of meat can benefit from marinating in a bit of soy sauce. You can either use straight-up soy sauce as your marinade or mix it with other ingredients, such as garlic, fresh herbs, apple cider vinegar or citrus zest. Seasoning soy sauce can create a more complex marinade. Check out our savory Honey & Tamari Chicken recipe that creates a marinade using our gluten-free tamari soy sauce.
If you do decide to marinate your meat in soy sauce, only do so for about half an hour. Any longer and the meat may become too salty. Blot the meat dry before sautéing or searing it to prevent any splattering or sticking.
3. Mash It Into a Compound Butter
Just as everything is better with butter, every butter is better with soy sauce. Combining soy sauce and softened butter creates a savory, umami-flavored spread that’s easy to melt over vegetables, resting meats or grains to instantly give them a delectable sauce. From swirling the compound butter into rice or noodles to sautéing ingredients in it to give basic recipes an extra kick, there are limitless uses for soy sauce butter.
Mix some soy sauce into room temperature butter — start with a quarter of a cup per pound of butter and adjust to taste. Then roll it into a log in plastic wrap and place it in the freezer. Once the compound butter log is frozen solid, you can slice off coins to cook with as needed.
4. Add It to Gravy
If you want a quick and easy way to add rich flavor to your gravy, stir in a splash of soy sauce. It won’t take much to make your gravy’s flavor pop, so start by adding in just a touch of soy sauce, taste-testing the gravy and adding more as needed.
5. Make a Savory Pasta Sauce With It
Soy sauce is a star pasta sauce ingredient. You need little more than soy sauce, sesame oil and some scallions to create a mouth-watering stir fry sauce. The soy sauce gives the noodles a delicious, salty umami taste while the sesame oil deepens the dish’s flavors and allows the sauce to cling to the pasta better.
Although soy sauce is traditionally used to make Asian-inspired noodle dishes, you can add a dash of it to other types of pasta sauces to give them a flavor boost. For instance, including a bit of soy sauce in a Bolognese brings out the natural umami flavor of the tomatoes and meat. Stirring some soy sauce into a classic white sauce like béchamel will also elevate its flavor profile by enhancing the nuttiness and creamy texture.
6. Create an All-Purpose Dipping Sauce
Of course, soy sauce is an excellent dipping sauce all on its own. But when you combine soy sauce with ingredients like fresh ginger, rice wine and scallions, you can concoct a show-stopping sauce. When you create your dipping sauce, let the mixture sit for a while to meld the flavors. On the off-chance you have any leftover dipping sauce, you can store it in your refrigerator for days in an airtight container.
7. Poach Poultry
You can easily poach chicken in a soy sauce and water mixture to whip up a delicious low-fat meal. Pour about a cup of soy sauce into the pot for each liter of water before submerging the chicken in the mixture and turning up the heat. Add some extra seasonings like lime juice or ginger to the water to give the meat a bit of extra flavoring.
8. Baste a Roast
You can use soy sauce as a delicious baste for red meats, such as a beef roast or ribs. Along with giving the meat some added umami taste, the soy sauce will turn the dish a lovely mahogany color. To baste the meat, brush the soy sauce onto the beef before roasting and throughout the cooking process to ensure extra flavor and even browning.
If you want to jazz up your plain soy sauce baste a bit, mix it with orange marmalade to give it a burst of citrus flavor. Brush the mixture over the meat the same way you would a regular soy sauce baste until the roast is cooked through.
9. Make a Miso Glaze
Embrace soy sauce’s Asian roots by combining it with miso to make a mouth-watering Japanese-style glaze. Miso is a traditional Japanese seasoning that also stems from fermented soybeans and gives dishes a deep, salty and savory flavor. Mix miso paste, soy sauce and a bit of honey together to produce a sticky glaze that’s perfect for coating fish, tofu, vegetables and most meats.
10. Boost Your Burgers
Because the umami flavor of soy sauce complements the natural richness of red meat so well, adding soy sauce to your ground meat blend can make your burgers taste gourmet. Simply mash a bit of soy sauce into the burger meat mixture before forming the meat into patties and tossing them on the grill. The result will make your burgers even better than restaurant-quality.
11. Let It Dress up Potatoes
Potatoes are the ultimate side dish to enhance a meal, and nothing punches up potatoes quite like soy sauce. Simmer cubed Yukon Gold potatoes in soy sauce with a bit of sugar and spices like chili pepper flakes to make the perfect accent dish. The soy sauce and spices infuse the potatoes with flavor while they soften and get a nice crisp from the skillet. Be sure to stir the potatoes occasionally throughout the cooking process so they don’t stick to the pan.
12. Stir It Into a Hearty Stew
In some Asian countries, soy sauce is regularly sweetened with sugar to produce a sweet, salty and bold cooking solution. Create your own sweetened version by blending equal parts soy sauce and molasses. Bring the mixture to a boil and simmer it until viscous before allowing it to cool.
This DIY slightly sweet soy sauce is perfect for stirring into a pork stew because the taste brings out the meat’s natural umami flavors. Try adding your sweet soy sauce creation to beef stew, chilis and other soups with red meat as well. You can also use soy sauce instead of salt when making stock, which will lend a deeper flavor to your stews and other dishes.
13. Roast Snacking Nuts
For a tasty and convenient snack, toss a variety of raw, unsalted nuts in soy sauce and chili powder, then roast until golden. The resulting snack mix will be your new favorite treat.
14. Bake With It
Soy sauce excellently complements the yeasty flavor of many doughs. Brush a bit of soy sauce onto either homemade rolled pizza dough or a store-bought pizza base before topping the crust and popping it in the oven. The hint of soy sauce will absorb into the dough as it bakes to bring out its yeasty qualities.
15. Enrich Your Desserts With It
If you really want to wow dinner guests with a sweet grand finale, use soy sauce as your secret dessert ingredient. Thanks to its deep savory flavor, soy sauce can be incorporated into a variety of desserts to balance out their sweetness and give them a more complex flavor profile. For example, pouring a bit of soy sauce into a chocolate brownie mixture before baking can intensify the cocoa flavors.
Adding some soy sauce to other baked goods’ batters, such as cakes or blueberry muffins, can also enhance their sweetness. The ingredient can also complement frozen desserts. Mixing just a dash of soy sauce into softened store-bought vanilla ice cream before putting it back in the freezer will bring out the butterscotch flavor of the frozen treat.
7 Unique Recipes Using Soy Sauce
Now that you have a general idea of what types of delicious dishes you can use soy sauce to create, start experimenting in the kitchen with specific recipes. If you know how to use your soy sauce right, you can sneak the condiment into each dish you serve, from appetizers to desserts. Your dinner guests will never suspect that soy sauce is what makes the flavors in your dishes unforgettable.
To get your creative juices flowing, here are seven recipes that use soy sauce in a surprising way:
1. Creamy Asparagus and Pea Soup
On its own, a vegetable puree soup like pea soup can be a bit bland. This creamy asparagus and pea soup recipe solves that problem by adding SAN-J Tamari Soy Sauce to the broth, which gives the soup a savory, umami-rich flavor. While the soy sauce deepens the soup’s flavor, the star ingredients of asparagus, baby peas, leeks and lemon juice keep the soup tasting fresh and light overall.
Along with elevating the soup’s flavors, the soy sauce nicely complements the soup’s creamy texture, which comes from the incorporation of coconut milk. Beginning a dinner with this refreshing soup is a great way to set the tone for a delicious meal.
2. Bacon-Wrapped Stuffed Dates
If you’re looking for an appetizer that’s a bit richer than soup, these bacon-wrapped stuffed dates are the perfect find. The addition of savory SAN-J Tamari Soy Sauce to this decadent dish perfectly melds with the sweet Medjool dates, salty bacon and tangy goat cheese. Crunchy chopped pecans are the perfect finish to complement the crispy bacon, chewy dates and smooth, creamy goat cheese.
3. Roasted Spring Vegetable Cobb Salad
This fresh take on the traditional Cobb salad relies on the savory, salty flavor of SAN-J Tamari Soy Sauce to boost its flavor. The salad recipe uses soy sauce to blend up a delicious sweet and savory dressing and to glaze the radishes, beets, artichoke hearts and asparagus spears. With richer ingredients like turkey bacon and goat cheese to counter the variety of veggies, this Cobb salad is delicious and filling enough to serve as an entrée.
4. Savory Tamari Meatloaf
Meatloaf and soy sauce make the perfect match because the savory taste of the condiment brings out the umami-rich flavors of the meatloaf. To make savory Tamari meatloaf, all you have to do is sauté a few ingredients and toss everything together in a large mixing bowl. Then pop it in the oven for an hour and a half to let the delicious flavors develop. The bold umami flavor of SAN-J Tamari Soy Sauce will do the rest of the work to make your meatloaf taste like fine dining.
5. Beef Stroganoff
Beef stroganoff presents the perfect opportunity for adding in some umami-enriching soy sauce. SAN-J Tamari Soy Sauce makes this beef stroganoff recipe irresistible by bringing out the savory flavors of the dish’s sauce and complementing the creamy texture. The beef and mushrooms benefit from an umami boost while the extra creaminess allows the sauce to coat the noodles more thoroughly.
6. Chocolate Pecan Pie
A double dose of SAN-J Tamari Soy Sauce makes this chocolate pecan pie recipe the sweetest way to end any dinner. First appearing in the pie filling mixture, soy sauce underscores the chocolate’s rich, earthy flavors to make the pie a more well-rounded dish. Then a splash of soy sauce enhances the homemade whipped cream, which balances out the powdered sugar to create the ideal fluffy topping for this picturesque pie.
7. Tamari Ice Cream With Toasted Pecan Marshmallows
No pie is complete until it’s served à la mode. Take your chocolate pecan pie to the next level by pairing it with this Tamari ice cream with toasted pecan marshmallows recipe. Simply combine your favorite brand of vanilla ice cream with a bit of SAN-J Tamari Soy Sauce, chopped pecans and toasted mini marshmallows to make a frozen delight that belongs beside pecan pie.
Use SAN-J Tamari Soy Sauce to Create Your Next Culinary Masterpiece
Before you start getting creative in the kitchen, you need to make sure you have top-quality soy sauce. At SAN-J, we provide you with a range of soy sauce styles to choose from so you can find the perfect product for your personal tastes and dietary preferences. From dipping sauces to desserts, all your favorite dishes will transform with our soy sauce varieties.
Are you a seafood enthusiast? If your favorite part of going out to eat is ordering a beautifully seared tuna ahi tuna steak, it might be time you learn how to cook ahi tuna yourself. Once you’ve mastered how to cook ahi tuna on your own, you can make any night a special occasion!
Below, you’ll discover everything you need to know before heating your stovetop, including what ahi tuna is, how to cut fresh ahi tuna, and how to cook it to perfection. Keep reading to get one step closer to having a gourmet ahi tuna steak tonight.
Ahi tuna is a meaty fish you can enjoy in many different ways. Most cuts of ahi tuna are less expensive than bluefin tuna, which has a similar texture and flavor profile to ahi tuna. Ahi tuna is also fairly easy to find and is most likely available in your local grocery store’s frozen or fresh seafood section.
As a type of tuna, ahi tuna is divided further into two separate species — yellowfin and bigeye. While bigeye tuna is known for its rich, buttery taste and smooth texture, yellowfin tuna is recognized for its milder flavor and firmer texture. These characteristics make bigeye tuna steaks perfect for grilling and thin yellowfin tuna slices popular for sashimi.
Why Cook Ahi Tuna
Now that you know what ahi tuna is and where to find it, you might be wondering why you should buy it. Ahi tuna is a great fish to have on hand because it’s tasty and versatile. A simple cut of ahi tuna tastes delicious all on its own, mixed into a salad or worked into a complex recipe. When you purchase ahi tuna, there’s no limit to what you can create with it.
Here are some ahi tuna recipe suggestions to get your creative culinary juices flowing:
Poke bowl: Ahi Tuna Poke bowls are all the rage right now. These delightful poke bowls typically consist of rice or another grain base, diced raw fish and various fresh toppings like tomato slices, mango chunks, shredded carrots, edamame and seaweed salad. The ingredients are usually doused in a delicious sauce and garnished with something crunchy like sesame seeds or nori.
Steak-style: Ahi tuna is a hearty enough meat that you can grill it up just as you would a steak. The beauty of ahi tuna is its tender cut, so make sure you don’t overcook your tuna steak, leaving it dry and tough.
Fish tacos: You can make some fantastic fish tacos with ahi tuna. The tastes of ahi tuna pair well with many traditional taco toppings, such as cilantro, red onion, avocado and salsa. Ahi tuna goes exceptionally well with fruit-based salsas like a tropical pineapple salsa.
Salad: Thin slices of ahi tuna steaks can quickly become the star of any salad. The mild fish goes well with many mainstay salad ingredients, including most fresh veggies, dried fruits, nuts, seeds and dressings. Placing pieces of ahi tuna on top of your spinach, arugula or other salad greens is a great way to add some protein to your meal.
Citrus fruits: If you want to keep your tuna recipe easy or just start with a small appetizer, you can simply serve slivers of ahi tuna with sliced citrus fruits, such as grapefruit, blood oranges and mandarin oranges, along with a light vinegarette. The sharper flavors of citrus fruits contrast nicely with the mild taste of tuna.
Roasted veggies: If citrus fruits aren’t in season, you can enjoy your ahi tuna alongside roasted vegetables. In particular, a cut of ahi tuna tastes delicious with roasted asparagus, green beans, sweet potato, cauliflower or beets.
Tuna burger: Jazz up your traditional burger night and keep your taste buds guessing by swapping your usual beef patty for ahi tuna. This fresh change will lighten up your meal while satisfying your burger craving.
Experimentation is key when trying new foods, so feel free to explore different ahi tuna dishes when you’re on your way to finding your favorite.
Health Benefits of Ahi Tuna
Along with being delicious, ahi tuna is nutritious. In fact, working ahi tuna into your regular diet comes with a range of health benefits. Check out five health advantages of eating tuna below.
Boost your vitamin B12: Ahi tuna is an excellent source of vitamin B12, which is a key vitamin for making DNA. In addition, vitamin B12 helps your body form new red blood cells and prevents you from developing anemia.
Reduced risk of heart disease: Tuna has high levels of omega-3 fatty acids, which help decrease low-density lipoprotein (LDL) cholesterol and omega-6 fatty acids that can build up inside the heart’s arteries. Getting more omega-3 is linked to lower rates of cardiovascular disease, including heart attacks.
Minimize vision problems: Tuna’s omega-3 fatty acids also appear to positively impact eye health. Specifically, omega-3s contribute to the retina’s overall health, so tuna is a top food many optometrists recommend.
Promote weight loss: Ahi tuna is a lean meat, which means it’s relatively high in protein while being low in calories. The combination of these qualities means ahi tuna keeps you full longer and prevents you from eating more. Swapping red meat for lean fishes like tuna may help you lose weight faster than you would otherwise, depending on your other health habits.
Ahi Tuna Nutrition Information
In addition to the health advantages listed above, ahi tuna is full of other essential vitamins and minerals. Here’s a breakdown of the main nutrients found in ahi tuna:
Vitamin D: Tuna is one of the best dietary sources of vitamin D, making it an excellent food for promoting bone health, ensuring optimal growth and development for children and strengthening the immune system against sicknesses.
Phosphorus: Phosphorus is another bone-friendly nutrient you can find in ahi tuna. Phosphorus is essential to bone health because your body uses the mineral to generate new bone tissue.
Iron: Iron is crucial for transporting oxygen and carbon dioxide. Not getting enough of this vital mineral may result in anemia.
Vitamin B6: This B vitamin is another crucial nutrient for fending off anemia. Getting enough vitamin B6 in your diet is critical for helping your body properly process fats, sugars and protein. This vitamin also aids in the growth and development of your brain, nerves and skin.
Selenium: As your body digests the ample amount of protein found in ahi tuna, it gives rise to individual amino acids used to produce proteins needed for tissue strength, along with hormones and enzymes vital for cell function. Ahi tuna’s high level of selenium helps activate many of these enzymes, which can help your body control new cell growth and maintain proper blood vessel function.
Potassium: The potassium found in ahi tuna supports nerve and brain function. Potassium is an electrolyte that assists in nerve communication by helping your nerves to conduct electricity.
Iodine: Iodine is a chemical element the body needs for making hormones but can’t produce on its own. You can get some iodine from eating tuna, which will help your thyroid function smoothly.
How to Cut Fresh Tuna
If you’re brave enough to try cutting fresh tuna on your own, you’ll need to know the proper technique. Once you’ve bought your beautiful ahi tuna fish, you can start prepping it for cooking. Even if you plan on enjoying your ahi tuna raw, you can still follow the five steps below to cut your ahi tuna like a certified sushi chef.
1. Remove the Tuna’s Collars and Head
Begin by laying the fish on its side with its belly facing you. Use the back of a sharp knife to feel for the hard, scaly material running along the lateral, spanning from the pectoral fin to the tail. Take the knife and start cutting the hard material away from the ahi tuna, beginning a little less than halfway up the tail and cutting toward the pectoral fin. Make sure you don’t cut into the fish, but lightly shave the scales away from the surface of the fish’s flesh while tugging on the pectoral fin.
After reaching the fin, you can start cutting into the tuna’s shoulder. Slice from the top of the head and around the collar in the direction of the belly. Once you’ve completed that cut, flip the ahi tuna over and repeat the same cut on the opposite side.
After cutting around the collar on the other side, you’ll be ready to cut through the fish’s spine. Hit the back of the knife with the palm of your hand to cut through the tuna’s soft bone. A light pull should be enough to detach the head from the rest of the fish. Then, you’ll be able to cut the collars free from the head.
2. Slice Away Any Hard Material Along the Spine
Once you’ve successfully removed the head and collars, lay your ahi tuna upright on its belly. Be extremely gentle while doing so to avoid applying more force than the fish’s own weight on its belly, which you can easily destroy with too much pressure.
Holding onto the ahi tuna by the dorsal fin, start to slice away the tough scale material running along the back of the fish. Just like you did with the lateral line material leading to the pectoral fins, pull slightly upward on the dorsal fin as you cut away the material. Keep cutting all the way to the head.
3. Remove Loins and Lower Loins
Now, you can lay the ahi tuna back down on its side and slice through the entire lateral line all the way to the bone. Cut the loin from the fish’s upper rib bones. Your knife should scrape the ribs — you’ll be able to feel the tip of the knife hit the spine. While gently pulling the loin toward you, sever anything still connecting the loin to the spine. Remove and reserve cold.
To get rid of the lower loins, turn the ahi tuna around so its tail is toward you. With a firm grip on your knife, cut the rib bones that secure the lower loin and belly onto the fish’s carcass. Remove the tail end of the lower loin by cutting slightly above the middle of the fish from its tail to its cavity opening.
4. Repeat on the Other Side of the Fish
Once you’ve removed the loin and belly, flip the ahi tuna over and repeat the process set out in step three.
5. Prepare and Store Your Ahi Tuna Filets
Now that you’ve removed the lower loin from the tuna, you can cut the fatty belly away. Trim away any rib bones remaining on the fish’s lower loin. You can either cut out the bloodline immediately or just before using the tuna.
Skin all your filets and reserve cold. Make sure you trim away any tough tail ends as well as soft front ends. To store your ahi tuna for a day, wrap it in sushi paper and place it on a tray in the fridge. For longer-term storage, wrap the ahi tuna in sushi paper, vacuum seal it and freeze the fish as cold as possible.
How to Cook AHI Tuna Steak
Now’s the time to start the cooking process. While ahi tuna can be a mouthwateringly tasty fish, how you cook it makes all the difference. When properly seared or served raw, ahi tuna tastes more tender, mild and oily. However, ahi tuna cooked medium can taste more like fishy cardboard.
The most reliable cooking methods for producing perfectly prepared ahi tuna are baking, grilling or sauteing a filet in a skillet. For the best results, you’ll want to season or marinade your ahi tuna before cooking and sear it on the stovetop. This section will go over everything from seasoning and searing your tuna steak to specific ahi tuna recipes.
How to Season Ahi Tuna
Before tossing your tuna in the skillet, you need to know how to prepare your ahi tuna steaks. Make sure you marinate it and sprinkle it with your favorite seasonings. Seasoning your tuna steak beforehand will allow the ahi tuna to absorb more of the marinade’s flavors and make for a more delicious steak.
If you’re not sure what flavors to add to your ahi tuna, consider any of these tasty options:
Salt and pepper: Never underestimate the seasoning power of a little salt and pepper. A sprinkle of each is enough to bring out the ahi tuna’s natural flavors without overshadowing its mild taste. As a bonus, coating the seasoned ahi tuna in sesame seeds before searing it gives the filet a crunchy outer crust.
Wasabi paste and soy sauce: Wasabi paste is a classic ahi tuna seasoning. Mixing wasabi paste and soy sauce creates a lovely marinade of savory, salty and slightly spicy flavors. Use SAN-J Shoyu to give your tuna steak a more elevated taste. Or you can try our classic Tamari Soy Sauce and 50% Less Sodium Tamari Soy Sauce.
Tamari: Tamari has a umami-rich and more complex taste than typical soy sauce. A dash of SAN-J Tamari will be enough to take your ahi tuna steak to the next level. SAN-J Umami Tamari Splash is another perfect way to add excitement to your dish with boosted flavors.
Teriyaki sauce: Whether you’re crafting a teriyaki poke bowl or just crave that signature teriyaki taste, marinating your ahi tuna in a bit of SAN-J Teriyaki Sauce before cooking it will give it a mouthwatering flavor.
Olive oil and minced jalapeno: Do you want to give your ahi tuna a bit of a spicy kick? All you have to do is marinate the tuna steaks in olive oil and minced jalapeno before cooking them.
Orange sauce: For the ultimate tuna and fruit combination, marinate your cut of ahi tuna in a light coating of SAN-J Orange Sauce to infuse it with some citrus flavor.
Sweet and tangy sauce: If you want to tone down the sweetness of your fruity sauce, SAN-J Sweet and Tangy Sauce is the perfect solution. With this marinade, you’ll get hints of fruit juice with some Asian spices to balance it out.
How to sear AHI tuna steak in a pan
The best way to cook ahi tuna is to sear it in a pan. Cooking ahi tuna in a pan allows you to sear it so it has a nice, crispy outside while maintaining its tender, pink center.
If you want a perfectly cooked seared tuna steak, follow these seven simple steps on how to sear ahi tuna:
Pat your ahi tuna steaks with paper towels until they’re very dry before rubbing both sides of the tuna steaks with oil. Season them with salt and pepper.
Roll the tuna steaks in sesame seeds until both sides are thoroughly coated.
Heat about a tablespoon of oil in a saute pan on high until the oil is extremely hot and just about to smoke.
Place the tuna steaks in the pan and sear for about 30 seconds to 1 1/2 minutes on each side.
Timing will vary based on thickness, preference, and your burner.
Estimated sear time on each side based on doneness: 30 seconds for very rare, 1 minute for medium rare, 1 ½ to 2 minutes for medium-well to well.
As the steaks cook, notice the color change climbing up the sides of the steaks. When that line is about ¼-inch high, flip the steaks and repeat. Allow the line to rise another ¼-inch before removing from heat.
Transfer the tuna steaks to a plate and cut them on a diagonal into thick slices.
Enjoy!
How Long Does It Take to Cook Ahi Tuna
Because ahi tuna is best enjoyed rare or medium-rare, it generally doesn’t take long to cook tuna steaks. In fact, pan-searing ahi tuna steaks only takes about two minutes total, with each side of the tuna steak cooking for about a minute. Try to stick to this timetable because ahi tuna hardens very quickly as it cooks — and you want your tuna steak to be soft and tender, not hard and dry.
Top Ahi Tuna Recipes
While ahi tuna is decadent on its own, you likely want to find a few different ways to prepare it. If you’re looking for some of the best ahi tuna creations you could put on your plate, try one of these top three tuna recipes:
Polynesian tuna salad: Take classic tuna salad up a notch with this Polynesian tuna salad recipe. Although the recipe calls for regular tuna, substituting in ahi tuna will elevate this recipe to new culinary heights. The smooth texture of ahi tuna will excellently complement the crunch of chopped celery and diced water chestnuts, giving you a tuna salad worthy of a Michelin star.
Pan-seared ahi tuna steaks:This pan-seared ahi tuna steak recipe packs a flavorful punch. By pairing the perfectly cooked ahi tuna steaks with a savory tamari-ginger dipping sauce, you’ll get a meal that’s quick, easy and stunning.
Marinated tuna tartare: If you love the natural taste of ahi tuna, this marinated tuna tartare recipe is sure to be your new favorite. The tartare’s delicate marinade is just enough to add a hint of flavor to the tuna while still allowing the fish’s mild flavor to shine through.
Use SAN-J Sauces to Season Your Ahi Tuna
Are you ready to cook a drool-worthy ahi tuna dinner? Make sure your ahi tuna is properly seasoned with help from the wide variety of SAN-J products. From basic soy sauce to flavor-packed cooking sauces, SAN-J has everything you need to whip up an ahi tuna masterpiece. Check out our other recipes using SAN-J sauces!
Chow Mein vs. Lo Mein: What’s the Difference and Common Recipes
Posted on: July 20, 2021
Many people assume the distinction between chow mein and lo mein dishes is the kind of noodles used. This conclusion makes sense considering that chow mein noodles are delightfully crisp while lo mein noodles are silky smooth. However, what makes chow mein different from lo mein is how the noodles are prepared, not the type of noodle used.
To expand your Asian cuisine expertise, we’ll provide a breakdown of what chow mein is, what lo mein is and the culinary contrasts between the two popular dishes. We’ll also discuss how to make chow mein and lo mein with specific recipes for each dish so you can try making them at home.
Chow mein is a popular Chinese noodle dish featuring fried noodles as the star of the dish. In general, the term chow mein refers to fried noodles.
What is a chow mein dish?
A classic chow mein dish is centered around the preparation of the noodles, which are the true highlight of the meal.The variations are endless, however there are two main types of chow mein dishes:
Steamed chow mein: In steamed chow mein, the noodles are initially flash-fried, then stir-fried while being tossed with additional ingredients like meat or vegetables and coated in a light sauce.
Crisp chow mein: When making crisp chow mein, the noodles are pressed flat while frying, creating a pancake-like dish. Any additional ingredients and sauces are layered on top of the noodle pancake.
In both styles of chow mein recipes, the noodles are the true star of the dish. Any extra vegetables or protein ingredients are kept to a minimum so they do not distract from the crunchy noodles. These accompaniments are added to the noodles only after the noodles have been boiled and fried in oil on their own, allowing the chef to solely focus on cooking the noodles to a crisp perfection.
Similarly, the sauce in a chow mein recipe is used sparingly. Instead of dousing the noodles with sauce, a chow mein dish allows its crispy noodles to shine without becoming soggy. Occasionally, crisp chow mein will be served with a darker, thicker sauce, which softens the crispy exterior of the noodles to create a chewier texture.
Here are some easy tricks to determine whether you’re eating chow mein:
The noodles are distinctly crispy — in the case of crisp chow mein.
The noodles are oily — in the case of steamed chow mein.
The amounts of protein and vegetables are kept at a minimum.
The sauce is lightly applied and does not overshadow or weigh down the noodles.
What Is Lo Mein?
At its root, lo mein simply refers to tossed or mixed noodles. Lo mein typically consists of fully cooked noodles that are tossed with a variety of vegetables, proteins, such as chicken, beef, pork, seafood or tofu and a flavorful sauce. The key to a delicious lo mein dish is the combination of textures and flavors from the fresh ingredients. In essence, lo mein is a dry variation of traditional noodle soup. To mimic the texture of soup, the chef drowns the noodle dish in a savory sauce.
Lo mein is made with fully cooked noodles that have been boiled and drained similar to how ramen, udon, and soba noodles are prepared. These cooked noodles are added to a wok containing various vegetables and proteins that have already been cooked and tossed in the lo mein sauce. All the ingredients are gently tossed together until the noodles are just heated through. At this point, some extra sauce may be drizzled over the wok to complete the dish.
If you’re unsure whether you are eating lo mein, look for these clues:
The entire dish is generously coated with lo mein sauce to give it a bold, delicious flavor.
The noodles are not greasy.
The dish includes a considerable amount of veggies and protein, which have been mixed in with the noodles and sauce.
Chow Mein vs. Lo Mein Noodles
If you confuse chow mein for lo mein and vice versa, you’re not alone. It is easy to see the word “mein” and assume they are the same dish. However, “mein” simply means “noodles,” which means mixing up chow mein and lo mein is similar to confusing tortellini with ravioli — both culinary terms refer to a type of Italian pasta, but they are distinct.
In English, chow mein means fried noodles and lo mein translates to tossed or stirred noodles. Because both dishes are variations of the type of noodle, the main difference in chow mein and lo mein lies in how the noodles are prepared. These are the main differentiators between the preparation styles for each Chinese noodle dish:
Chow Mein vs. Lo Mein
The cooking method: Although both mein recipes call for similar ingredients, the cooking methods for chow mein and lo mein are completely different. Chow mein noodles are soaked in hot water to soften them up before stir-frying. The process of stir-frying fully cooks the noodles along with the remaining ingredients. In contrast, lo mein noodles are completely cooked before getting mixed in with the meat, vegetables and sauce. Instead of getting stir-fried, the lo mein ingredients are lightly mixed and tossed.
The wok technique: While both noodle dishes taste best when prepared with a wok, the way each is cooked in the wok differs. Making chow mein noodles involves using a small amount of oil in a very hot wok to lightly fry the ingredients while stirring briskly. For lo mein, the noodles are already cooked and are simply mixed and tossed with the rest of the ingredients instead of fried.
The sauce: Chow mein is more of a dry noodle dish with an extremely light and delicate sauce — if any sauce at all. Lo mein is a saucy noodle dish that depends on a rich sauce for much of its flavor.
The texture: Chow mein noodles tend to be crunchier than lo mein noodles due to the way they are cooked. Lo mein noodles are typically smoother and slightly chewier because they are fully cooked before being tossed with any extra ingredients and sauce. The noodles used to make a lo mein dish must also be thick and sturdy enough to support the weight of extra sauce.
Types of Lo Mein Noodles
Despite their differences, chow mein and lo mein dishes are both made with Chinese egg noodles, which are wheat flour noodles with egg added. While lo mein requires fresh egg noodles, chow mein can be made with either fresh or dried egg noodles.
Regardless of whether you use fresh or dried egg noodles, you will need to soften the noodles in boiling water before cooking them. The goal of boiling the egg noodles is to get them to the point where they are just barely cooked, and not yet too soft. This texture is what is generally referred to as “al dente” in Italian cooking, which means “cooked to the tooth.”
Fresh egg noodles only need to be boiled for a couple of minutes, whereas dried egg noodles must be parboiled in boiling water for about five minutes before they’re ready to be cooked with. Keep in mind that the exact amount of cooking time will vary depending on the thickness of the noodles, so be sure to follow the package instructions for each kind of noodle.
If you are unable to find noodles that are specifically labeled as chow mein noodles or lo mein noodles, you can use linguine noodles, regular Italian spaghetti noodles, or another type of Asian noodle as a similar substitute.
Chow Mein vs. Lo Mein: Which Is Better?
When it comes to choosing the better Chinese noodle dish, the ultimate factor is personal taste. While some noodle lovers enjoy the crunch of dried egg noodles expertly stir-fried into a delicious chow mein dish, others prefer a heaping bowl of steaming, sauce-soaked lo mein.
Your noodle texture choice will often depend on your other ingredients. Consider pairing crunchy chow mein noodles with softer ingredients like cooked mushrooms, juicy tomatoes and bean sprouts, and adding tougher ingredients like carrots, broccoli, celery and snow peas to your lo mein dishes.
How to Make Chow Mein
If all this talk about chow mein and lo mein is making you hungry, you might want to know how to make these noodles dishes on your own. Before explaining how to whip up a batch of chow mein, let’s discuss why you should choose this chow mein recipe for dinner. Along with the delectable tastes and textures, here are some of the top reasons to make chow mein:
Versatility: Like any other stir-fry, chow mein is incredibly customizable and allows you to switch up the vegetables and proteins as you please.
Simple sauce: While chow mein sauce is unbelievably easy to make, it still brings a complexity of flavors to the dish. The careful combination of ingredients like soy sauce, sesame oil, oyster sauce and sugar results in a chow mein sauce that has hints of both savory and sweet notes.
Quick and easy: Homemade chow mein is simple to prepare and the entire cooking process takes less time to complete than ordering takeout and picking it up or waiting for a delivery order to arrive.
Disguised veggies: Thanks to a delicious blend of crunchy noodles and slightly sweet sauce, chow mein is the ideal noodle dish for sneaking in vegetables. Members of your family will be so focused on the yumminess of the noodles that they won’t notice nutritious additions like cabbage and bean sprouts.
Before you start cooking your chow mein, gather these chow mein noodles ingredients:
Egg noodles: For chow mein, you can use fresh or dried egg noodles depending on what texture you want your dish to have. Make sure you use dried egg noodles if you want your chow mein to be crispy.
Vegetables: Chow mein almost always features bean sprouts, shredded cabbage and chopped carrots. Usually, chow mein does not contain many other veggies, but you can feel free to add more.
Protein: You can toss whatever type of protein you want into your chow mein. From chicken or shrimp to tofu or tempeh, just about any source of protein tastes good with chow mein. Chicken tends to be the most popular chow mein protein because it complements the broth in the sauce quite nicely.
Sauce components: A standard chow mein sauce includes soy sauce, oyster sauce, light sesame oil, chicken broth, cornstarch and granulated sugar.
Be sure all your chow mein ingredients are chopped, prepped and ready to go before starting the cooking process because a hot wok cooks ingredients extremely fast. Although a wok is the best and most traditional way to prepare chow mein, you can use a regular skillet if you do not own a wok. Just make sure you use a skillet that is large enough to contain your noodles and other ingredients as you stir-fry them.
Follow these steps to ensure your chow mein is properly prepared:
Start by boiling the egg noodles.
As the noodles are cooking, whisk together your chow mein sauce ingredients.
Cook any protein you’re using in a hot wok or skillet.
After the protein is cooked through, saute your veggies in the wok.
Once the noodles are ready, stir-fry them in the wok with the rest of the ingredients.
Add the sauce to the wok and mix until the noodles are coated — only a minute or so.
Remove from the wok and enjoy!
While the stir-fried noodles are the central focus of a chow mein dish, an excellently prepared sauce is what sets a stellar chow mein apart from an average chow mein. Enhance your chow mein sauce by using a high-quality soy sauce that will give your dish a deeper savory quality and more layers of complex flavors. Try using Tamari — a rich, dark soy sauce — as your secret weapon for making a wow-worthy chow mein. Try SAN-J’s Organic Tamari Soy Sauce and 50% Less Sodium Soy Sauce in your chow mein.
Popular Chow Mein Recipes
For a more precise set of ingredients, try one of these traditional chow mein recipes:
Chicken chow mein:Chicken chow mein is an iconic Chinese takeout dish. You can whip up your own chicken chow mein in minutes by following the chow mein instructions above and using chicken, shredded cabbage, julienned carrots and green onions as your add-ins.
Shrimp chow mein: Have a seafood lover in your household? Shrimp chow mein will surely become a new dinnertime favorite for anyone who enjoys seafood and Chinese cuisine. Simply combine shrimp, cabbage, carrots and bean sprouts with your chow mein noodles to create this delicious dish.
Soy sauce chow mein: Ready to let your chow mein sauce-making skills shine? A simple soy sauce chow mein seasons plain fried egg noodles with a mouthwatering blend of light soy sauce, dark soy sauce, oyster sauce, sesame oil, sugar, white pepper and Shaoxing wine.
How to Make Lo Mein
Lo mein offers all the same benefits as chow mein — versatility, a simple sauce, quick and easy cooking and disguised vegetables — but follows a slightly different cooking method. For lo mein, noodles are not fried. Instead, fully cooked egg noodles are tossed with pre-stir-fried vegetables and protein. Lo mein is also loaded with more sauce to stick to the soft, plump noodles.
Before diving into the details of making this delicious dish, here are the lo mein noodles ingredients you will need to have on hand:
Noodles: For the best results, use fresh egg noodles. If you’re in a pinch, you can substitute virtually any other type of long noodle for your lo mein.
Vegetables: Lo mein typically includes sturdier veggies like broccoli, bell peppers, sliced zucchini and carrots. You can also sprinkle in some chopped onion, green onion and garlic for an extra pop of flavor to your vegetable lo mein.
Protein: Nearly any protein goes well with lo mein. Most commonly, lo mein involves chicken, beef, pork, turkey, shrimp or tofu.
Sauce components: Lo mein sauce is mainly composed of sesame oil, light soy sauce, dark soy sauce, garlic, ginger, oyster sauce and a dash of sugar. If you like your noodles to have a little heat, you can sprinkle in some red pepper flakes.
Once you’ve assembled your ingredients, follow these steps to make the perfect lo mein:
Boil and drain the egg noodles.
Make your lo mein sauce by whisking all the ingredients together.
Stir-fry the veggies and protein in a hot wok or heavy-based skillet. Incorporate a bit of the lo mein sauce while you’re cooking the veggies and protein to season them even more. Make sure you only cook the veggies until they are just cooked on the outside and still a bit raw in the center — overcooked veggies will leech water, which waters down the sauce’s flavor.
Add the egg noodles and sauce to the wok.
Use two wooden spoons to toss the noodles with the sauce and other ingredients. Work quickly and constantly stir so the noodles do not become overcooked, watery or soggy.
Remove from the wok as soon as the noodles are coated, plate and enjoy!
The defining feature of any lo mein dish is the sauce, so make sure you take the time to get it right. Using dark soy sauce will give the lo mein color and a bolder taste while adding light soy sauce will give the dish some extra saltiness and flavor without staining the noodles darker. For a more intense savory flavor, consider using Tamari, which uses more soy protein to create a richer, more complex taste.
Because the sauce is the star ingredient of lo mein, this dish will be drenched in much more sauce than chow mein. The thick and chewy fresh egg noodles perfectly complement the lo mein sauce by soaking up the sauce. These plump and soft noodles are also suitable for wrapping around chopsticks, making them the ideal lo mein noodle.
Popular Lo Mein Recipes
Ready to whip up a tasty Chinese lo mein dish? Try out one of these recipes:
Dan Dan noodles: If you’re looking for a dish with some heat, this Dan Dan noodles recipe is perfect as it incorporates Sichuan peppercorns and chili oil. You can also zest up your lo mein’s flavors by using a splash of Chinese cooking wine in its sauce.
Chicken lo mein: Chicken is the standard meat used in lo mein noodles. If you’re looking for a little extra protein with your noodles and want to try a classic Chinese takeout dish, add some stir-fried chicken to your lo mein. Be sure to cook the chicken in the lo mein sauce to take the dish’s flavors up a notch.
Szechuan shrimp and asparagus over linguine: For those who really love to think outside the box, this Szechuan shrimp and asparagus over linguine recipe will certainly satisfy your daring taste buds. Adding a touch of SAN-J Szechuan Sauce to this lo mein-style recipe fills the dish with impactful flavors, while using linguine gives it a unique texture.
Give Your Chow Mein and Lo Mein a Flavor Boost With SAN-J Tamari
If you want your homemade chow mein or lo mein to taste better than takeout, use our Tamari Soy Sauce to enhance your noodle recipe. The savory complexity of our Tamari Soy Sauce will bring out the other flavors in your dish while adding a distinct richness to your meal. Our Tamari Soy Sauce is also Non-GMO verified by the Non-GMO Project, certified gluten-free by the Gluten-Free Certification Organization, certified vegan and certified kosher, so you can feel good about adding it to your dish.
What foods make you think of summer? Most of our favorite seasonal recipes follow the same basic concepts. When summer begins, it’s time to start up the grill for vegetables, meat and alternatives like tofu. You can use marinades or drizzle your meal with Asian grilling sauces for rich flavors. Try these four Asian BBQ ideas this summer.
These Teriyaki Tofu Kebabs are a great way to avoid eating meat and still enjoy grilling.
When you make these colorful kebabs, start by draining and pressing your tofu. While you wait, check your skewers. If they’re made of bamboo or another wood, use this time to soak them before assembly. Next, cut your tofu, orange and red bell peppers, zucchini and onion into cubes. If you have a half-hour to spare, marinate your cubes in 1/4 cup SAN-J Teriyaki Lite Sauce, which is a new addition to our sauce lineup and features 50% less sodium. Skewer your tofu and vegetables and grill your kebabs. This should take about 15 minutes on medium-high heat.
You can serve these alone or with a grain or salad. For one last flourish, pour some of the teriyaki sauce over your kebabs and enjoy! You can even try making Asian kebab recipes with different ingredients to upgrade any cookout! Easy skewer recipes are perfect for grilling in the summer!
When you’re ready to grill, cover the grates with aluminum foil and use your glaze on the bok choy’s stems. Turn your bok choy after a few minutes, adding more Hoisin Honey Glaze as needed. You might also need to spray water on your stems to keep them from becoming dehydrated. Cook until stems are tender.
Take your bok choy off the aluminum foil, add a new coating of glaze and return them to the grill for one minute to sear. You can add extra hot chili powder before serving.
3. Grilled Mongolian Flank Steak
Plan ahead when you make this Grilled Mongolian Flank Steak. Cut quarter-inch scores into your steaks and add the steak to a plastic bag with a 10oz bottle of SAN-J Mongolian Sauce. Let the meat marinate between six hours and overnight before you want to grill.
Once you’ve marinated your steak, grill each side for four or five minutes. Once cooked, put your steak on a plate and serve after 10 minutes.
4. Asian Spiced Salmon With Wasabi Mayonnaise
Start making your Asian Spiced Salmon With Wasabi Mayonnaise by combining the ingredients you need for the wasabi mayonnaise. Chill your mixture of mayonnaise, SAN-J Gluten Free Tamari, sugar, lemon juice, wasabi paste, salt and pepper. Next, make your marinade from SAN-J Gluten Free Tamari, minced garlic, lemon juice and sugar. Let your salmon fillet marinate for 30 minutes, then grill for three minutes on each side. Serve with the wasabi mayonnaise.
SAN-J Asian Soy Sauce Marinade
When you grill with authentic, gluten-free, non-GMO Asian cooking sauces, it gives you more choices to make a healthy menu for your family. SAN-J makes delicious Asian Cooking Sauces that are certified gluten free and Non-GMO Project verified for your Asian barbecue. Find your favorite SAN-J sauce, and happy grilling!
What’s one of the most exciting ways to introduce you and your family to a host of fresh, new-to-you flavors? The answer is by taking ingredients you already love and pairing them with a variety of sauces.
Whether you’re expanding your cooking repertoire or want to spruce up your weekly dinners and lunches, use this handy sauce guide to add a little dazzle to your dishes.
Hoisin Sauce
Do you like a bit of saltiness mixed with sweetness? Meet Hoisin Sauce. With its robust flavor, Hoisin Sauce made from fermented soybeans is hardly shy. You’ll want to drizzle it sparingly, at least until you get the general sense of how much is perfect for your taste buds.
Marry Hoisin Sauce with any items you want to dip, from egg rolls to steamed shrimp and broccoli. If you’re going to jumpstart your typical stir fry routine, splash some Hoisin Sauce into the wok at the last minute to darken and intensify the meal.
Szechuan Sauce
If you want spicy with a good level of heat, grab your bottle of Szechuan Sauce. It’s a unique combination of sesame oil, rice vinegar, soy sauce and a variety of spices and seasonings. As you can imagine, it makes a delightfully memorable marinade. At the same time, it can stand on its own as a dip.
If you fall head over heels for Szechuan Sauce, consider making it your go-to dip for anything from Asian dumplings to American fried mozzarella sticks. You’ll be surprised at how many meals are just begging for a bit of Szechuan excitement.
Thai Peanut Sauce
Unless you have a peanut allergy, you’re probably gaga for this popular nut. Thai Peanut Sauce has a rich silkiness that lends itself well as a partner for a variety of taste temptations.
Drizzle a bit on cooked veggies and noodles for a hearty treat that will leave you craving seconds. You can also use peanut sauce as a dip for anything from raw carrots to crunchy spring rolls. Additionally, when it’s mixed with your preferred type of soy sauce, chopped scallions and a dash of hot pepper, peanut sauce makes an ideal meat, seafood or tofu marinade.
Mongolian Sauce
Maybe you’ve never tried Mongolian Sauce. Don’t be afraid to taste this savory-sweet find. It’s a nice balance of deep flavor that doesn’t overpower foods.
One of the tried and true recipes that relies on Mongolian Sauce is, not surprising, Mongolian beef. But Mongolian Sauce is just as at home served over steamed vegetables and rice. From the moment you start playing around with this sauce, you’ll start finding innovative ways to sneak it into your diet.
Orange Sauce
Often used as a glaze, Orange Sauce provides a splash of citrus in a sweeter sauce. It’s a delectable choice to cover anything from baked tofu to pieces of organic chicken.
Craving some orange sauce but want to whip up a light salad for dinner? Create a homemade orange tamari dressing. Just use a little bit of Orange Sauce and Tamari Soy Sauce” with “mix Orange Sauce, vinegar, and olive oil and drizzle it onto a mega lettuce-filled meal — bonus points for adding slivered toasted almonds for the finishing touch.
Pair up for Perfect Kitchen Pleasers
If you’re looking for something exciting to bring to your kitchen, start with delicious SAN-J Asian Cooking Sauces. You’ll recharge your routine and bring out untapped flavors in some of your favorite foods.
Summer is heating up, and nothing reminds us more of yummy cookout food than a kabob on the grill. What could possibly beat each mouthwatering bite of meat, fruit and veggies, with everything roasted to perfection and coated in a delectable sauce of your choice?
If you’re eager to get cooking, consider trying these Asian kabob recipes. Gather up some wooden skewers (make sure you soak them in water first!), select your favorite ingredients and fire up the grill — it’s time to serve some new favorites on the backyard barbecue.
Spicy Szechuan Beef Kabobs
Our sauce Szechuan Sauce adds significant heat to this beef kabob recipe. Let slices of sirloin steak, cherry tomatoes and squares of onion, green and red bell peppers mingle with the Asian cooking sauce before you load the kabobs. If you can’t get enough of spicy food, baste the skewers with a little extra Szechuan Sauce while cooking, and don’t forget to pour an ice-cold beverage before digging in.
Grilled Teriyaki Vegetables
With several kinds of tender veggies on each of these nutritious and delicious veggie skewers, everyone has something to enjoy! Start by combining our sauce Teriyaki Sauce with sesame oil. Brush this seasoning onto evenly sized slices of zucchini, summer squash, onions, bell peppers and button mushrooms. Build separate skewers for the cherry tomatoes since they’ll roast quicker. When cooking finishes in about 15 minutes, coat everything with a little more Teriyaki Sauce and sprinkle with toasted sesame seeds and salt.
Mongolian Chicken Kabobs
For this chicken kabob recipe, you’ll need to first cut up chicken thigh meat into 1-inch pieces. Allow them to marinate in a container or bag with sauce Mongolian Sauce and ground black pepper for at least half an hour. After removing from the marinade and discarding the sauce, thread the chicken and alternate each chunk with a slice of green onion. Brush with vegetable oil and cook each side evenly — you’ll be ready to savor the result in minutes!
BBQ Beef and Apple Skewers
Enjoy the balanced tastes of juicy steak, sweet diced apples and fresh vegetables with a perfect blend of seasonings. Our beef and apple skewer recipe calls for slices of sirloin, apple, onion, zucchini and whole button mushrooms. Whisk four tablespoons of sauce Asian BBQ Sauce with some minced garlic, parsley and black pepper. Spread the mix over each kabob before they hit the grill for about 8 minutes.
Customize Your Skewer!
The best thing about cooking kebabs is the freedom you have with preparation. You can swap different meats, veggies, marinades and dipping sauces to make something truly unique and tasty. Plus, this is a smart way to accommodate different diets around the table or use up leftover ingredients. Invite everyone to experiment and create a combination to call their own!
We have all sorts of additional idea recipes with Asian ingredients and flavors for inspiration within the kitchen or ideas on the grill. Read more helpful pointers for food prep on our blog.
Sticky rice tastes sweet and clumps together, making it a popular component of Asian desserts and side dishes. There are many types of sticky rice from different countries including Thailand and Japan. (Japanese sticky rice is known as an ingredient for mochi.) Here we talk about Thai or Chinese style long-grain sticky rice. Cooking sticky rice at home can be as simple as buying a bag labeled “long-grain sticky rice,” “glutinous rice,” “sweet rice” or something similar for a quick sticky rice recipe.
Don’t have access to an Asian food market to buy these products? Don’t worry! Here’s our guide to preparing store-bought varieties of sticky rice and some simple, yummy ways to create an alternative.
The key to sticky rice is to not rinse the rice — this washes away the starch dust that allows the rice to clump. Soak the sticky rice in enough water to cover the rice. This softens the grain and the extra water helps add that fluffy texture. Soaking for 4-24 hours is a good range. After soaking, add a little salt before cooking for taste, about 1/2 to 3/4 of a teaspoon.
Not every kitchen has a traditional bamboo basket used to prepare sticky rice, so here are some cooking methods you can try.
Steamer Basket
Drain the soaked rice in a colander and add it to your steamer basket. Lining with a parchment paper is a good way to prevent the rice from sticking to the basket. Fill a large pot or wok with a few inches of water, heat until boiling and place the steamer over it, ensuring the rice doesn’t touch the water below. Cover for 20 minutes or so, and turn the rice over to let the top layer finish steaming for 5 more minutes at the bottom of the basket.
Stovetop
Heat an uncovered pot with the soaked rice and water until boiling. Reduce the heat, and set the lid slightly off-center to vent for 10 minutes. Next, use a fork to make a small hole in the center of the rice to the bottom of the pot and check if the water is fully absorbed. If so, turn off the heat, cover securely with the lid and allow the rice to finish steaming on the burner for another 8 minutes.
Rice Cooker
Let the rice soak inside the cooker, close the lid and let the appliance handle the heating. Some high-end rice cookers have a special setting for cooking sticky or sweet rice. Some digital rice cookers shut off automatically, while others will need you to turn them off after about 15-20 minutes once all the water is absorbed.
How To Make Sticky Rice With Japanese Rice
Japanese sushi rice can be used as an alternative to authentic sticky rice. It’s stickier than other types of rice and doesn’t require additional soaking. Simply follow the cooking instructions given on the Japanese rice packet you purchase.
Try This Recipe With Homemade Sticky Rice!
Quick Coconut Sticky Rice With Honey Hoisin Glazed Peaches
So good, you can treat this dish as a dessert! Our coconut sticky rice recipe uses instant white rice and a mixture of coconut milk, sugar, cornstarch and salt. When this sweet solution boils away with the rice, you’ll have a sticky texture to work with. For a delicious glaze on the peach slices, combine several tablespoons of honey, lemon juice and our savory Hoisin Sauce. After briefly cooking the peaches with melted butter, combine the fruit with the sauce and heat until thickened. Serve atop a bowl of coconut sticky rice and enjoy!
Say you have a well-stocked pantry with all the essentials, but you’re looking to get creative with old favorites. Plus, most frozen foods stay safe for so long, you might forget they’re in there! It’s time to reach to the back of the shelf and thaw some packages.
Let’s tackle a few easy recipes to liven up the freezer and pantry staples in your kitchen.
1. Thai Peanut Stir Fry Noodles
To create this dish, you can use your favorite variety of flat noodles made with egg or rice. The essential ingredient is the sauce — mix SAN-J Tamari Peanut Sauce. Stir fry with chicken, a cooked, scrambled egg, and your favorite vegetables such as peppers, mushrooms and bean sprouts.
2. Korean BBQ Tacos
The whole family can enjoy this spin on tacos for dinner, and leftovers for lunch! Start by marinating chopped sirloin steak in our Korean BBQ Sauce, then sauté and combine it with shredded carrots and cucumber. All that’s left is to load up your soft-shell tortillas and dig in.
3. Tuna Potato Cakes
Prepare these fish cakes as an appetizer or snack by opening a can of tuna from your pantry and a package of pre-prepared mashed potatoes — or make your own. Combine them with bread crumbs, egg and finely chopped garlic, spring onions and celery, then a touch of SAN-J Tamari. Once you shape the mixture into patties and fry them in a large pan, you’ll have an easy-dip food in your hands!
4. Hoisin Shrimp With Broccoli
Here’s another yummy seafood recipe you can cook up with ease. Prepare the stir fry sauce in a flash with our Hoisin Sauce, water and a bit of corn starch. Sauté peeled ginger, shrimp and red bell pepper in your skillet or wok. You can save time by warming up a microwaveable bag of broccoli florets — just ensure these veggies are thawed when you add them in.
5. Instant Pot Rice With Chicken and Vegetables
This recipe is a clever use of freezer ingredients and your choice of rice from the pantry, all in one quick meal. On Sauté setting, cook onion and garlic with oil along with a sprinkling of seasonings, diced carrots, and chopped bell peppers. Stir in rice, broth, and Tamari Soy Sauce and place thawed boneless chicken breasts on top. Pressure cooking makes this meal ready in less than 30 minutes!
6. Teriyaki Cauliflower Fried Rice
If you are a veggie-lover, you probably eat cauliflower as much as broccoli. Try making cauliflower rice yourself or use frozen cauliflower rice as a lower-carb alternative to usual rice. Make this recipe with a splash of our Teriyaki Sauce, and you have a delicious plate of fried rice!
Discover More Easy Recipes With SAN-J
Are you searching for more Asian recipes? We have plenty of recipes and meal ideas that use frequent household ingredients. Read our blog for more tips to creating flavorful, healthy meals at home.
Sushi rolls are a restaurant favorite with countless varieties to enjoy. If your family can’t dine in or take out, you can still have sushi together with a few pantry ingredients.
We wouldn’t recommend using raw fish unless you’re sure you have access to sushi-grade seafood, so we’ll focus on rice and vegetables for our maki rolls.
Here is what you’ll need to make sushi at home:
A bamboo mat or kitchen towel
Plastic wrap
2 cups of uncooked white rice (Sticky Japanese short-grain rice or sushi rice recommended)
2 cups of water
About 1 cup of chopped vegetables
One package of nori (dried seaweed)
1/2 cup rice vinegar
2 Tbsp. sugar
1 tsp. salt
Serving size: 6 rolls; 6-8 small sushi pieces per roll
Prepare the Rice
Rinse and drain the rice, and then add it to a medium nonstick saucepan with the water. Bring to a boil, reduce the heat, cover, then simmer on low for about 15 minutes. Remove from the heat and let stand covered for about 10 minutes. A rice cooker can also come in handy.
While the rice heats, combine the rice vinegar, sugar, and salt in a smaller saucepan and heat to a boil, stirring until all the sugar dissolves. Remove the mixture and let it cool.
Season the finished rice with the vinegar mixture by combining both in a mixing bowl. Cool the seasoned rice before using it to make your sushi rolls.
Choose the Vegetable Filling
A benefit of making sushi rolls at home is that everyone, including the kids, can add their favorite vegetables. Some options include avocado, red bell pepper, carrots and cucumbers. Slice and cut your chosen veggies about as thin as matchsticks or smaller so the nori and rice can easily mold around the filling. You can even choose to add imitation crab meat to make California Rolls.
Build the Rolls
Layout a bamboo mat or rectangularly folded towel on a flat surface, and line it with plastic wrap to help clean up later. Position the nori on top, then use a wooden spoon to spread the rice into an even, thin layer. Leave an extra half-inch or so of nori uncovered for sealing later. Arrange a line of vegetables across the rice, about halfway from the bottom. Start rolling the rice and nori, and once the filling is covered, roll over the top of the mat or towel and carefully compress.
After transferring the completed sushi roll to a cutting board, use a sharp knife to slice into the nori and create equally thick, coin-shaped portions. Remember not to saw through the roll, and it helps to wet the blade beforehand.
Time to Serve
Everyone’s probably ready to dig in, but make sure you have some dipping choices set out to accommodate the palates around the table. Don’t forget the wasabi paste, pickled ginger, and a bowl of SAN-J Gluten-Free Tamari Soy Sauce. Made from a traditional brewing method using 100% soybeans, our Tamari Soy Sauce pairs well with sushi.
Try This Vegetarian Faux Sushi Recipe
If you don’t have rice or nori, try this special take on sushi that uses silken tofu and your preferred vegetables. Tortillas or your choice of gluten-free wraps hold these homemade rolls together, and the addition of our sweet Orange Sauce inside makes these delectable straight off the plate.
Learn more ideas for Asian cuisine from our recipes section!
Protein is necessary for an overall balanced diet. It’s a needed nutrient for the growth and repair of muscles, bones and skin.
If you are a vegetarian or vegan, getting enough protein in your diet is vital when you’ve cut down on the consumption of meat. Making the switch and focusing on plants for protein can be beneficial, however, because plant protein also supplies fiber — which animal proteins cannot provide. In addition, signs point to less risk of cardiovascular disease when you trim down on red meat.
Here are three protein-packed, plant-based foods you can start adding more of to your diet today.
1. Tofu
Tofu, or bean curd, is a versatile food that can be soft or firm. It’s made from soybeans, which are already regarded as one of the best sources of plant-based protein. With about 16 grams of protein per one-cup serving, it’s gaining popularity as a meat substitute and healthy eating trend for its ability to be seasoned any way you please.
Looking for a tasty method to prepare tofu? Try this Tofu & Green Bean Stir-Fry recipe that only needs six ingredients and makes a great leftover dish for lunches. If you like a spicier kick, Szechuan Tofu Stir-Fry is another yummy, simple meal you can cook for a protein boost anytime.
2. Lentils
Lentils are an inexpensive type of bean that comes in several varieties. Just a cup of cooked lentils provides up to 15 grams of protein and 15 grams of fiber. Lentils also contain folate, iron and potassium to support your heart and blood, while staying low on saturated fat and sodium.
Lentil beans have a subtle taste and hearty texture, perfect as a healthy alternative to meat in curries, soups and stews. They also pair nicely with salad greens and make a filling vegan chili!
3. Quinoa
Quinoa is a whole grain with an odd name but a straightforward source of eight grams of protein and five grams of fiber per one cup when cooked. It also offers manganese, magnesium and phosphorous, and it is gluten-free.
We recommend you try the recipe for Vegan Grilled Vegetable Quinoa, a highly nutritious mix of veggies and zesty flavors.
Tamari Soy Sauce
Did you know that SAN-J Tamari Soy Sauce contains over 30% more umami derived from soy protein than typical soy sauce? It also contains 18 amino acids you need, including nine essential amino acids that you can only get from your food.
SAN-J Tamari Soy Sauce is brewed with 100% soybeans, with no wheat content. Try SAN-J Tamari, and you’ll find it has a richer flavor than other typical soy sauces, good for pairing with all your protein-packed foods.
SAN-J also offers organic and reduced sodium varieties to accommodate your dietary preferences and needs including Organic Tamari, Reduced Sodium Tamari and Tamari Lite 50% Less Sodium, all of which are gluten-free and certified vegan. SAN-J’s Brown Rice Crackers and Wakame Soup are also certified vegan and gluten-free.
See all of our products and learn more about their benefits to your diet. Explore our recipe section to inspire your next plant-based meal with SAN-J Tamari!
It can be hard to find the time to sit down with your family for a healthy meal together, but with some organization and the right products, you don’t have to feel pressured to compromise a nutritious meal for a quick meal.
Perhaps the most time wasted in cooking is spent trying to decide what to eat! By determining a meal schedule in advance, you’ll avoid the fuss and indecision later.
Meal prepping is a popular cooking trend these days for both convenience and portion control. Some home cooks find it helpful to prepare a few extra servings than needed. Those leftovers can go in airtight, reusable containers, and you can store them inside the refrigerator or freezer for future, easy-to-reheat meals.
2. Stock Some Essential Cooking Gadgets
The right kitchen tools and appliances can shave minutes or hours off your prep time. Here are some must-haves for your kitchen:
Electric pressure cookers: These programmable multi-cookers boil water and trap vapor for a constant temperature. You can have a healthy portion of steamed vegetables, meat or cooked rice in much less time. Clean-up afterward is simple too, so it’s easy to see why more people swear by these appliances for faster food on the table.
Slow cooker: Great for cooking tender meat and hearty soups and stews, these appliances steadily keep the temperature up even if you’re away for a few hours. SAN-J easy slow cooker sauces are perfect to add to your dish. When everyone’s together, you can serve a warm meal right into bowls or onto plates.
Kitchen shears: A versatile pair of scissors can snip off animal fat or divide meats, so they cook faster. Kitchen shears also remove vegetable stems, then cut up leaves for quick salads.
Food processor: This device might count as a knife, blender, pastry kneader, grinder and shredder in one. With it, you can crush nuts, make purees and whip up your own sauces. If you want an easy way to toss some ingredients together and combine them in a flash, this needs to be on your countertop.
Mandoline slicer: Home cooks lose a lot of time handling knives, so mandoline slicers offer the perfect time-saving solution for cutting anything from veggies to fruit with an easy wrist motion. A good slicer has multiple settings for straight, julienne or waffle cuts and lets you adjust for a uniform thickness.
Air fryer: If you have the space, you can use an air fryer for just about anything you can cook in the oven. Fries, chicken nuggets, fish fillets, potatoes, pork chops, vegetables — an air fryer lets you cook them all in record time. Additionally, air fryers don’t need to preheat, so you’re always going to save time with this step.
3. Keep Basics on Hand
Staples like flour, oils, grains, spices, herbs, sugar and your go-to sauces or condiments are must-haves in your kitchen. You’ll always be prepared for your recipes if you have these essentials.
Don’t be afraid to build on your stock of favorites! For example, keep some Tamari Soy Sauce ready anytime you want to enhance your food’s flavor.
4. Pre-Cut Your Produce
Cutting your produce can be time-consuming, especially when you have other things going on in the kitchen. You can save time by pre-cutting your veggies to have them ready when you need them.
Use airtight containers to keep your veggies fresh in the refrigerator until you’re ready to cook or eat them. You can make this step easy by doing your slicing, dicing, grating, cutting and peeling when you bring your groceries home from the store. You’ll be able to set yourself up for the rest of the week quickly, and it encourages you to reach for veggies throughout the day. However, be wary of products that can bruise or discolor easily, like cucumbers, avocados and peaches.
5. Use Shortcuts When Needed
Shortcuts can make the cooking process much quicker and simpler. You don’t have to start from scratch every time you make a meal — instead, find ways to minimize prep time by eliminating lengthy steps. Check out these food shortcuts:
Buy pizza crusts from the store rather than creating them from scratch.
Pick up some pre-made sauces, so you don’t have to make them at home.
If you’re in a hurry, stick to the recipes you know best to avoid needing to look at cookbooks.
Stock your freezer with baked bread to serve with pasta and soups instead of waiting all day for it to rise.
Pair any dish with a bagged salad mix rather than purchasing separate ingredients to toss yourself.
6. Batch Cook
You can plan ahead for big meals that need an entire whole chicken or large chunks of meat by preparing it in advance. Grab a crockpot and cook the food you need over the weekend. When it’s time to make your favorite recipe, you can minimize your steps and cooking time. You can also store leftovers in the fridge and freezer and use them to complete other meals as the week continues.
7. Clean as You Go
One of the best kitchen hacks for cooking is to clean your space as you make your way through the process. You likely won’t want to spend another hour cleaning up after you’ve finished your meal. Instead, look for opportunities to wash dishes and put items away during the cooking process.
The next time you cook, consider using some of the following tips:
Scrub pots and pans as meat cooks or sauces simmer, getting them clean before food residue can stick to the bottom of your equipment.
Keep a bag near you so you can easily toss wrappers and shavings.
Rinse used equipment and place it in the dishwasher as soon as you’re finished with it.
8. Mix in SAN-J’s Asian Cooking Sauces
Cooking hacks don’t have to be complicated or expensive. Not everyone has the time to chop up herbs and measure spices and powders, especially for recipes with long ingredient lists.
SAN-J simplifies the prep and brings delicious world flavors to your kitchen. Our Asian Cooking Sauces feature a perfect blend of rich Tamari Soy Sauce and a variety of Asian-inspired seasonings. If you want a convenient and authentic way to add a twist to your leftovers or complete a stir fry, all it takes is splashes of SAN-J sauce to enhance the taste.
Simplify Cooking With SAN-J
SAN-J began its legacy in 1804 and we have continued growing since our start. We’ve passed our brewing method down through eight generations to continue crafting high-quality Tamari from the finest soybeans. Our Tamari Soy Sauce contains no wheat, letting you enjoy the authentic taste of soy sauce without the added ingredients.
You can always find ways to save time and get new ideas for the kitchen with SAN-J. You can look through our easy-to-make recipes for your next meal. We hope you and your family enjoy sitting together at the table!
Many of us are still adjusting to the new normal during the coronavirus outbreak. More employees than ever have to work from home and treat their living space as their office, and that poses new challenges with eating right. Now that grabbing a bite with coworkers is out of the question, and your kids might be home with you, what do you do about lunch or dinner?
We’ve got some tips and tricks for saving time and still eating healthy while working from home.
Get Smart With Storage
Although your kitchen and all its appliances and ingredients are close by, you might not have the chance to cook like you’re used to. Calls can spring up and distract you from your pots and pans — plus, those on the other line don’t want to hear microwave button beeps and clattering dishes! It’s why you should consider prepping future meals before or after the workday crunch and store them in the fridge for when you need them.
Some tools to help include plastic sealable containers and foil or plastic wrap. You can load up an airtight tub with freshly chopped vegetables and other whole foods for a salad. Or, after making a sandwich out of peanut butter and jelly or deli meats for the kids, leave it wrapped in the fridge for them to grab when they’re hungry.
Make Larger Portions for Later
“Meal prepping” is one of 2020’s health trends, and while it involves cooking more food than usual, you’re dividing it into ideal, convenient portions. Stash these leftovers in containers and label them for when you use them — then you’ll have your lunch schedule set for a few days. Meal planning can help with busy schedules.
If you grow tired of the same leftovers, a few containers of different pre-cooked and prepped ingredients will also let you mix and match. Plenty of staple ingredients turn into several meals down the line, such as pasta, noodles, rice and beans. Try a can of tuna or chicken slices with your greens, or squeeze a citrus fruit, pour some salad dressing or drizzle cooking sauces over your plate for added flavor.
Let the Slow Cooker Do the Work
Your slow cooker makes it easy to prep your proteins or cook soup or stew. Before the day starts, prep a recipe you can come back to with a ladle or fork for lunch — or dinner too! With lots of space in a slow cooker, it’s the perfect appliance for extra batches. Try creating a pot early in the week of pork, quinoa, and broth with slow cooker sauces.
Eat Away From the Computer
It seems like a no-brainer, but remember — if you have a break time set aside, use it to its full potential! You need to disconnect at some point.
Once you toss together your salad or reheat leftovers, take your plate with you somewhere else rather than your desk chair — the dining table counts, or even your porch on a pleasant day. By changing your environment, you’ll lower your stress levels and get to focus on enjoying your food.
Read More Tips and Tricks
While working from home, you may have different habits, but food and nutrition shouldn’t change. We hope these tips alleviate some of the stress with prepping meals. For more ideas, read through our blog!
As mouthwatering as fruit or crunchy veggie are, their freshness runs on nature’s timer. Meanwhile, the processed foods sitting in your pantry seem to have a much longer shelf life. When you arrive home with produce from the grocery store or farmer’s market or need to use your own homegrown Asian produce, you need to store it in the right place. Here are a few essential food tips to prolong the lifespan of your fresh produce.
Be Mindful of Produce That Emits Ethylene
Ethylene is a colorless gas compound that naturally ripens fruits. Like human hormones, ethylene controls the way a plant develops, grows and ages. Its effects include changing the texture or color of the plant’s skin.
If you place a type of produce that gives off ethylene close to another variety of plant, you may find the latter goes bad much quicker. It’s wise to keep these two kinds apart.
Apples: Store apples in the crisper drawer of your fridge. Avoid cutting apples open until you’re ready to enjoy them, as oxygen quickly browns the inside.
Cantaloupe and honeydew: These melons can lie in the fridge as long as they’re kept away from your vegetables.
Celery: Celery will last longer if you wrap it in aluminum foil before placing the stalks in the produce drawer, retaining the moisture.
Avocados: These fruits can rest on the counter until they ripen after a few days, then they can go into the fridge.
Bananas: It’s best to leave ripening bananas outside the fridge and separate from each other to keep the ethylene concentration low.
Tomatoes: Another food to let sit on the counter. Cut off the stems and leave them upside-down to slow the aging process.
Some Produce Stays Out of the Fridge
Citrus and tropical fruits like oranges, tangerines, grapefruit and lemons can remain on the counter as long as they’re kept out of direct sunlight. Once they’re cut, you can preserve them in a fridge drawer. Produce such as potatoes, garlic and onions prefer dark, dry, room-temperature spaces like your pantry in breathable bags.
Manage the Moisture of Your Produce
You can rinse strawberries, blueberries and grapes, but don’t let them stay in a moist container for long to prevent mold growth. If you store them inside the fridge in open containers lined with paper towels, they should last longer.
To keep lettuce from wilting, wrap it in paper towels after washing and seal it in a plastic bag or container. Leave a little air inside so the lettuce can respirate, and place within your fridge’s crisper drawer.
Fresh herbs do well when you trim their stems, set them in jars and loosely cover them with plastic.
Shopping Smarter for Your Produce
The vendors at your local farmer’s markets know when their produce is at peak season and tastes the freshest. Ask the sellers how they store their produce — some do without refrigeration, bagging or keeping the items in the shade, which affects the quality. Buying your produce from grocers has benefits out-of-season since they take steps to maintain freshness on the shelves.
There’s a lot to remember when it comes to storing produce, but the payoff is having a host of delicious and nutritious ingredients to use with the meals you cook at home.
25 Conversation Topics for Connecting at the Dinner Table
Written by: San-JPosted on: March 11, 2020
Dinnertime is the part of the day when everyone’s schedules finally align. It’s a golden opportunity in our busy lives to catch up and strengthen relationships. But sometimes, as much as you try to strike up a discussion with your kids, you hear only one-word answers. This is completely normal. One tip for families — ask some deeper dinner table questions where everybody gets to participate.
Switch off the TV, put away the smartphones and spark a meaningful dinner conversation with this list of 25 family dinner conversation starters. You can write these mealtime conversation starters on slips of paper and draw them from a jar, or put them down on note cards and shuffle them into a stack. Try to fit in at least one of these dinner topics every time you sit down together!
Questions To Ask At Dinner
If you were going to live on a deserted island for a year and only allowed to bring three personal items with you, what would they be?
What’s your favorite smell? Does it remind you of any good memories?
How would you spend a million dollars if you could?
Would you rather not hear or not see?
Is there extraterrestrial life on other planets? What do you think they might look like?
What’s the most recent joke you heard?
What did you do with your friends today?
What were two great things that happened today, and one not-so-great?
What superpower would you have for life and how would you use it for good?
If you could work in any career for one week, what would it be?
What’s your favorite song on the radio at the moment and why?
How would you describe a good friend?
What’s your favorite family activity we do together and why?
What’s the earliest memory you have?
What’s one talent you have that you’re really proud of?
If you could pick a different name for yourself, what would it be?
If you could go back to any time period, when would it be? Would there be any historical people you’d want to meet?
What are you planning to do after dinner tonight?
What do you think is your lucky number and why?
What’s the best gift you could give to someone?
If you won a vacation to anywhere in the world for a week, where would you go?
How did you meet your best friend?
If there was one type of cuisine you had to eat for the rest of your life, what would it be?
What’s one thing you hope will never change?
If you could write the next great bestselling book, what would it be about?
Share a Smile and a Meal With SAN-J Tamari Soy Sauce
At SAN-J, we believe that good food warms the heart and helps people spend more time with one another. We want the flavor of your next meal to satisfy and excite everyone. When you cook at home with SAN-J Tamari products, anything you serve from meat to vegetables will be more delicious.
Written by: Lauren Fields, San-J MarketingPosted on: February 26, 2019
Forget what you know about broccoli soup. This one gets a category of it’s own.
It’s smooth, creamy, and slightly spicy with a kick of umami. It’ll warm you to your core on these relentlessly cold winter days. And since it’s loaded with fiber and plant proteins, you’ll be feeling energized to take on the rest of the day!
red pepper flakes plus fresh ginger and garlic really spice it up
When chopping the broccoli, make sure to include the stems, because those are totally edible! If you have a kitchen scale, it’ll come in handy for getting an accurate measurement. Otherwise, just make sure to chop nice and small to get as much to fit into your measuring cups as possible.
If you’re using dry beans (which I do), remember to cook those ahead of time. And while we’re talking about prepping ahead, you can chop the onion and broccoli a day ahead to save on day-of prep time.
Since the ingredients in this soup are so flavorful, you won’t regret using water as the liquid. For a subtle upgrade, use vegetable stock. Check out how to make your own vegetable stock for free.
Top it with some red pepper flakes, broccoli leaves, and freshly ground black pepper. Pair with some freshly baked bread or serve alongside a stir-fry or some potstickers.
1 Tbsp grapeseed oil
½ yellow onion, chopped
1 clove garlic, minced
1 Tbsp fresh grated ginger (about 1 thumb’s worth)
1 lb or 2 cups chopped broccoli, including trimmed stalks; reserve leaves for garnish if available
¼ t red pepper flakes, plus more for serving
3 cups vegetable stock or water
1 ½ cup frozen peas
1 cup white beans
1 Tbsp Tamari
1 ½ Tbsp miso paste
pepper to taste
DIRECTIONS
Heat oil in a large pan over medium heat and saute onion until soft.
Add garlic, ginger, broccoli, and red pepper flakes. Saute for 1 minute.
Add vegetable stock or water, peas, white beans and bring to a boil.
Reduce to a simmer and cook covered until broccoli is tender, about 5 minutes.
Remove from heat and allow to cool slightly. Transfer to a blender, along with Tamari and miso paste. Blend on high until smooth. If you prefer a thinner soup, slowly add hot water until desired consistency is reached.
Pour blended soup back into pot to heat until hot. Or if it is already the temperature you like, pour directly into bowls to serve.
Garnish as desired. Try red pepper flakes, fresh cracked black pepper, and broccoli leaves.
We all know celebrations are best when spent with those you love and the food you can't wait to eat! Bring your loved ones together this Chinese New Year to celebrate prosperity and good fortune in the upcoming year. We have a menu created by Carol Kicinski of Simply Gluten Free, and it's the perfect way to celebrate!
Lamb Potstickers
Begin your celebration with an appetizer that gets everyone involved. Get your favorite people together and save yourself some prep-work by making potsticker assembly the main activity before dinner! Just don't forget the dipping sauce of Tamari Soy Sauce, rice vinegar, honey, and chili garlic sauce for the best balance of flavors.
We like these with ground lamb, but you can swap that for pork, chicken, or make it vegetarian with sautéed mushrooms. Mix in some freshly grated ginger, finely diced red and green onions, Tamari Soy Sauce, and sherry.
This stir-fry has a nice mix of textures and is bursting with flavor, thanks to the unexpected and juicy pomegranate seeds. The tofu keeps it light yet filling, and the garnishes tie it all together.
Start by preparing the tofu to remove excess moisture. Meanwhile, whisk up a flavorful marinade of Tamari Soy Sauce, rice vinegar, minced garlic, ground cumin, and red pepper flakes. Let the tofu marinate for at least 15 minutes to soak up these flavors. Then stir-fry wedges of red onion and the tofu separately, allowing enough time for the tofu to brown and heat through. Now for the fun part – layer the stir-fried tofu and red onion over steamed rice and top it all with some Tamari yogurt, pomegranate seeds, chopped pistachios, and cilantro leaves.
While you're toasting to good fortune in the upcoming year, save room for a cookie – or a few! These sandwich cookies are made with almond flour and have a creamy sweet and salty center made with chocolate, cream, and Tamari.
5 Tasty Asian Dressings to Save You From Salad Boredom
Written by: Misako Binford, San-J MarketingPosted on: January 17, 2019
It’s not new that I hear stories about all kinds of dieting techniques from my friends. In fact, I feel like we’ve always been on a journey of losing weight since we were teenagers. The foods and exercises that are most effective to burn calories and how we fight our cravings for sweets are our never changing conversation themes.
It makes me wonder why our conversation around diet never ends. That is because we either never reached where we wanted to be or couldn’t stay where we wanted to stay, meaning an unsuccessful diet or a rebound. I realized that it happens when we are not satisfied with what we eat. In my opinion, food should feed both your body and soul. To me, cooking is like giving love whether to your loved ones or to yourself. With foods created with a loving mind, you can be truly satisfied with your eating experience.
I noticed lately that so many of my friends are eating more salads than ever before. Yes, salads are conceived as “healthy” in order to eat more veggies or lighten up on calorie intake. But they are now eating salads more as a meal as a way to avoid excess carbs in their diet. With various low-carb diets being so popular, salads have become the star of their meals.
Many of my friends are enjoying hopping on a scale seeing that their weight is going down however, they are not enjoying the same old tastes or their bland meals. They are eating salads just to satisfy their hunger. Their body and soul are not happy and they are in danger of the reoccurring rebound. So here I am to rescue my dear friends and anyone who is willing to get out of their salad boredom. I hope these tips and recipes will help you enjoy salads again and keep your meals as joyful, satisfying experiences.
Here are 3 tips to make your salads more exciting and satisfying.
Use homemade dressings
Change up veggies, protein, and toppings
Make your salads with love
These are the five Asian dressings that I make often. They all are very tasty and complement so well with various veggies, protein, and toppings. If you prefer, these dressings can be made without sugar or with your favorite type of sugar.
Tamari Lemon Dressing
Gluten free, vegan
Makes about ½ cup
Ingredients:
¼ cup Olive oil
3 Tbsp. Fresh lemon juice
2 Tbsp. SAN-J Tamari Soy Sauce
2 tsp. Fresh lemon zest
2 tsp. Sugar of choice, optional; granulated sugar, honey, agave, or other
Instructions:
Add all ingredients to a jar and shake well, or add to a bowl and whisk well.
Serving suggestions:
Pour over grilled chicken, grilled tofu, or “Salad chicken” on a bed of greens. Top with lemon slices. For another option, marinate chicken breast or tofu with any SAN-J Asian Cooking Sauce for 30 minutes then grill. Try this Grilled Orange Chicken or Grilled Lemon Herb Chicken to add to your salad with Tamari Lemon Dressing.
Instructions:
Add all ingredients to a bowl and whisk well.
Serving suggestions:
Drizzle over baked tofu on a bed of baby kale. Top with shelled, cooked edamame and shaved carrots.
Add zucchini noodles to make Asian sesame zoodles. Try different SAN-J Asian Cooking Sauces for flavorful baked tofu. Top with slivered almonds to add some crunch.
Tamari Carrot Dressing
Gluten free, vegan
Makes about 1 cup
Ingredients:
1 medium Carrot, cut into about 1 inch chunks
¼ medium Sweet onion, cut into about 1 inch chunks
¼ cup Olive oil
3 Tbsp. Vinegar
1 Tbsp. SAN-J Tamari Soy Sauce
2 tsp. Sugar of choice, optional; granulated sugar, honey, agave, or other
1 tsp. Fresh ginger, chopped finely
Instructions:
Add all ingredients to a blender and blend well until it has a smooth consistency. If you prefer a less thick dressing, you may add up to 1/8 cup water while blending.
Serving suggestions:
Spoon over a bowl full of shredded napa cabbage and red cabbage. Top with roasted chickpeas and halved cherry tomatoes.
Miso Yogurt Dressing
Gluten free
Makes about ¾ cup
Ingredients:
1/3 cup Plain yogurt
3 Tbsp. White miso (gluten-free brands are available)
2 Tbsp. Olive oil
2 Tbsp. Rice vinegar
2 tsp. Sugar of choice, optional; granulated sugar, honey, agave, or other
1 tsp. SAN-J Tamari Soy Sauce
Instructions:
Add all ingredients to a bowl and whisk well.
Serving suggestions: Serve as a dip with fresh or lightly steamed vegetables such as broccoli and cauliflower florets, sweet potatoes, sugar snap peas, asparagus, carrots, celery sticks and radishes.
Creamy Wasabi Dressing
Gluten free
Makes about ¾ cup
Ingredients:
½ cup Mayonnaise
2 Tbsp. Rice vinegar
1 Tbsp. SAN-J Tamari Soy Sauce
2 tsp. Wasabi paste
2 tsp. Sugar of choice, optional; granulated sugar, honey, agave, or other
Instructions:
Add all ingredients in a bowl and whisk well.
Serving suggestions:
Drizzle over cooked shrimp and cubed avocados on endive leaves. Also pairs well with grilled chicken, salmon, steaks, or portabella mushrooms.
It’s hard not to get excited about your salad meals with these Asian dressings. The combinations are limitless. I’d love to hear about your creations. Please write us at info@san-j.com if you’d like to share your salad experiences. If your recipe is added to the SAN-J recipe collection on our website, we will send you a gift as to say thank you! Check out other salads and salad dressing recipes!
If the holiday rush leaves you feeling, well, rushed, turn to your slow cooker. Here are three of our favorite crockpot meals to keep us going through the end of the season.
Orange Crockpot Meatballs
When it’s really all about simplicity, you’ll want these meatballs. Reach for a bag of frozen pre-cooked meatballs and a nearly full bottle of SAN-J Orange Sauce. Add them to your slow cooker with some water and cook on low for a couple hours.
There’s no prep work and if you like to live on the wild side, you can even say there’s no measuring! Just make sure the amount of water and sauce covers the meatballs but doesn’t taste too diluted.
We like to garnish these meatballs with green onion for some added flavor and color. Serve them as an easy party appetizer. Or serve them over rice for a simple dinner.
Here are some tricks to switch it up:
Try different kinds of meatballs, like pork or beef, or a mixture of veggies “meat” balls
Use different sauces. SAN-J has a variety of Asian Cooking Sauces to choose from!
Serve with rice, noodles, quinoa, or even mashed potatoes
Slow Cooker Asian Pulled Pork with Pickled Vegetables in Lettuce Cups
Here you’ll find 3 main components, layered for the ultimate lettuce cups.
It starts with the juicy, tender pork. It’s slow-cooked all day in a sauce of Tamari, chili garlic paste, ginger, and lime juice. After cooking is done, the pork is shredded then tossed in more sauce – this time SAN-J Korean BBQ Sauce to help layer in more flavor.
The second component is the quick pickled vegetables. These come together easily and can be made a day ahead of time to simplify the process. If you don’t have rice vinegar, try white vinegar or apple cider vinegar. If you want to simplify even more, keep a jar of kimchi in the fridge and the pickled veggies are ready when you are.
Thirdly and finally, everything is scooped into crisp Boston lettuce leaves and sprinkled with cilantro and sesame seeds.
To help everything come together quickly – and for you to get out the door on time in the morning – cross these tasks off the night before:
Mix the sauce
Prep the pickled veggies – or buy kimchi
Set the slow cooker on the counter, if it’s not already there
Make sure the pork is thawed and refrigerated
Then in the morning, all you have to do is throw the pork and sauce in the slow cooker and turn it on. Once evening rolls around, your house will smell incredible and you’ll be ready to layer your lettuce cups. You’ll be so proud of yourself for thinking ahead!
Sometimes it’s worth the extra effort to sear meat before adding it to the slow cooker. This is one of those times. Pan-frying the chicken first gives it a head start on the cooking and forms a crisp outer layer to lock in the flavor.
While the chicken is searing, whip up a gourmet sauce with Tamari, sugar, apple cider vinegar, and sesame oil. The chicken and sauce get slow-cooked together while you try to take your mind off of just how excited you are for this sesame chicken.
To complete the meal, serve with Horenso Peanuts Aé (blanched spinach tossed with Thai Peanut Sauce) and Lemony Red Jacket Potatoes (roasted potato wedges with Sweet and Tangy sauce).
What are your favorite slow cooker recipes? Share your creations with us on Instagram, Facebook, and Twitter by tagging @sanjtamari for your chance to be featured!
Written by: Lauren Fields, San-J MarketingPosted on: August 31, 2018
Is there anything better than relaxing with family and friends grill-side, brew in hand?
I like to keep summer going strong by being outdoors as much as possible. If I can cook outside rather than cooped up in a kitchen, it’s a good day. My favorite setting is directly over a campfire with an added grate after a day of hiking. And grilling at home comes in a close second, because nothing beats that simplicity (and unfortunately not everyday can be filled with camping).
Whether it’s right in your backyard, a friend’s backyard, or at a campground, your locations are just as limitless as your ingredients.
Kabobs are a solid go-to for grilling and camp cooking. Just chop, marinate, assemble, and grill.
• Chop ingredients large enough to pierce without crumbling.
• Marinate protein for 20 minutes or more. SAN-J Asian Cooking Sauces have everything you need in one bottle.
• Assemble ahead of time or on the spot.
• Remember to use best practices when handling raw meat.
To really save on time, see if your local grocer carries assembled kabobs ready to grill. While you’re there pick up some SAN-J sauces! Depending on the store layout, they may be in the Asian isle or the condiment isle, or sometimes in a special gluten-free section.
Mix it up. Choose your combination of protein, veggies, and even fruit.
For protein, choose from chicken, beef, pork, tofu, mushrooms, and shrimp. Whole cremini mushrooms work well, and so do sliced portabella mushrooms. If using tofu, make sure it’s extra firm and follow the same practices you would before other methods of cooking tofu – drain, press, marinate or glaze. For meats, make sure to avoid overcooking so they remain juicy rather than dry or tough. Tofu and mushrooms are very forgiving on that front, and really just get better the longer they cook.
When choosing veggies for your kabobs, consider what will offer a variety of textures and colors. Bell peppers, white onion, yellow squash, zucchini, grape tomatoes, baby corn, sugar snap peas, and broccoli are really good options. Broccoli may sound like a curve ball for a skewer, but it’s so good!
You could even get a little wild and add in some fruit. Pineapple is no stranger to a tropical kabob situation. Apple is another common favorite which pairs really well with barbeque sauce and chicken. And while it’s peach season, let’s not forget what sweetness they add to a skewer.
Serve it up. Grain bowls, salads, noodle bowls, or just straight from the skewers.
You can serve them straight from the skewers on their own, or try them as part of a grain bowl or salad. Another idea, which takes a little more effort and is absolutely worth it: Vietnamese Noodle Bowls. Whichever meal you choose to create, top it off with fresh herbs to really level it up.
You can be spontaneous with whatever ingredients you want, or try one of these recipes.
UPDATE: This giveaway is now closed. Follow us on instagram for more giveaways!
SAN-J is giving away a full set of gluten-free Asian Cooking Sauces to one lucky winner! We want to see how you’re grilling with SAN-J this holiday weekend. To enter, follow @sanjtamari on Instagram and tag SAN-J in your Labor Day cookout photos. Once tagged the photo should show up in SAN-J’s section of tagged media.
For extra entries, mention @sanjtamari in your caption, comment on our latest Instagram photo, and tag friends you’d share these sauces with if you win. Giveaway closes at the end of the day on Monday, September 3. One winner will be chosen and messaged by Wednesday, September 5. Winner must respond within 48 hours to claim prize. Giveaway is open in the US only.
This promotion is in no way sponsored, endorsed, or administered by, or associated with, Instagram.
Surprisingly Simple Asian Noodle Recipes You Can Make Tonight
Written by: Lauren Fields, San-J MarketingPosted on: April 10, 2018
When cold weather is just dragging on, the urge for warm comfort food is strong. Luckily, these Asian noodle recipes are comforting without feeling heavy. Better yet, they call for common ingredients you probably already have on hand.
1. Thai Peanut Tempeh
Just 8 ingredients and about 20 minutes is all you need. Keep a spare bottle of SAN-J Thai Peanut Sauce on hand so you can whip this up on a whim after a busy day. Combining Thai Peanut with toasted sesame oil adds an even deeper flavor to this dish, but in a pinch, any oil you have on hand will do – such as grapeseed oil, olive oil, or peanut oil. If you’ve never cooked with tempeh before, this is an easy introduction to give it a shot! You’ll want some sturdy noodles for this meal, which is why we suggest linguine. Udon noodles would also work well. We love this with mushrooms and snow peas, but you can get creative with your combinations.
This ingredient list is a little longer, but well worth it. After stir-frying carrots and broccoli, add a few key ingredients into the skillet which you’ll vow to always keep stocked once you try this: SAN-J Tamari Soy Sauce, honey, chili garlic sauce, sesame oil, and rice wine vinegar. Then you’ll add the noodles, tomatoes, and edamame to combine the flavors, topping it all off with sesame seeds.
The best part of this recipe is the option to make a simple teriyaki sauce from scratch, or to use SAN-J Teriyaki Sauce to cut back on your grocery list. Assuming you already have a stocked pantry of Teriyaki Sauce, rice noodles, salt, and pepper, your grocery list will only be 2 fresh items: salmon and green onions.
Fresh ginger root, garlic clove, green onion bulbs, and shiitake mushrooms are sauteed before adding vegetable stock, creating a flavorful, aromatic broth. Then comes the SAN-J Tamari Soy Sauce and red miso paste for umami, rounding out a full flavor. We suggest using homemade broth. If you’re not already on this train, read our article to learn how to make your own stock! Take your pick of noodles, either udon or rice noodles being our top choices. We like to serve it with fresh spinach shredded carrot, and green onion. This aromatic miso broth keeps well in the fridge, so make extra ahead of time for a quick soup!
This meal takes less than 10 ingredients, and is as simple as combining all ingredients into a large skillet – after first cooking the noodles separately. Experiment with the versatility of veggies you already have in the fridge. The star of this dish is SAN-J’s Mongolian Sauce, keeping your cook-time and ingredient list to a minimum!
This list of simple noodle dishes would not be complete without Vietnamese Noodle Bowls. The ingredient list and process may look intimidating, but think of it as this simplified template:
Written by: Jaden HairPosted on: September 12, 2017
Now that school has started back up again, so have all of the kids’ extracurricular activities! Between school drop-off, pick-up, tennis clinics, swimming practice, Boy Scouts, and working, sometimes I feel like a full-time chauffeur!
A couple of years ago, we developed a system to help our family run more smoothly. One of the most important components is a written meal plan that I complete every Sunday morning. Pre-planning our lunch and dinner menu for the entire week keeps the family on-track health-wise, helps create a grocery shopping list, and prevents me from worrying about, “What should I make for dinner tonight?!”
The kids bring a lunch to school four days a week, and I let them buy school lunch on Fridays. Planning for four school lunches (as well as lunch for myself and Scott) used to be such a chore, until I started a new strategy:
Tonight’s main protein becomes part of tomorrow’s lunch…but reinvented, so that it didn’t seem like we were just eating leftovers for lunch.
For example:
For dinner on Wednesday, we will have grilled salmon with SAN-J Thai Peanut Sauce.
The next day, leftover salmon goes inside Vietnamese Summer Rolls, along with lettuce, cucumber and carrots.
Dinner: Salmon with Thai-Peanut Sauce and Steamed Broccoli
This meal is ready in 15 minutes! Salmon fillet goes into a hot frying pan. SAN-J’s cooking sauces make it so easy to turn any ingredient into healthy, flavorful creations.
While the salmon is cooking on one side, just brush some SAN-J Thai Peanut Sauce (or other flavor of your choice) onto the salmon. Cook about 3-4 minutes per side. My salmon fillets are really thin, so they only took a couple minutes per side.
Steam broccoli on the stovetop, or even in the microwave for a couple of minutes. For microwave steaming, add the broccoli florets to a microwave-safe bowl. Add a couple tablespoons of water, cover bowl with plate. If you’re only cooking broccoli for 2 people, cook for 90 seconds and then check. Broccoli for four people, usually about 2 1/2 minutes (it also depends on how big you cut your broccoli). Simply drizzle olive oil on steamed broccoli, a squeeze of lemon, and a sprinkling of salt.
Dinner is ready!
Lunch: Vietnamese Summer Rolls with Salmon
Okay, you have to try these summer rolls! They are light, refreshing, and simple to make with a couple of important pointers. Let’s prep some ingredients:
Thin slices of cucumbers are cut in seconds with a julienne tool.
Stab one end of cucumber with a fork to anchor the cucumber down. Swipe the tool to create perfect julienne slices. The fork is important…the tool has very sharp teeth, and the fork keeps your fingers and hands away from the teeth.
Stop when you see the cucumber seeds. It’s hard to julienne the watery seedy center.
Just rotate the cucumber, anchor with fork, and continue with another side.
You can use the same tool to cut carrots….or buy matchstick-cut carrots from the store, which is what I did. Here are the ingredients: carrots, cucumber, leafy lettuce and Vietnamese rice paper.
Don’t be intimidated by rice paper rolls, they are so easy to use. Here are important tips:
In a large, shallow bowl, add hot water. Not boiling hot, just hot to the touch. Take a rice paper and dip into the hot water for 3-5 seconds. The rice paper is a little bigger than my bowl, so all I have to do is rotate the the rice paper so that all sides get wet. But remember, just 3-5 seconds total is all you need! Don’t soak the rice paper in the hot water, just dip it. Shake off any excess water.
The rice paper is now wet, but still a little stiff. That’s ok. Fold it in half, like a half-moon.
If your lettuce has a hard center stem, I recommend removing the stem. It will make rolling easier.
Just fold the lettuce in half and tear the soft, leafy part away from the stiff stem.
Now, place the lettuce leaf on one side of the half-moon.
Add cucumber and carrots.
Now the leftover salmon.
By this time, the rice paper will be soft and ready to roll. Start with one end, and roll.
Ingredients will peek out, but that’s the beauty of these rolls!
Now there are ready to be packaged up for lunch.
In the lunchbox, I have the summer rolls, a little ice pack, a small container of extra SAN-J Thai Peanut Sauce for dipping, and a fruit.
If you are making these the night before, I highly recommend wrapping each roll loosely in plastic wrap. That prevents the rice paper from drying out.
Summer rolls are great for transforming leftover into something new. It will work with practically any meat or seafood! Try shrimp, very thinly sliced steak, chicken breast. Even roasted vegetables will be fabulous rolled up.
More dinner to lunch transformations
The key to your dinner meal doing double-duty is to reinvent the dish, so that it doesn’t seem like you’re just warming up leftovers for dinner.
Store-bought rotisserie chicken for dinner -> chicken salad sandwich in a croissant for lunch (add sliced almonds for crunch)
Ground beef lettuce cups for dinner -> tacos for lunch (keep the tortillas or hard taco shell separate until ready to eat)
Roasted vegetables for side dish for dinner -> roasted vegetables on pita bread with hummus for lunch
Roast chicken for dinner -> Pasta salad with diced chicken breast for lunch (add peas, cherry tomatoes, Italian dressing)
Rice and beans as side dish for dinner -> Quinoa salad with rice and beans for lunch (add avocado, cooked shrimp)
Steak for dinner -> Steak quesadillas for lunch (pack all the fixin’s too: sour cream, cilantro, a wedge of lime)
Tips for successful meal planning
I only plan lunch and dinners. Breakfast is pretty much on a rotation: eggs, turkey sausage, cereal, fruit, toast, etc.
Plan and prep your lunches for work ahead of time. Having your food prepped when working from home or in the office will allow you to eat healthier and save time during the week.
Keep weeknight dinner simple. Save your long and complicated recipes for the weekend! Not all dinners have to include a main dish and 3 sides. We’ve been sticking to one main (protein) and one side (vegetable).
On Sunday, I stock up on pre-made, plain protein like simple grilled sirloin, poached chicken breast, or dice up a pre-cooked ham from store. This is my emergency “stash” that I keep in the refrigerator. If I really run out of time, I can use any of these ingredients to make a giant salad in 10 minutes. Right now, I’ve got diced ham (I use for omelets in the morning), poached chicken breast (yesterday’s snack was a lettuce wrap with guacamole and a piece of chicken) and pre-cooked shrimp (I just buy already-cooked cocktail shrimp from the store) for an anytime-salad.
Plan meals together as a family. I’ve found that when the kids have a say in what the family eats, they’ll eat more and not complain!
Summer is still going strong, and we’ve got some 2-step, Asian-inspired kebab and skewer recipes for grilling! These are so simple they only take a few minutes to prep….and a few minutes to grill. That’s the beauty of using kebabs!
The magic to the recipes is ready-to-use SAN-J Cooking Sauces that are all gluten-free. These sauces double marinades for your kebabs.
Don’t forget to bookmark this page or add to your Pinterest to save the recipes!
I’m always looking for ways to take the humblest of ingredients and transform them into a flavor-packed dish that is truly unforgettable. This desire comes from my own childhood, growing up as the only Asian family in our town of North Platte, Nebraska during the 1970s.
Our family didn’t have much — just a simple home with a flat backyard for a summertime plastic kiddie pool, rose bushes and a modest garden. Dad grew the standard Midwest vegetables, like corn, zucchini and cucumbers. We also mail-ordered special Asian vegetable seeds to grow bok choy, Chinese long green beans and Thai chili peppers.
The nearest Asian market was 4 hours away by car, so we had to make do with the specialty vegetables we grew at home for our Chinese meals. During our monthly family road trips to the Asian market, we would stock up on dried goods, pantry items and frozen goods that we’d haul back in a cooler. Ingredients like jasmine rice, hoisin sauce, oyster sauce and dried shrimp were a luxury, since our neighborhood Hinky Dinky Supermarket only carried just the basic American goods.
Mom was the ultimate in thriftiness and making do with what we had available. Sometimes, that meant taking a plain vegetable, like cabbage, or inexpensive cut of meat and using Asian staples to create a meal that any Chinese immigrant would devour.
I’ve created a recipe for you to take the humble bok choy, the most popular of Chinese cabbages, and SAN-J Hoisin Sauce with a few other pantry ingredients to create a savory, fire-grilled side dish that your family and friends will love.
We’ll learn the secrets of how to create a homemade Asian style sauce with the 5-S’s, and how to perfectly grill bok choy without burning the leaves.
After experimenting for the past 15 years in creating all sorts of Asian-style sauces from scratch, I’ve developed what I call the 5-S’s rule, which stands for:
Salty
Savory
Sweet
Sour
Spicy
Foods that taste the most delicious, especially in Asian cuisine, have these 5 flavor profiles in every single bite. Think of addictive Vietnamese noodle bowls with grilled pork, or Thai Beef Salad. Both of these dishes have flavors that explode, and activate every single taste bud in your mouth!
Salty: tamari/soy sauce, fish sauce
Savory: tamari/soy sauce, fish sauce
Sweet: sugar
Sour: fresh lime
Spicy: chili pepper
This formula makes creating dishes simple. Ingredients are flexible (and some ingredients fit into two S’s, like tamari and fish sauce. Of course, you can always skip out on the spicy if you are feeding kids, but even a tiny little bit of spicy adds immense flavor. Other “spicy” elements could be grated fresh ginger, finely minced garlic, mustard powder, wasabi, black pepper or chopped fresh chili pepper.
Note: Fresh garlic that’s smushed in a garlic press is a “spicy” flavor if used raw or just barely cooked. The more you cook garlic, the less spicy it becomes. Burnt garlic is bitter.
For our recipe, Grilled Baby Bok Choy with Hoisin Honey Glaze, here are the 5-S’s in action. Can you guess what fits in each S?
Tamari: salty, savory. Hoisin: salty, savory, sweet. Honey: sweet. Rice vinegar: sour. Japanese chili pepper powder: spicy.
If you don’t have those ingredients, how about this combination?
One more ingredient:
I’m also adding “nutty” to the flavor profile, with just a small amount of Asian roasted sesame oil.
Creating the Hoisin Honey Glaze
Chinese Hoisin Sauce is a sweet-savory sauce that’s used in many stir-fries, noodle dishes, and as a popular dipping sauce. You can find all of the ingredients and specific amounts below once we get into the recipe for the grilled baby bok choy.
For this recipe, we’ll use SAN-J Hoisin Sauce and Tamari Soy Sauce, along with some additional ingredients, to make sure we’re following the 5 S’s principle and making the most of every flavor profile in the finished dish. We’re using Tamari Soy Sauce rather than typical soy sauce because it will add a richer and more complex flavor to the glaze. SAN-J Tamari Soy Sauce is also made with 100% soy and no wheat, which means this dish will be perfect to share with family members or guests who avoid gluten.
To create the glaze, we’ll take all of our sauce ingredients and simmer for just a few minutes to thicken. The Hoisin Honey sauce is the perfect glaze for our grilled baby bok choy.
There’s an easy way to tell that the sauce is ready. Once you’ve simmered it for the perfect amount of time, the sauce should thicken slightly and coat the back of a spoon.
How to Perfectly Grill Baby Bok Choy
Baby bok choy has a very thick, bulbous stem, and thin leaves. The shape makes it more difficult to grill, because by the time the stems are tender, the leaves have burnt to a black, brittle, crisp.
There’s a very simple secret to how to cook baby bok choy on the grill: tin foil and water.
Follow these steps to grill your baby bok choy to perfection.
1. Cut the Baby Bok Choy
First, let’s start by cutting the vegetable. Cut the baby bok choy in half, lengthwise.
The center of the stem should hold the individual leaves together.
Since my baby bok choy is rather large, I’m cutting again, to quarter.
2. Add the Glaze
Adding the glaze before you grill your baby bok choy will help to infuse the vegetable with flavor.
Brush some of the Hoisin Honey Glaze on the STEMS only. Try to avoid the leaves. Adding the glaze to the leaves will make them cook and burn even faster.
3. Line the Grill With Foil
Place a strip of tin foil down on your grill grates. The tin foil will prevent the flames from touching the delicate leaves, giving you plenty of time to let the stems of your baby bok choy cook evenly.
4. Start Grilling
Place the baby bok choy on the grill, resting the leaves on the tin foil.
Grill, covered, for 3 minutes, rotate the bok choy to grill the other side, brushing more Hoisin Honey Glaze on the stem. As you did before, avoid brushing the glaze onto the leaves.
While you’re grilling the stems of the bok choy, spritz a little water onto the leaves.
The water prevents the leaves from drying out too much on the grill.
5. Finish the Grilling Process
The bok choy should cook in about 6-7 minutes. Once the thickest part of the stem is tender, and nicely charred (but not burnt), it’s just about done.
Remove the tin foil, brush a bit more Hoisin Honey Glaze on the bok choy (you can brush on the leaves as well) and let the vegetable grill for another minute to lightly char the leaves.
Baby Bok Choy With Hoisin Honey Glaze Recipe
Serves 4
INGREDIENTS
4 tablespoons SAN-J Hoisin Sauce
2 tablespoons SAN-J Tamari Soy Sauce
2 tablespoons honey
2 teaspoons rice vinegar
1 teaspoon Asian sesame oil
1/4 teaspoon Asian chili powder or chili flakes
1 pound baby bok choy DIRECTIONS
To make the Hoisin Honey Glaze, combine all ingredients (except bok choy) into a small sauce pan. Simmer for 3-4 minutes, until slightly thickened.
Wash and cut the baby bok choy lengthwise, into quarters (smaller baby bok choy can just be halved).
Preheat grill to medium. Place a long piece of tin foil (6″ x 14″) on grill. When grill is hot, brush the Hoisin Honey Glaze onto the stems only of the bok choy. Place the bok choy on the grill, resting the leaves on the tin foil. Grill for 3 minutes, covered. Rotate bok choy, brushing additional glaze, if needed. Spritz a little bit of water on the leaves of the bok choy. Cover grill again, and cook for an additional 3 minutes. Check the stems of the baby bok choy. Are they tender? Rotate and brush again if needed. Spritz the leaves again if they are looking very dry.
When bok choy is cooked through, remove the tin foil. Brush leaves and stems with the glaze and let grill for just another minute, to let the leaves get the perfect amount of flame.
Just prior to serving, sprinkle a little more hot chili powder, if desired.
ADDITIONAL TIPS
After you’ve tried out this recipe for grilled baby bok choy, you might want to try making it again with a few changes to the glaze. Keeping the idea of the 5 S’s in mind, you can swap a few of the ingredients to give the dish your own personal spin.
Use SAN-J Hoisin Sauce and Tamari Sauce as your base and experiment with the other components. You might try using lemon juice instead of the rice vinegar to give your glaze a sour kick. Maybe you prefer to add spice with sriracha rather than chili powder. Feel free to get creative until you find the perfect combination!
Written by: Lauren Fields, San-J MarketingPosted on: April 27, 2017
Food has a way of bringing people together. In my mom’s family, our gatherings always include a pot of soup. And why not? With just a few simple ingredients and minimal effort, you can throw together something that tastes incredible.
Nearly every Saturday since before I was born, my grandma has put on a giant pot of soup – sometimes a few varieties – and the whole family would get together. And so every Saturday was deemed Soup Day.
Through the years, I’ve made many pots of soup. But it only recently occurred to me that I’ve been relying on a store-bought product for the easiest part – the stock. So this year I decided to change that. Making my own stock has become a monthly routine, and I see no reason to ever go back to store-bought.
Store-bought vs homemade stock
Stock is so easy to make, you’ll wonder why you’ve ever spent money on the store-bought stock. Have you ever looked at the ingredient list of packaged vegetable stock? The list contains veggies and herbs that you probably use on a regular basis – or should consider using if you don’t already. It probably also contains some preservatives that you can gladly avoid.
And don’t even get me started on bouillon cubes. Salt much? Sure, you can find some organic brands that may use less salt and avoid MSG, but the nutritional value is basically non-existent.
Whereas homemade stock is a fresh infusion of whole ingredients, much like when you brew loose-leaf tea. Veggies and herbs are heated in water at a simmer for an hour with a low and slow heat to combine all the flavors. With this infusion process, homemade stock offers an immune boost to ward off illness, fights inflammation (with use of garlic, celery, onion, ginger), and helps repair gut health for better digestion. And you get to choose what goes in and what doesn’t.
Don’t toss those scraps!
With a little bit of planning ahead, you can make your own veggie stock for free. Think about all the times you prepare food… what do you do with the scraps? The ends of the carrots and onions, ginger peels, apple cores, stems of herbs, and mushroom stems? Maybe you toss them out, or maybe you use them for compost. Instead, you can dedicate a freezer container to saving scraps like these (for up to six months). Once the container is full (which for me is every month), you’re ready to add them to a pot and make your own veggie stock.
What ingredients work best for vegetable stock?
Let’s get more specific. Do any food scraps work? Not really. Bitter veggies like cabbage and broccoli may not be best (although, I’ve read contrary thoughts on this). But this isn’t limiting if you use any of the following foods regularly. These items are great for creating a really flavorful and nutrient-dense stock:
You may be asking yourself, what’s with the apples and pears? Veggie stock can use a little bit of sweetness. Adding a few apple and pear cores are a great way to achieve this flavor without added sugar. Carrots are also slightly sweet and help with this. But don’t go adding pineapple into your stock pot… Consider apples and pears the fruit exceptions.
Start cookin’
Once you’ve gathered a variety of scraps, add them to a large pot. Fill with enough water to cover your scraps. I usually use a double ratio of water to scraps. But you may instead choose to use less water for a more condensed stock. There’s really no wrong quantity here. It does get a little more specific if meat and bones are involved. So veggie stock keeps it simplified and versatile.
Bring the water and scraps to a light boil, then reduce to a simmer. Simmer for an hour or so. Meanwhile, enjoy how fresh your kitchen smells with the concoction brewing on your stove.
After it’s done simmering, remove the pot from heat and allow it to cool for a bit before straining. I use a fine mesh colander over a large bowl to separate the scraps. If you have a regular colander that’ll work, or you can also add some cheesecloth to line the colander.
Then simply add your homemade stock to some containers. I keep one in the fridge to use within the next few days, and I freeze the remaining amount divided into portions to last throughout the rest of the month. Sometimes I end up with an especially large batch, which makes for some easy, thoughtful gifts. Fill some jars you have stashed away and share! Soup Day favors, perhaps?
How to use your stock
Stock is the base of any soup or stew, but you can also put it to use in other ways. In many dishes, stock can be used in place of water to create more depth of flavor while soaking up all the nutrients. The next time you cook rice, use your homemade veggie stock in place of water. Need some other ideas? Use it to cook noodles and any other grain such as quinoa, millet, etc. You can also use it when cooking dried beans.
It’s probably no surprise that soup is what I really want from my homemade stock. I like to try new variations, and a latest favorite of mine is this Japanese noodle soup. It’s light and satisfying, and it’s packed with nutrition.
Japanese Noodle Soup
Serves 2 as main course or 4 as sides
INGREDIENTS
8 oz Udon noodles or Rice noodles (plus water or separate stock for cooking)
2 Tablespoon Grapeseed oil
2 Green onions
1 inch Ginger root, peeled and finely chopped
2 Garlic cloves, peeled and finely chopped
1 cup Shiitake mushrooms
2 Tablespoons Tamari Soy Sauce
6 cups Vegetable stock
2 teaspoons Red Miso Paste
Spinach
Carrot, shredded
DIRECTIONS
Prepare noodles as directed on packaging. Be sure to slightly undercook them.
In an empty medium pot on low-medium heat, add grapeseed oil, diced green onion (just the white parts – save the green for garnish), ginger, garlic, shiitake mushrooms, and tamari. Sauté for a few minutes until fragrant, stirring constantly.
Add vegetable stock and simmer for a few minutes to mix the flavors.
Scoop out some of the broth and stir the miso paste into it until dissolved. Pour the miso broth mixture into the pot and remove the pot from heat.
Prepare serving bowls by adding to each a handful of spinach, shredded carrot, and chopped green onion. Add more chopped green onion to garnish.
It’s time for Spring gardening! Our Spring gardening this year is a modest patio garden, with our essential Asian herbs and vegetables, growing in a self-watering planter (more on this later.)
My family and I used to live on a 5-acre homestead near Sarasota, Florida, where we enjoyed year-round gardening. In Florida, we grew all of our own vegetables, and even had pet hens that laid fresh eggs daily!
Our specialty was eco-friendly, all natural gardening, with a green house powered by an aquaponics system, an indoor micro-greens garden, and rows upon rows of raised beds and planters. It was our family hobby, and memorable learning experience. We gave away so many vegetables, herbs and fresh eggs to our friends, that we probably put a dent in our local super market sales!
Why we grow our own vegetables
In Florida, we lived in between some of the nation’s largest orange groves…and a major interstate that spans from South Florida all the way up to the top of Michigan. During orange harvest season, we’d see massive semi-trucks overfilled with oranges in their open-top trailers rumble by from grove to freeway, delivering their goods to distribution centers nationwide.
When my son, Andrew, was 3 years old, we were reading a children’s book about food, and I asked him, “Andrew, where do oranges come from?”
He replied, “A truck!”
I just about fell over! I was doing a horrible job as a parent teaching my own children about where food really comes from, and the dedication it takes to grow the food that nourishes our bodies.
A couple years later, when we had the chance to purchase the 5 acre farm, we immediately went to work building multiple gardens and a large chicken coop.
Our boys helped us every step of the way, from planning what to grow, hammering nails to build the planters, to getting their fingernails dirty with compost.
Before long, we were harvesting rainbow chard bigger than any I’ve ever seen:
….bell peppers so sweet that we ate them like apples:
Hatching baby chicks was the most fun:
One of my favorite Spring vegetables is Pea Shoots. You can grow them in 14 days, here’s how we did it. Pea Shoots is just the baby plant of the pea, and only available in the markets in the early Springtime. The shoots are tender, so sweet and full of the bright, snappy pea flavor. Enjoy them raw in salads (especially when they are very young) and in a 3-minute stir fry with garlic, a pinch of sugar, and a touch of SAN-J Tamari.
Some of our favorite vegetables that we grew were Asian types that I couldn’t find at our local grocery stores.
Mizuna – Japanese mustard greens popular in many baby mixed salads.
Shiso – One of my favorite herbs! You’ll find this most often as a garnish on a sashimi platter. I love it just minced in my fresh salads, and in Vietnamese Spring Rolls.
Chinese Eggplant – This eggplant is a lighter, paler in color than Japanese or globe eggplants. Asian eggplants are meatier, thinner skinned and less bitter than globe eggplants. Slice an eggplant in half lengthwise, marinate in SAN-J Sweet & Tangy Sauce, then grill.
Thai Basil – This is an indispensable herb in Southeast Asian cooking. Stir in your Thai curry, add a handful to your Vietnamese Pho and use the pretty lavender leaves as a gorgeous garnish.
Chinese Broccoli (Gai Lan) – Unlike regular broccoli you find in stores, Chinese Broccoli is best when you find long stems, long leaves and closed florets. The most popular way to enjoy them is stir-fried with garlic and oyster sauce and SAN-J Tamari.
Peppers – Oh, all kinds! My very favorite one is Japanese shishito, which is small, thin-skinned, sweet pepper that’s simply grilled on skewers or shaken on a hot frying pan for a few minutes and then seasoned with sea salt. But be careful, while the peppers are mostly mild, every so often, one of the peppers will have a nice, spicy bite. It’s like playing Russian roulette – you never know which one is hot-hot-HOT!
Japanese Cucumbers – Thin skinned, crunchier, less seeds and sweeter than regular cucumbers! No need to peel or de-seed prior to enjoying them. We love them in salads or snack recipes, like cucumber sushi.
Easiest Way to Grow Asian Vegetables
If you’re a beginner gardener and would like to grow your own Asian vegetables, I have several recommendations for you. Container gardening is the easiest way to garden, especially containers that are “self watering.” That means you’ll add water to the bottom of the planter box, and the plants will draw up exactly the right amount of water they need, through their roots and a soil “wick.” This type of gardening is nearly fool proof – you’ll never worry about over-watering.
We set a drip line, on a timer, into the planter so that watering is done automatically. There’s very little work involved, other than harvesting your very own herbs and vegetables, and fertilizing once or twice a growing season.
We love the EarthBox, which are the dark green containers in our photos above. The planters are inexpensive, reusable, and will last you many years.
After growing your own vegetables it is important that you follow the right tips to keep produce fresh to use in your favorite dishes.
Home Depot: Big City Pickers planters are larger than EarthBox, so you’ll be able to plant three rows of herbs or vegetables (vs. EarthBox’s 2 rows). They also have one with a stand, making gardening easy on your back!
Gardeners.com: They have various earthy-colored planters. I think they are a bit overpriced here.
Where to buy Asian Vegetable and Herb Seeds
For years, I’ve sourced my seeds from Kitazawa Seed Company, the oldest seed company in the world that specializes in Asian vegetables! They began in 1917 in downtown San Jose, California. Their company history is fascinating, and their Safe Seed Pledge guarantees they don’t sell genetically modified seeds.
Each Spring, I’ll get their paper catalog in the mail, and sit with a cup of tea and devour each page of seed offerings. You can find a catalog here.
Trade Winds Fruit has a nice selection of greens, this Spring, I’m going to order their Dragon Tongue Mustard.
I’ve also ordered from Seed Savers Exchange, a nonprofit organization that preserves, shares and sells heirloom seeds. The Mizuna seeds I get from them always produces sweeter, less bitter leaves than any other source.
What types of Asian Vegetables to Plant
For Salad Lovers
Mizuna – Mizuna can grow fast! If you don’t harvest frequently enough, they’ll get thick, bushy and more bitter as it ages. To harvest, just pluck leaves, leaving the root to grow more.
Tatsoi – This also grows very fast, going from seed to harvest in only 45 days. You can cut leaves as you need (more leaves will continue to grow) or harvest the entire plant to use. For salads, I harvest by cutting leaves after only 30 days and allow it it to continue to grow more.
Ruby Streaks Mustard – Tickly, frilly leaves that add color and texture to your salad.
Japanese Cucumbers – If you are growing in a planter, I suggest only planting a single cucumber plant, and surrounding it with smaller, leafy vegetables (any on this list. Give cucumber plenty of room to grow and catch the sunlight with a trellis.
Chinese Broccoli – Harvest when buds are still closed. Once the stalk fully flowers, it’s a sign that the Chinese broccoli is getting mature and will turn stringy and bitter.
Misome – A newer hybrid, grows really well! This was one of my kids favorite vegetables. They have tender, glossy, dark green leaves, great for stirfries and harvested, while baby, for salads.
Snow Peas – My kids are known to harvest and eat at the same time….one for my tummy….one for the basket.
Essential Asian Herbs
Thai Basil – So easy to grow! The lavender flowers are pretty and I pick the Thai Basil to add to my flower arrangements. Try making a lighter, Asian style pesto with walnuts, garlic, ginger, Thai Basil, parmesan and lime.
Shiso or Perilla – I prefer the Japanese Shiso (green) as it’s more tender, milder than its Vietnamese or Korean counterpart.
Cilantro – I use the leaves for garnish and in Mexican cooking, but for stir fries, I very finely mince the Cilantro stems and add them along with garlic and ginger.
Mint – I keep mint in its own small container. Mint grows like crazy, and will do a hostile takeover of your entire planter, its roots choking out the other plants, if left unchecked!
Lemongrass – This grows best in ground (not container garden) because it grows tall, deep and wide. It’s actually beautiful as an accent plant in your yard. But keep the plant in a corner, or a place you don’t walk by often. The long lemongrass leaves have baby fine hairs that can be prickly.
Asian Peppers
Shishito – Green, mild and so easy to grow. Baby shishito have a tougher skin. Let the pepper grow to 2 1/2″ or longer before harvesting.
Thai Bird Chile Pepper – For my spice loving friends! After harvest, I place whole peppers in a bag to freeze. They retain their color and flavor very well. Just defrost peppers as you need.
Lady Choi Chile Pepper – Korean pepper that is so versatile. I love drying the peppers and using them whole in stews or stir fries for the fruity flavor with just a hint of spiciness.
The Perfect Recipe for Springtime – Vietnamese Noodle Bowls
With all these homegrown Asian herbs and vegetables, you’ll love making Vietnamese Noodle Bowls! This recipe will utilize nearly every type of leafy greens from your garden. Crisp, crunchy fresh vegetables are accompanied by light rice noodles and bright herbs. Springtime is also the perfect time to dabble back into grilling. Start easy with skewered chicken, pork or beef, marinated in SAN-J Asian Cooking Sauces. Use any flavor sauce that you enjoy, all of them work wonderfully! Our favorite is the Asian BBQ for this recipe. To julienne carrots and cucumber, I love using a handheld julienne tool, like the Oxo Julienne Peeler, for less than $10.
Vietnamese Noodle Bowls
Serves 4
Prep: 30 minutes | Cook: 30 minutes
FOR THE GRILLED SKEWERS:
1/2 pound thinly sliced pork, chicken, or beef
1/4 cup SAN-J Asian Cooking Sauce, flavor of your choice
wooden bamboo skewers, soaked in water for 20 minutes
FOR THE DIPPING SAUCE:
2 tablespoons sugar
1/2 cup warm water
1 small clove garlic, very finely minced
3 tablespoons fresh lime juice
2 tablespoons fish sauce
fresh Asian chile, minced (amount up to you))
FOR THE NOODLE BOWLS:
8 ounces thin rice noodles
1 cup julienned carrot
1 cup julienned jicama
1 cup julienned Japanese cucumber
1 cup bean sprouts, roots pinched off
2 cups shredded or baby lettuces
Handful of fresh cilantro
Handful of fresh Thai basil
Handful of fresh shiso
1/2 cup chopped roasted peanuts
fresh lime wedges
In a large bowl, add the thinly sliced meat and SAN-J Asian Cooking Sauce. Mix to coat. Marinate for 20 minutes or up to overnight in the refrigerator.
For the dipping sauce, in a small bowl, whisk together the warm water with sugar until dissolved. Whisk in rest of the ingredients for the dipping sauce. You can do this ahead of time, up to overnight.
Bring a big pot of water to a boil. Add in the dried rice noodles, and cook for 3-4 minutes, until the noodles are tender and opaque white. Immediately drain and rinse with cool water to stop the cooking. Rice noodles will be gummy if overcooked. Set aside until ready to serve. Arrange the rest of the vegetables on large platters, and refrigerate until ready to serve.
About 15 minutes prior to go-time, pre-heat the grill. Skewer the meat onto the soaked bamboo skewers. Grill the skewered meat, 4 minutes each side over high heat, until cooked through. Please note that pork and chicken should no longer be pink in the middle. I prefer the beef to be slightly caramelized on the edges, but still tender and medium in the center. Timing will depend on how thinly you slice the meat.
Serve the rice noodles, grilled meats, fresh vegetables, herbs, peanuts, lime and dipping sauce, family style. Each person can assemble their own bowls.
Written by: Carol KicinskiPosted on: March 3, 2017
I look forward to spring each year. The world just seems to come alive all over again. The trees are budding, flowers are starting to bloom, and oh those spring vegetables!
Asparagus, baby peas, baby carrots, young potatoes, and beets – spring brings with it an abundance of fresh produce, sweet flavors.
Tamari might not be the first thing you think of when you think of cooking spring vegetables, but I am telling you to start thinking this way! Tamari is such a uniquely versatile seasoning that adds depth of flavor and “umami” (loosely translated to mean “a pleasant, savory taste”) to many foods and that goes quite beautifully with sweet spring vegetables.
Just add tamari
Adding a little tamari to roasted vegetables balances the natural sweetness brought out by roasting. Your guests might not know what that pleasant flavor is attributed to, but they certainly appreciate the lovely flavor. The flavor of quick stir-fried vegetables is greatly enhanced with the use of a bit of tamari.
More than just Asian cooking
While the use of tamari is very prevalent in Asian cooking, it is certainly not limited to strictly Asian applications. I have found that just a touch of tamari along with some balsamic vinegar work beautifully with ripe berries and other fruits as well as spring vegetables. It also happens to taste amazing mixed into chocolate and vanilla ice cream – the tamari intensifies the chocolate flavor and brings out the butterscotch notes in vanilla.
Try it out!
The following recipe combines Asian flavor with spring vegetables in an easy-to-prepare meal with very little hands-on time and effort. The chicken is sweet, spicy, and delicious. The cauliflower rice with spring vegetables makes a tasty and healthy alternative to rice with much fewer carbohydrates and a bright flavor, which complements the chicken beautifully.
⅓ cup rice wine vinegar
¼ cup SAN-J Tamari Soy Sauce
¼ cup honey
1 tablespoon sesame oil
1-2 tablespoons chili garlic sauce (depending on how spicy you like it)
1 teaspoon grated fresh ginger
6 bone-in, skin-on chicken thighs
Spring Vegetable Cauliflower Rice:
1 (12-ounce) bag cauliflower rice (or 1 head cauliflower – see note)
2 tablespoons vegetable oil
1 leek, white and light green parts, cleaned and thinly sliced
1 cup shredded carrots
8 asparagus spears, trimmed and cut into 1-inch pieces
1 cup frozen baby peas, thawed
¼ teaspoon kosher or fine sea salt
¼ teaspoon black pepper
1 tablespoon SAN-J Tamari Soy Sauce
1 teaspoon sesame oil
Juice of ½ lemon (1 tablespoon)
Directions
Chicken:
Preheat the oven to 425 degrees.
Combine the vinegar, tamari, honey, sesame oil, chili garlic sauce and ginger in a small saucepan and bring to a boil over medium heat. Reduce heat and allow to simmer uncovered for 6-8 minutes, stirring occasionally, until thickened.
Place the chicken thighs in an even layer in an ovenproof skillet or baking dish just large enough to hold them. Pour about ⅔ of the sauce over top, turning each piece of chicken to coat well with the sauce. Position the thighs skin side down and cook for 30 minutes. Turn the thighs over, pour on the rest of the sauce, and cook for another 10-15 minutes or until the chicken is browned and cooked through. Allow to rest 5 minutes before serving with the spring vegetable cauliflower rice.
Spring Vegetable Cauliflower Rice:
Cook the cauliflower rice according to the package directions.
Heat the oil in a large skillet over medium-high heat. Add the leek and carrots and cook, stirring, for 2 minutes. Add the asparagus and peas and cook for another minute. Add the cauliflower rice and cook, stirring, for another minute or two. Add the salt, pepper, tamari, sesame oil, and lemon juice and cook, stirring, just until everything is heated through and thoroughly mixed, about 1 minute. Serve with the chicken.
Servings: Serves 6
Note – If you are making cauliflower rice from a head of cauliflower, simply grate the raw cauliflower with a box grater or pulse in a food processor until it resembles rice. Transfer to a microwave-safe bowl, cover with plastic wrap, and microwave on high for 4 minutes.
Written by: Lauren Fields, San-J MarketingPosted on: February 13, 2017
My favorite way to cook, hands down, is stir-frying. It’s my go-to when I’m cooking to share and to impress. It’s also practical for the times I’m just cooking for one, because it’s as simple as chopping some veggies and heating them on the stove.
Why stir-fry?
Stir-fry is an easy way to serve a meal full of flavor and nutrition without spending much time or money. Endless ingredient combinations offer the flexibility of working with what’s available in your fridge and with what’s in season.
Sometimes I like to mix my own stir-fry sauce from scratch, but I always keep a variety of sauces in my pantry to make a quick stir-fry taste like I put a lot of time into it. I like SAN-J Asian Cooking Sauces for their rich, authentic flavors and the selection of real-food ingredients. There’s nothing artificial and each of the ingredients are items I can pronounce and can find in the grocery store. It’s also reassuring to know that these sauces are Non-GMO and gluten-free. These sauces make it so easy to create a flavorful stir-fry in very little time, with minimal effort.
Stir-fry is cooked over high heat for a short time – just long enough to cut the rawness of the veggies. This retains their color, texture, and nutritional value. This is entirely different from mushy casserole veggies and if you have any picky eaters in the house, they may actually prefer this approach to eating veggies. It worked in this household!
Don’t I need a wok?
You may be wondering if you need to invest in a wok, but it’s not necessary. As long as you have a large skillet, you’re set. I’ve been using an extra-large stainless steel skillet from a thrift store for the past seven years until receiving a wok as a gift. So if you’re lucky enough to own a wok, it’s certainly worth the space it takes up! A wok is specially designed to allow more control over how much heat each ingredient receives.
Strategic stir-frying
If you’re new to stir-frying or just need some guidance, try using this stir fry recipe template to make 4 servings.
1 POUND OF PROTEIN
4 CUPS OF VEGGIES
3/4 CUP OF SAUCE
Cooking with a template is so great because it allows for cooking in the moment rather than restricting you to the rigidity of a recipe. Translation: You can blast your favorite Kishi Bashi album and sing every word without missing a beat because you’re not tied down to your Pinterest recipe board.
Think about what ingredients you’d like to use. I like to choose items that add variety into my weekly meal plan, while incorporating what I find on special when grocery shopping. I also choose based on what can fit into other meals. For instance, I love using the stems of broccoli cut into matchsticks for stir-fry because they’re full of flavor and nutrition. You can either add the broccoli florets into your stir-fry or save them for another meal. Snap peas, carrots, and bell peppers offer a variety of textures to stir-fry. I like to occasionally mix some thick greens into the wok in the last minute or so – like kale, collard greens, or bok choy. If you happen to have fresh herbs and chopped nuts on hand, use them as garnish. Stir-fry doesn’t need garnishes, but if you’re looking for some ways to use up that last bit of cilantro and green onion before it goes bad, this is your ticket.
When I’m using beef, pork, or chicken as my protein, I usually try to find them pre-sliced to save time. Alternatively, when I’m using tofu, I make sure to drain and press it dry ahead of time.
How to stir-fry
Once you’ve gathered your ingredients and are ready to cook, start by chopping your veggies and slicing your protein if these items are not already in bite-sized pieces. A pound of protein and four cups of veggies will make four servings. Choose your sauce and measure 3/4 cup. Once you get the hang of this, you’ll be able to skip the measuring and will be a pro at eye-balling the amount of veggies and sauce based on your taste preference.
Add some oil to your skillet or wok and turn the heat up to medium-high. I use grapeseed oil because of its neutral flavor and its high smoke point. Add your protein and allow all edges to brown. Next, add your chopped vegetables and allow them to cook along with the protein, stirring constantly. After about a minute, add the sauce, and allow all ingredients to cook together. Sometimes I’ll serve with rice or noodles if I want to add more variation to the meal.
Serve up your colorful stir-fry and enjoy the feeling of being full without the food coma! The key is to avoid getting burnt out with the same ingredients each time, because the combinations are infinite. So don’t stop at just one stir-fry. Try a new one each week, like our Thai Peanut Chicken Stir Fry.
For more stir-fry combinations, check out our info-graphic below and these recipe ideas.
Written by: Bee Yinn LowPosted on: January 17, 2017
Chinese New Year, also known as Lunar New Year, falls on January 28 this year. This year marks the arrival of the Red Fire Rooster, a year that is going to be blessed with great progress, harmony, health and wealth. Lunar New Year is celebrated all across Asia, in countries like the Greater China (Mainland China, Hong Kong, Macau and Taiwan), Korea, Malaysia, Singapore, Vietnam (as “Tet”) and anywhere with a significant presence of the diaspora of the Chinese, Vietnamese or Korean people.
Lunar New Year Preparations
Lunar New Year is the happiest time of the year for those celebrating the festivities. There is the jovial anticipation of the arrival of the new year, with families busy cleaning up their homes for “spring cleaning,” baking delicious and dainty Lunar New Year cookies and candies, buying new clothes, shoes and firecrackers for the children, and gift baskets for friends and family.
Walking down any malls or food markets now, you will be welcomed with festive and cheery Lunar New Year songs and tunes. Many shops are decorated with red and gold color Lunar New Year decorations. For the home cooks, purchasing the right ingredients for the reunion dinner is not to be taken lightly.
Holiday Feasting
A reunion dinner falls on the eve of Lunar New Year, which is January 27. On the day, family members all come back to their home to feast on scrumptious and auspicious dishes that signify wealth, health and abundance in the new year. The cook is tasked with planning the entire menu, which is easily a good 6-10 courses, if not more. We feast on everything from rice, noodles, soups, dumplings, pork, chicken, fish, seafood, eggs, abalone, sea cucumbers, vegetables, to special Lunar New Year dishes such as hot pot or poon choi, a medley of Chinese delicacies layered in a big pot.
One of the lucky and auspicious dishes to make during Lunar New Year is Chinese Tea Leaf Eggs or Cha Ye Dan in Chinese. In China, these eggs symbolize golden nuggets, which means wealth and prosperity. As the shape of the egg is round, it also signifies wholeness and togetherness of the family.
Making Chinese Tea Leaf Eggs at home is very easy and the results are always very rewarding. The eggs are first hard-boiled and then lightly cracked. You then make a pot of Chinese tea, flavored with soy sauce, star anise and Chinese five-spice powder. The process of slow cooking and steeping the eggs in the tea leaf mixture turns the plain hard-boiled eggs into something utterly delightful and aromatic. The soy sauce-laden tea mixture also seeps through the cracked shells of the eggs to form beautiful marbled patterns on the white eggs. They are both gorgeous and delightful.
When it comes to choosing the perfect soy sauce for Chinese Tea Leaf Eggs, I always turn to my favorite SAN-J Organic Tamari. SAN-J Organic Tamari is a premium Japanese soy sauce brewed for up to six months with all soybeans and no wheat, so it has a richer, smoother taste. It’s certified Gluten Free, Vegan, Kosher and Non-GMO Project verified. It’s the only tamari I have in my pantry and a perfect ingredient for these tea eggs.
Without further ado, here is my recipe for Chinese Tea Leaf Eggs. For those who celebrate Lunar New Year, I wanted to wish you a very happy, healthy and prosperous year ahead!
12 large eggs
4 cups water
1/4 cup SAN-J Organic Tamari Soy Sauce
¼ cup Chinese black tea leaf
3 star anise
1/2 teaspoon Chinese five-spice powder
1 teaspoon sugar
Method:
Add the eggs in a soup pot and add the water. Bring the water to boil on high heat. Boil the eggs for 10 minutes, make sure that the eggs are completely cooked.
Transfer the hard-boiled eggs out of the hot boiling water and rinse them with cold water. Using the back of a teaspoon, gently tap the egg shell to crack the shell. Return the eggs to the water and add the remaining ingredients. Bring the tea mixture to a boil and immediately turn the heat to low. Simmer for 2 hours. Add more water if needed.
Written by: Misako Binford, San-J MarketingPosted on: December 27, 2016
New Year is the most celebrated holiday in Japan. It’s full of tradition, customs, and events. Schools are out for about two weeks total before and after New Year and most companies also close their business from around December 30th through January 3rd. This was how my family typically spent our new year’s holiday during my childhood in the 70’s in Japan.
A week before New Year’s Eve
My mother starts visiting grocery stores more often and spending extra time in the kitchen to prepare special celebration meals, called Osechi Ryori (御節料理). Osechi Ryori is consisted of many different dishes colorfully packed in Jūbako (重箱), tiered lacquered boxes. Each dish has a special meaning celebrating the coming year.
Kuro-mame(黒豆 black soybean) is a dish cooked in soy sauce and sugar, and symbolizes a wish for health as “mame” also sounds like hard work and good health in Japanese.
We also have a crunchy dried anchovy dish called tazukuri (田作り), which means “rice paddy maker.” This is because sardines were once used as fertilizers for rice fields, which are called rice paddies. Therefore, its symbolism is an abundant harvest.
Another dish is shrimp cooked in soy sauce and sake. Shrimp is a symbol of longevity because of its beard and curved back like an elderly person.
Most of these special dishes are prepared with a lot of soy sauce, sugar, or vinegar to preserve the food and enough is made to last over the New Year period. Years ago, most stores were closed over the year-end and beginning of the New Year, so people relied on food preservation. In turn, this also helped to reduce work in the kitchen.
Each household’s osechi ryori is slightly different. And now you can even buy osechi ryori already prepared at stores. But my mother always made everything from scratch, which requires a lot of planning. This time of year in Japan, all the stores are packed and everyone seems to be in a rush preparing for the big holiday. It’s much like the hurried rush here in the US just before Christmas.
A few days before New Year’s Eve
This is when my father joins the New Year prep party. It’s time to clean the whole house! It’s believed that the New Year is a fresh start for everything, so we need to wash away any dirt from the passing year for the new year. This requires a very thorough cleaning of the whole house, known in Japan as Ōsoji (大掃除). I remember I was shivering and wrapped in a blanket while my parents opened up all doors and windows in the cold weather and wiped them by hand until they were literally shining. My sister’s added responsibility was to clean the bathroom besides her own room. Being a younger sister, all I had to do was to clean my room and to observe everyone’s hard work. I miss those care-free days!
By the evening of the 30th, the house is super clean and all the osechi ryori is packed, stored in a cold place, and we are ready for the fun to start the next day, New Year’s Eve!
New Year’s Eve
The real fun on New Year’s Eve starts in the evening when the popular annual music TV show is on, called Kōhaku Uta Gassen (紅白歌合戦). You get to see performances of about 50 musical artists who were the most popular that year. The show runs for more than 4 hours and ends shortly before midnight. Since its start in the 1950’s, it has become a tradition for many Japanese people to watch the show with family while they await the midnight hour.
After watching our favorite young J-pop singers in the early part of the show, it’s time for my sister and I to take a bath. Our mother always bought new pajama and underwear for us to wear on New Year’s Eve for the fresh start of the year.
Another tradition to follow before midnight is to eat toshikoshi soba (年越し蕎麦)which means “year crossing buckwheat noodle”. Like osechi ryori, toshikoshi soba also has a special meaning. The most common theory is that the long shape of the noodle signifies the wish for a long life. Additional symbolism includes letting go of hardships from that year, as the noodles are easy to cut while eating. I never understood the reason why I was able to eat soba noodle with no problem after already eating dinner. I guess it was the excitement of the night and the hot soup that my mother makes for the soba noodle was exceptional with good bonito stock, dashi (出汁).
Despite of all the excitement, it was always difficult to keep my eyes open, especially with my belly so full. It’s almost midnight and it’s time to go to bed, or futon. In my dark room snuggling in my futon with my eyes half closed, I hear joyano kane (除夜の鐘)from a local temple that is miles away from our house. Joyano kane is the tolling of a large bell in Buddhist temples. They strike 108 times starting usually a little before midnight. According to Buddhist beliefs, the number 108 corresponds to the number of worldly passions and desires of human beings. It is said that the 108 strikes of the bell remove these evil desires and purifies you for the upcoming year. As my consciousness is fading, going to a dreamland, the awe-inspiring bells continue ringing in the crisp, cold winter air.
New Year’s Day
A warm, appetizing smell from downstairs wakes me up on New Year’s Day. Most of the Japanese homes don’t have a central air system and we have an individual heating unit for each room. It’s turned off after you get into a futon at night so of course, it’s cold in the morning which makes it so hard to get up. But there are a few events that give me a reason to encourage myself to come out of the nice and warm futon.
One of them is Otoshidama(お年玉). It’s a little envelope containing money that adults give to children for New Year. After we greet to each other by saying “Akemashite omedetou gozaimasu“ (A Happy New Year) in a bit of a formal way, my sister and I get the envelope from our father that we were looking forward to. The older you are the more money you get. So I was always jealous of my sister who is eight years older, comparing the amount of money we get.
Then it’s time to eat a special dish called ozōni (お雑煮) which is the second event of New Year’s Day. It’s a soup containing mochi rice cake and it is one of a few dishes that my father cooks for the family. I am not sure how this family tradition started, but it was always my father who cooked this special dish for the New Year as far as I can remember. Ozōni is very regional, so the flavor and the ingredients to put in are very different depending on where you are from in Japan. Some areas add miso for the soup with different veggies and meat. But our family’s version was very simple with a soy sauce based fish stock and a green leafy vegetable called mochina (餅菜).
While we are savoring our ozōni, we hear a mail carrier drop nenga-jō (年賀状) in our mail box, my third favorite event of the day. It’s a New Year card, similar to a holiday card here. But unlike holiday cards, the post office holds all the New Year cards mailed, usually between December 15th through 25th, and delivers them all on January 1st. My sister and I patiently wait while our father sorts all cards for each family member. My father receives hundreds of cards; many of them are business related. My sister and I compete for the number of cards from our friends. Our parents are talking about how big all the kids have grown, looking at pictures on the cards from family and friends who live far from us.
After we get dressed in nice, new clothes, we visit our neighbors for New Year’s greeting. There again, my sister and I get more otoshidama. It’s usually only given from your family members but these neighbor families were always very close to us like our own family. We also visit a local shrine and then go to see our grandmother who lived about 30 minutes away from us by car. She was the biggest contributor for my New Year money collecting campaign!
January First Through the Third
Whenever we eat a meal at our house during sanga nichi (三が日) from the first through the third, osechi ryori makes its way back to the table. By the last day, you don’t even want to see these dishes any more, but it’s also a part of tradition to feel that way. The TV is on with all the special New Year shows while we munch on mikan (みかん), Japanese mandarin. The clock during these three New Year days definitely moves more slowly, in my opinion. These three days are all about spending time with your family and enjoying time to relax.
Continuing the Tradition
Living in the US now, these memories around the New Year holiday in Japan make me feel homesick, missing my family in Japan terribly, especially after Christmas is over. But that also means that I am so blessed to have the memories that I cherish so deeply.
I love you so much, Mom, Dad, and my beloved sister. I’ll try to keep the spirit of tradition here by making special New Year dishes and embracing family time so my children can feel warm and loved as much as I did.
Try making your own toshikoshi soba with this recipe.
Written by: Bee Yinn LowPosted on: November 15, 2016
Hi everyone!
My name is Bee and I am a best-selling cookbook author (Easy Chinese Recipes, Tuttle, 2011) and a food blogger. I specialize in Asian cuisines, especially Chinese food. I am a huge fan of SAN-J sauces, especially its legendary soy sauce, tamari, and I am extremely humbled—and honored—to be writing articles for this blog.
Here are some basics and techniques that I’d like to share with you to make a delicious and authentic Chinese stir-fry dish at home.
Stir-frying is one of the fundamental techniques of authentic Chinese cooking, one that you ought to master if you want to make homemade Chinese food at home. If you have had real and authentic Chinese or Cantonese food in restaurants, I am sure you know that a great stir-fry dish beckons like no other, with flash cooked, glossy ingredients in a light but utterly savory and delicious sauce. The aroma of the food is both tempting, mouthwatering and you can’t wait to dig in.
Unlike Japanese cooking, there are basic distinctions in authentic Chinese stir-fries. Here are my quick tips and tricks in mastering the skill:
You may use a wok, skillet, or pan for stir-frying, but the utensil must be fully heated before stir-frying so as to create “wok-hei” (breath of wok) for the dish.
Be generous with oil as you want the oil to fully coat the bottom surface of the wok, skillet, or pan. You can’t do a proper stir-fry dish if you skim on oil.
All ingredients called for in the recipe—meat, seafood, tofu or vegetables—should be cut or sliced into uniform pieces or cubes to make sure that they are cooked evenly. Spread the ingredients in a single layer to ensure even cooking.
Chinese stir-fries are generally prepared with a light and savory sauce. Soy sauce is most commonly used. If soy sauce is called for in the recipe, I recommend using SAN-J Tamari or SAN-J Shoyu. An authentic Chinese stir-fry dish shouldn’t be soaked in gloppy and sticky sauce; the sauce should be light, nicely coat and cling to the ingredients in the recipe.
A Chinese spatula (preferably steel) is a very important utensil. Use the spatula to stir and toss the ingredients in a back and forth, circular, turning, and/or flipping motions.
Last but not least, do not overcook the ingredients. The ingredients should be just cooked through. The meat should be silky and velvety; the vegetables shouldn’t be overly wilted or mushy.
There you have them, the essentials of mastering the art of Chinese stir-frying.
Written by: Carol KicinskiPosted on: November 1, 2016
Holiday entertaining can be daunting for anyone, especially those new to a gluten-free diet. I love entertaining and have learned a lot over the years about how to host without overloading myself with stress.
Entertaining is usually about spending time with people we care about and sometimes about trying to impress someone we feel we need to, like the boss or the in-laws. Regardless of the reason, the result is the same, you are sharing of yourself.
So why not share who you REALLY are and how you REALLY eat? Look at it this way – if you were invited to a person’s home from Ethiopia, wouldn’t you get more from the experience if they served you a traditional meal of theirs than if they tried to make the food you eat every day? The same holds true for gluten-free – sharing the foods you eat and love will give the other person more of an experience of who you are and how you live than trying to feed them food they can get anywhere else.
My rules for entertaining are pretty simple: I prepare food I love with care and hope others will love it also, I keep it as simple as I can so I can actually enjoy my guests, and I try to make everyone who enters my home feel special. I don’t try to be something I am not – like a gourmet French Chef. I just try to be the best of what I am. And you know what? It is enough!
To keep your holiday entertaining hassle-free, here are a few tips:
Organize. As a professional event planner, I always did a timeline for events and I do them for my own parties, as well. Spreading the work over a period of a week is so much easier that trying to get it all done in one day. Figure out what can be done ahead and work it into the schedule. Decorating, shopping, gift wrapping of favors, setting up tables, and even making a lot of the food can all be done ahead. I even set up the bar, put out my buckets that will hold drinks, and put the drinks in them. Then a couple hours before, I just add ice. Easy!
Allocate an hour or so of time before the party for you to relax and get ready; you should enjoy the party too!
Instead of buying costly bottles of water, put out pitchers of water with lemon or lime slices – it’s pretty and economical.
Make a signature cocktail. Stocking a bar with all types of liquors, mixers, and garnishes is expensive and there is a lot of waste. Make one festive alcoholic drink and one non-alcoholic drink, then set out sparkling and still water. If the budget allows, add some sodas, wine, and gluten-free beer. You also won’t spend tons of time during the party making drinks. Have the glasses, ice, and drinks all set up and let people serve themselves.
When buying liquor and wine, always buy it from a place that will let you return unopened bottles. This way if you don’t use it, you don’t pay for it!
If space is an issue, think outside the box. In one house I lived in, I was very space challenged. Fortunately, there was an open floor plan, so I used the kitchen sink as my drink station – I filled it with wine, gluten-free beer, waters, and ice and put out glasses on the kitchen counter. The best part was at the end of the night I just pulled the plug and the water drained away! You can set food out all over the place, on side tables, coffee tables, even chairs if they are stable enough. Make little food stations. It is a lot of fun and encourages mingling around.
The supermarket is your friend! You don’t have to cook everything from scratch. Take help where you can. Scope out the deli section for gluten-free meats and cheeses, frozen, precooked shrimp (thaw and serve with store-bought cocktail sauce – how easy!), fruits, veggies, and nuts. Make one or two really great things and then arrange the rest on platters. Supermarket flowers are inexpensive but may not be the prettiest – buy a couple arrangements then separate the flowers by type or color, put into small vases, and it looks super chic!
Most of all, don’t bite off more than you can chew – relax, have fun, crank up the music, and spend time with your guests – everyone will enjoy themselves, including you!
A word about Tamari:
I made an entire holiday meal using Tamari in every course, from appetizers to dessert. You might think of Tamari as a typically Asian flavor but in reality, it is an excellent seasoning for poultry, meat, seafood, sauces, and sweets. Due to the amino acids in Tamari, it complements all the flavors of food – sweet, salty, sour, and bitter.
I like to combine Tamari with salt in my brining liquid for turkey and chicken – the Tamari has a rich, smooth, well-balanced flavor and less of a “salty bite” than using just salt. It adds flavor while reducing the sodium content, as I cut the amount of salt I would normally use in a brine. When roasting meats or poultry, it adds depth of flavor, deep color, and helps to ensure even browning.
Tamari deepens the flavor of gravies and sauces and adds nice color, as well.
You might wonder about Tamari in desserts. A little Tamari added to store-bought vanilla ice cream intensifies the vanilla flavor and brings out light, butterscotch notes. The addition of Tamari to chocolate intensifies the chocolate flavor, as well as adding a slight hint of saltiness – it is truly addictive!
Click here to view my holiday recipes with SAN-J Tamari.
Written by: Misako Binford, San-J MarketingPosted on: October 18, 2016
Having been born and raised in Japan, soy sauce is something that was always on our family table. It was used in almost every dish and was a part of my life, just the like air you breathe. So I never paid attention to how soy sauce was made or how different varieties existed. To me, soy sauce was soy sauce.
It was when I first came to the United States and found SAN-J Tamari that I asked myself, “What is the difference between tamari and other soy sauces?” I was familiar with Tamari because I was from the region in Japan where Tamari was manufactured the most, but I had never thought about what it was exactly. The more I learned about soy sauce, the more fascinated I was.
History of Japanese Soy Sauce
The history of soy sauce goes back to ancient China. It was born from necessity when there was no refrigeration available. The Chinese used a method of food preservation where they pickled raw materials. The raw materials varied from meat, fish, vegetables, seaweed, grains and legumes, including soybeans. These fermented preserved foods became tasty seasonings called Jiang.
It is not clear when Jiang came to Japan, but Jiang, under the name “hishio” in Japanese first appeared in the Taiho Code, an administrative and penal code enacted in 701. It appeared that hishio was served at the dining table of palace banquets.
After that, it is said that the Japanese Zen monk brought the technique of miso (fermented soybean paste) making to Japan from China in the 13th century. While he was teaching villagers of Kishu Yuasa how to make miso, he noticed that the liquid that accumulated on the surface of miso paste was very tasty, and that became what is now known as “tamari soy sauce.”
Tamari soy sauce is the origin of Japanese soy sauce. In the 17th and 18th centuries, the manufacturing of soy sauce developed from a household art to a commercial industry, becoming an essential seasoning for Japanese cuisine.
I’ve always been intrigued by traditions that are hundreds or thousands of years old and still used by everyone today. That means what it was back then is still needed and still enriches people’s lives today. These traditions are usually made with natural materials because synthetic materials were not available back then. How amazing it is that nature is designed to fulfill our needs so perfectly and timelessly.
So, soy sauce is an incredible seasoning that has been passed down for thousands of years. Does that mean you can enjoy this timeless invention with any soy sauce you buy at a store? Unfortunately, the answer is no.
What makes it confusing is that there are many different types of soy sauces sold on the market — yet many people think all soy sauces are the same and don’t know the difference. Soy sauce tastes very different depending on the type and brand you’re using. Here are the three main types of soy sauce widely available in the United States: regular soy sauce, Tamari Soy Sauce, and hydrolyzed vegetable protein soy sauce (HVP soy sauce).
Regular Soy Sauce vs. Tamari vs. HVP Soy Sauce
1.) Regular Soy Sauce
Typical soy sauce is made with about half soybeans and half wheat. It is fermented and aromatic, and it has a sharper taste than Tamari due to the difference in raw materials and a stronger alcoholic fermentation. Its flavor flashes off when cooked under high temperatures. This sauce is categorized as “koikuchi” soy sauce in Japan.
2.) Tamari Soy Sauce
Tamari Soy Sauce is made with all soybeans, or primarily soybeans with just a small amount of wheat added. It is fermented, and it features a richer, milder taste than regular soy sauce due to a higher concentration of soy protein. This sauce holds its flavor after it’s cooked under high temperatures. It is categorized as “tamari” soy sauce in Japan.
3.) HVP Soy Sauce (Hydrolyzed Vegetable Protein soy sauce)
HVP soy sauce is made with chemically processed hydrolyzed vegetable protein. It is not fermented, so it requires just a few days to produce. HVP soy sauce features a harsh and artificial flavor, an acrid aroma and a bitter aftertaste.
How to Tell the Difference Between Soy Sauce Varieties
The best way to distinguish a particular type of soy sauce at a store is to read the ingredient list on the label. The main difference between regular soy sauce and Tamari soy sauce is the proportion of soybeans and wheat. If you are on a gluten-free diet, make sure to choose a Tamari soy sauce brand that is made with all soybeans, as some Tamari soy sauce brands contain wheat. If you see hydrolyzed vegetable protein or hydrolyzed soy protein on the label, it is HVP soy sauce.
Besides verifying a type of soy sauce, there are other factors you should consider in order to choose a good soy sauce.
Choosing a Good Soy Sauce
1.) Ingredients
Read the labels on the bottle of soy sauce. Watch for artificial preservatives, flavors, and colors. Common artificial preservatives are sodium benzoate and potassium sorbate. Fermented soy sauce doesn’t need caramel color or corn syrup. Verify whether your soy sauce is non-GMO. Avoid chemically processed hydrolyzed vegetable/soy protein.
2.) How It’s Made
Is the sauce fermented? Not chemically processed? How long does it take to make? Traditional soy sauce is fermented and aged for several months with minimal ingredients.
3.) Taste
While you can’t always try before you buy, taste is one of the biggest factors that can help you choose the best soy sauce for your needs. Only the fermentation and aging process can give authentic soy sauce its complex flavor. Soy protein from soybeans is broken into amino acids that give the balanced flavors of sweetness, acidity, saltiness, bitterness, and umami. The proportion of ingredients also contributes to a different taste. The variety of tastes will help determine which type of soy sauce to incorporate in recipes in different ways.
4.) Certifications
Some brands take extra steps to meet standards of various certifications, such as Non-GMO, organic, gluten-free, kosher, and vegan. Look for certification logos on the label to ensure the quality.
5.) Reduced sodium varieties
High sodium is a concern for many people, and there are various reduced-sodium soy sauces available. However, not all reduced-sodium varieties have the same taste — and often, good taste can be compromised in order to reduce sodium. Choose a brand that retains a good, full flavor while reducing sodium.
Now you know the basics of soy sauce. Next time you are at a store, choose the right soy sauce for you and savor the taste of this amazing, timeless seasoning!
Now you know the basics of soy sauce. Next time you are at a store, choose the right soy sauce for you and savor the taste of this amazing, timeless seasoning! Browse our SAN-J Sauces online and discover the many flavorful sauce uses!